
Protecting your website with a password is an essential security measure, especially when you want to control access to specific pages or restrict access to an entire site. Here’s a step-by-step guide on how to set up password protection for your website.
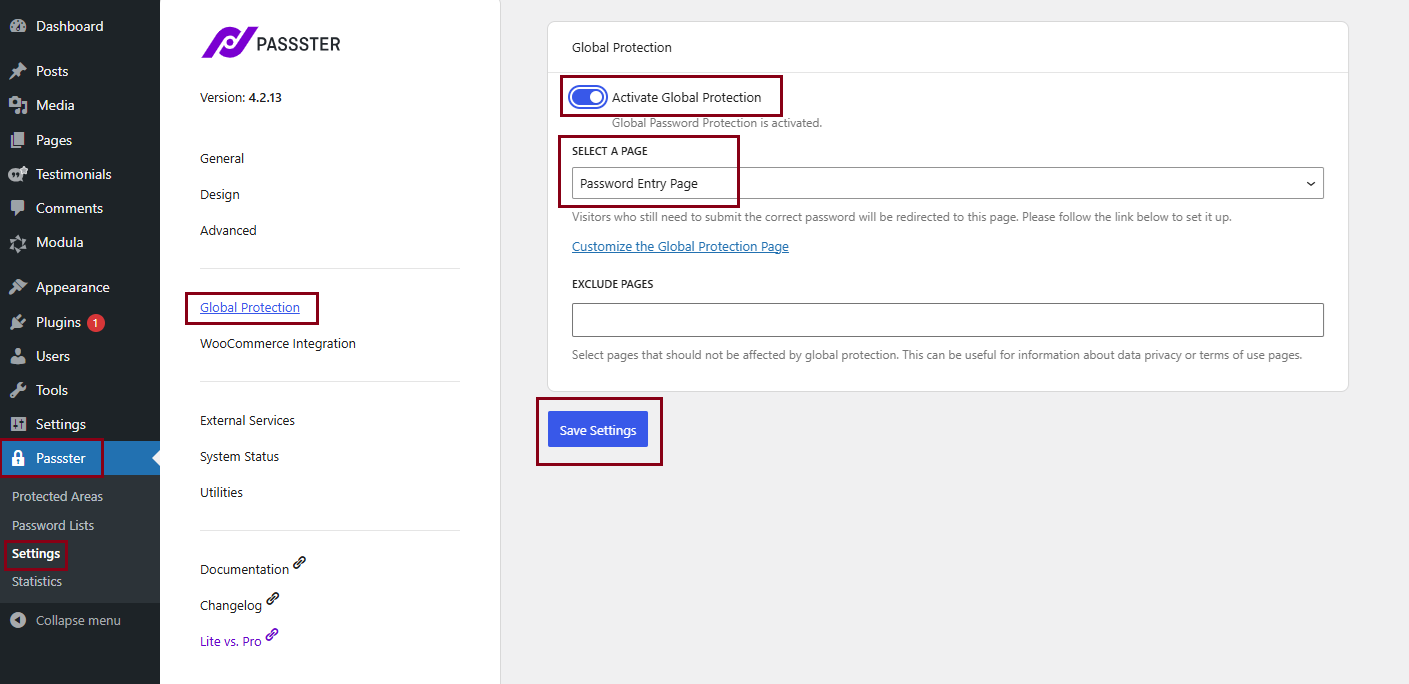
Step 1: Enable Global Protection
-
Log in to your WordPress Dashboard.
-
Navigate to Passster > Settings > Global Protection.
-
Enable the ‘Activate Global Protection’ option > Select the page that will serve as the password entry page > Click Save Settings.
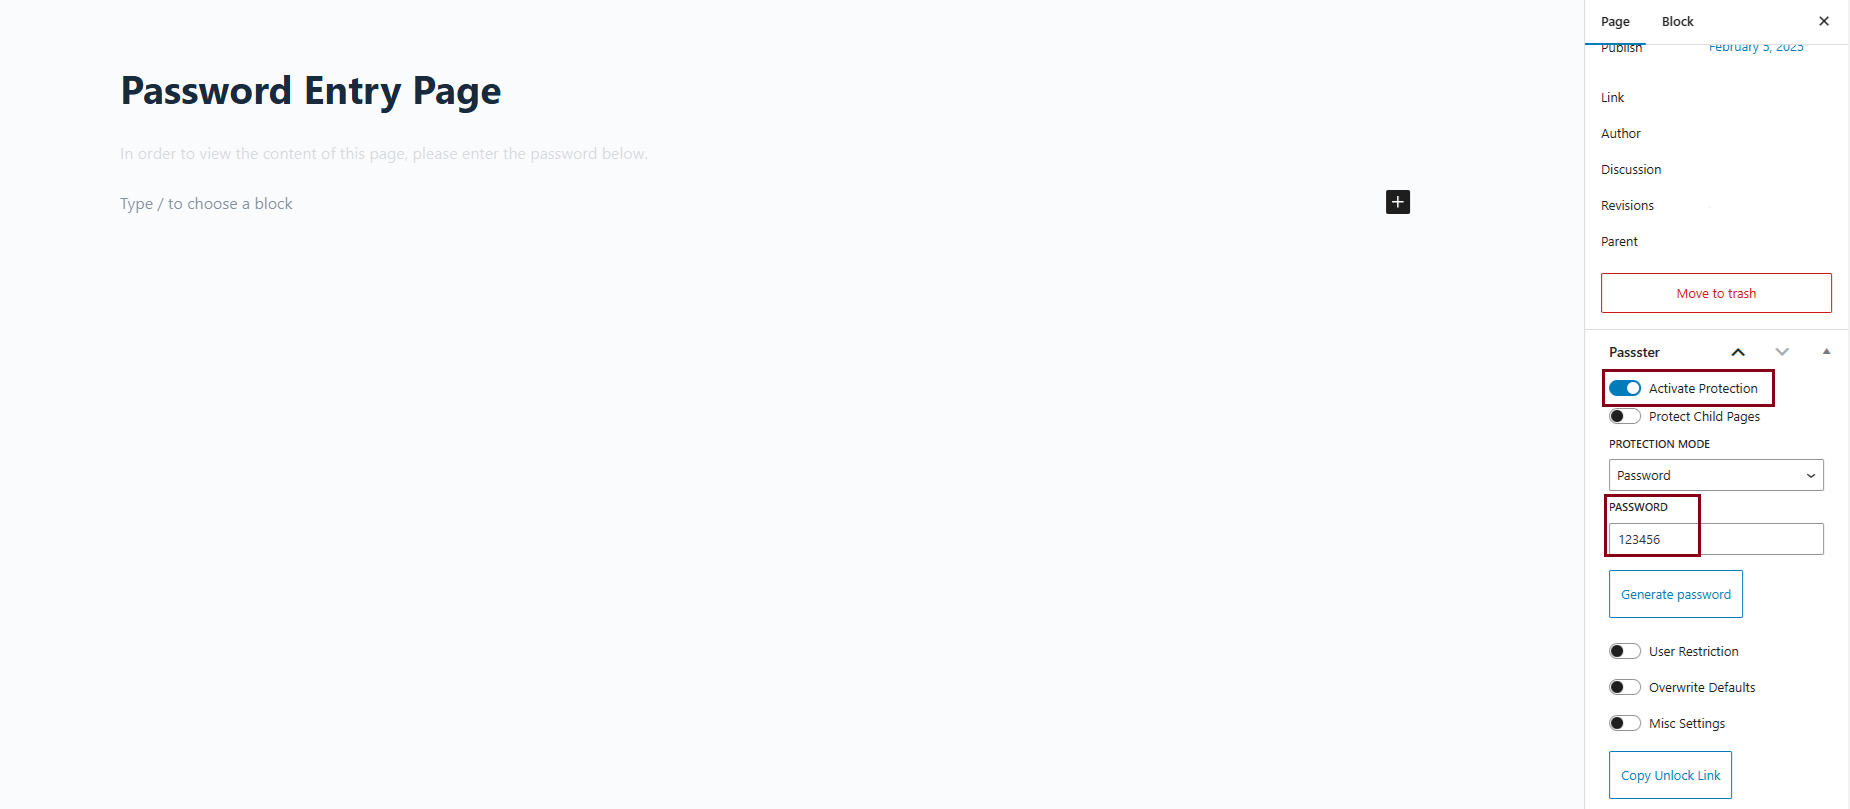
Step 2: Ensure Your Selected Page is Password Protected
-
In your WordPress Dashboard, go to Pages.
-
Find and edit the page you selected in Step 1.
-
In the Passster settings on the page, toggle ON the ‘Activate Protection’ option.
-
Set a password for the page > Click Publish.
How It Works
Once these settings are applied, every visitor attempting to access any page on your website will first be redirected to the selected password-protected page. Only after entering the correct password will they be able to view the desired content.
This method ensures an additional layer of security and is especially useful for websites under development or restricted access portals.