


Elementor powers over 10 million active WordPress websites, making it the most widely used page builder on the platform (Colorlib, 2026). If you build with Elementor and need to password-protect content, you’ll quickly discover there’s no built-in way to do it. That’s where the Passster plugin comes in.
This guide walks you through the full workflow — from creating your Elementor page to placing a password gate on it. You’ll also see how to lock a whole page versus just a specific section.
Elementor page builder for WordPress
Elementor is a visual WordPress page builder that gives designers full control over layout, typography, and content structure — without writing HTML or CSS. You can build a bespoke website and preview changes to the front-end in real time as you work.
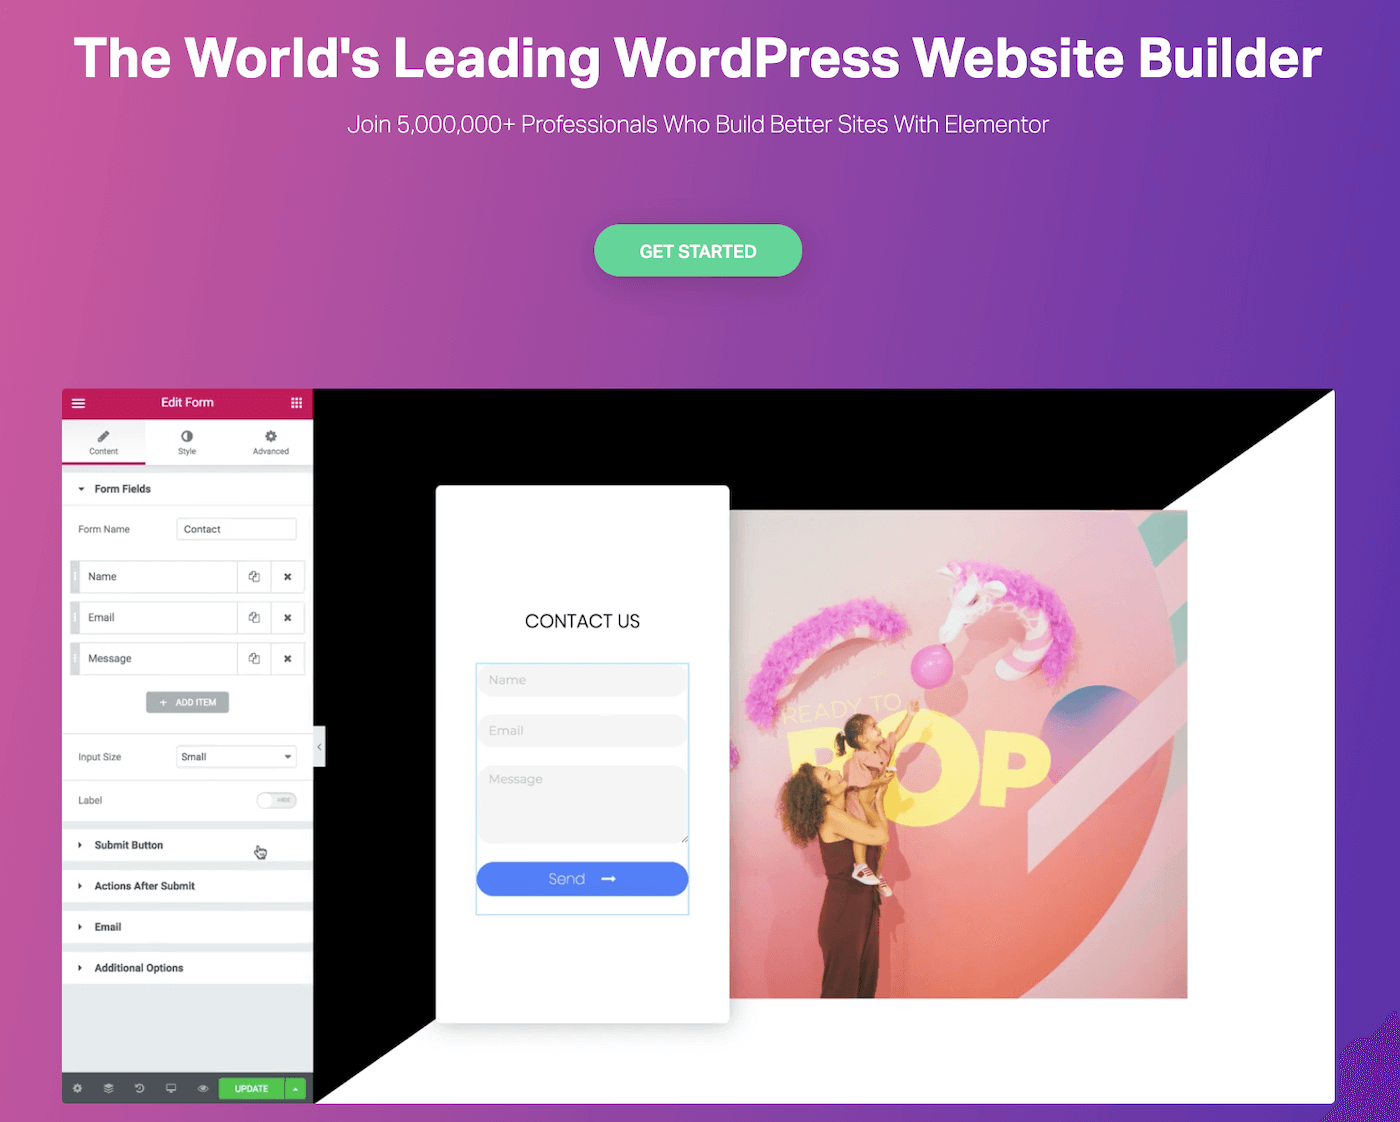
Elementor is an all-in-one WordPress page builder with a visual drag-and-drop interface. Here’s a quick overview of its key features:
- Drag-and-drop editor with live editing so you see every change as you make it.
- Font library with hundreds of options out of the box, plus support for custom uploads.
- Lead generation widgets to capture visitors and boost social engagement.
Elementor commands roughly 40–50% of the WordPress page builder market (Colorlib, 2026). Despite that broad feature set, Elementor has no native content protection. For that, you need Passster.
Page protection vs. section protection in Elementor
Passster supports two distinct protection modes for Elementor content: full-page locks and section-level shortcode gates. Knowing the difference before you start saves setup time.
- Full-page protection locks the entire Elementor page. Visitors see a password form before they can view any content.
- Section (partial) protection lets you gate a specific block of content within a page — a pricing table, a download area, or an exclusive video — while the rest of the page stays public.
Both modes use the same Passster workflow: create a Protected Area, add your content, and embed the generated shortcode wherever you need it. The difference is simply where you drop that shortcode — on a dedicated locked page, or inside a single section of an existing one.
This distinction also matters for SEO. Search engines don’t crawl or index password-protected content, so only gate content you’re comfortable keeping out of search results. If the content needs to rank, keep it public.
How to password-protect content in Elementor (in 3 easy steps)
Password-protecting Elementor content with Passster takes three steps: create an Elementor page, install Passster, and configure a Protected Area with your content and access settings.
Common use cases include:
- Grant paying members access to online courses, training materials, or downloadable resources.
- Share a private portfolio with prospective clients without making it publicly visible.
- Let clients view and select photos before purchase — particularly useful for photographers and designers.
Step 1: Create a page or post using Elementor
Assuming Elementor is already installed, go to Pages > Add New in the WordPress admin and click Edit with Elementor.

Give the page a title and add the content you want to protect. Once you’re happy with the layout, click Publish to proceed.
Step 2: Install Passster
Next, install Passster. You can download the free version from the WordPress Plugin Directory (10,000+ active installs, WordPress.org) — this covers single-password protection. For multiple passwords, password lists, and configurable session cookies, you’ll need the premium version.

Once installed and activated, Passster adds a Passster menu item to your WordPress admin sidebar. You can choose to password-protect the entire page or a specific section using a shortcode — the next step covers both.
Step 3: Password-protect content
Passster organizes protected content into Areas — a dedicated post type that holds the gated content, its password settings, and the shortcode you drop into Elementor.
1. Go to Passster > Areas and click Add New.
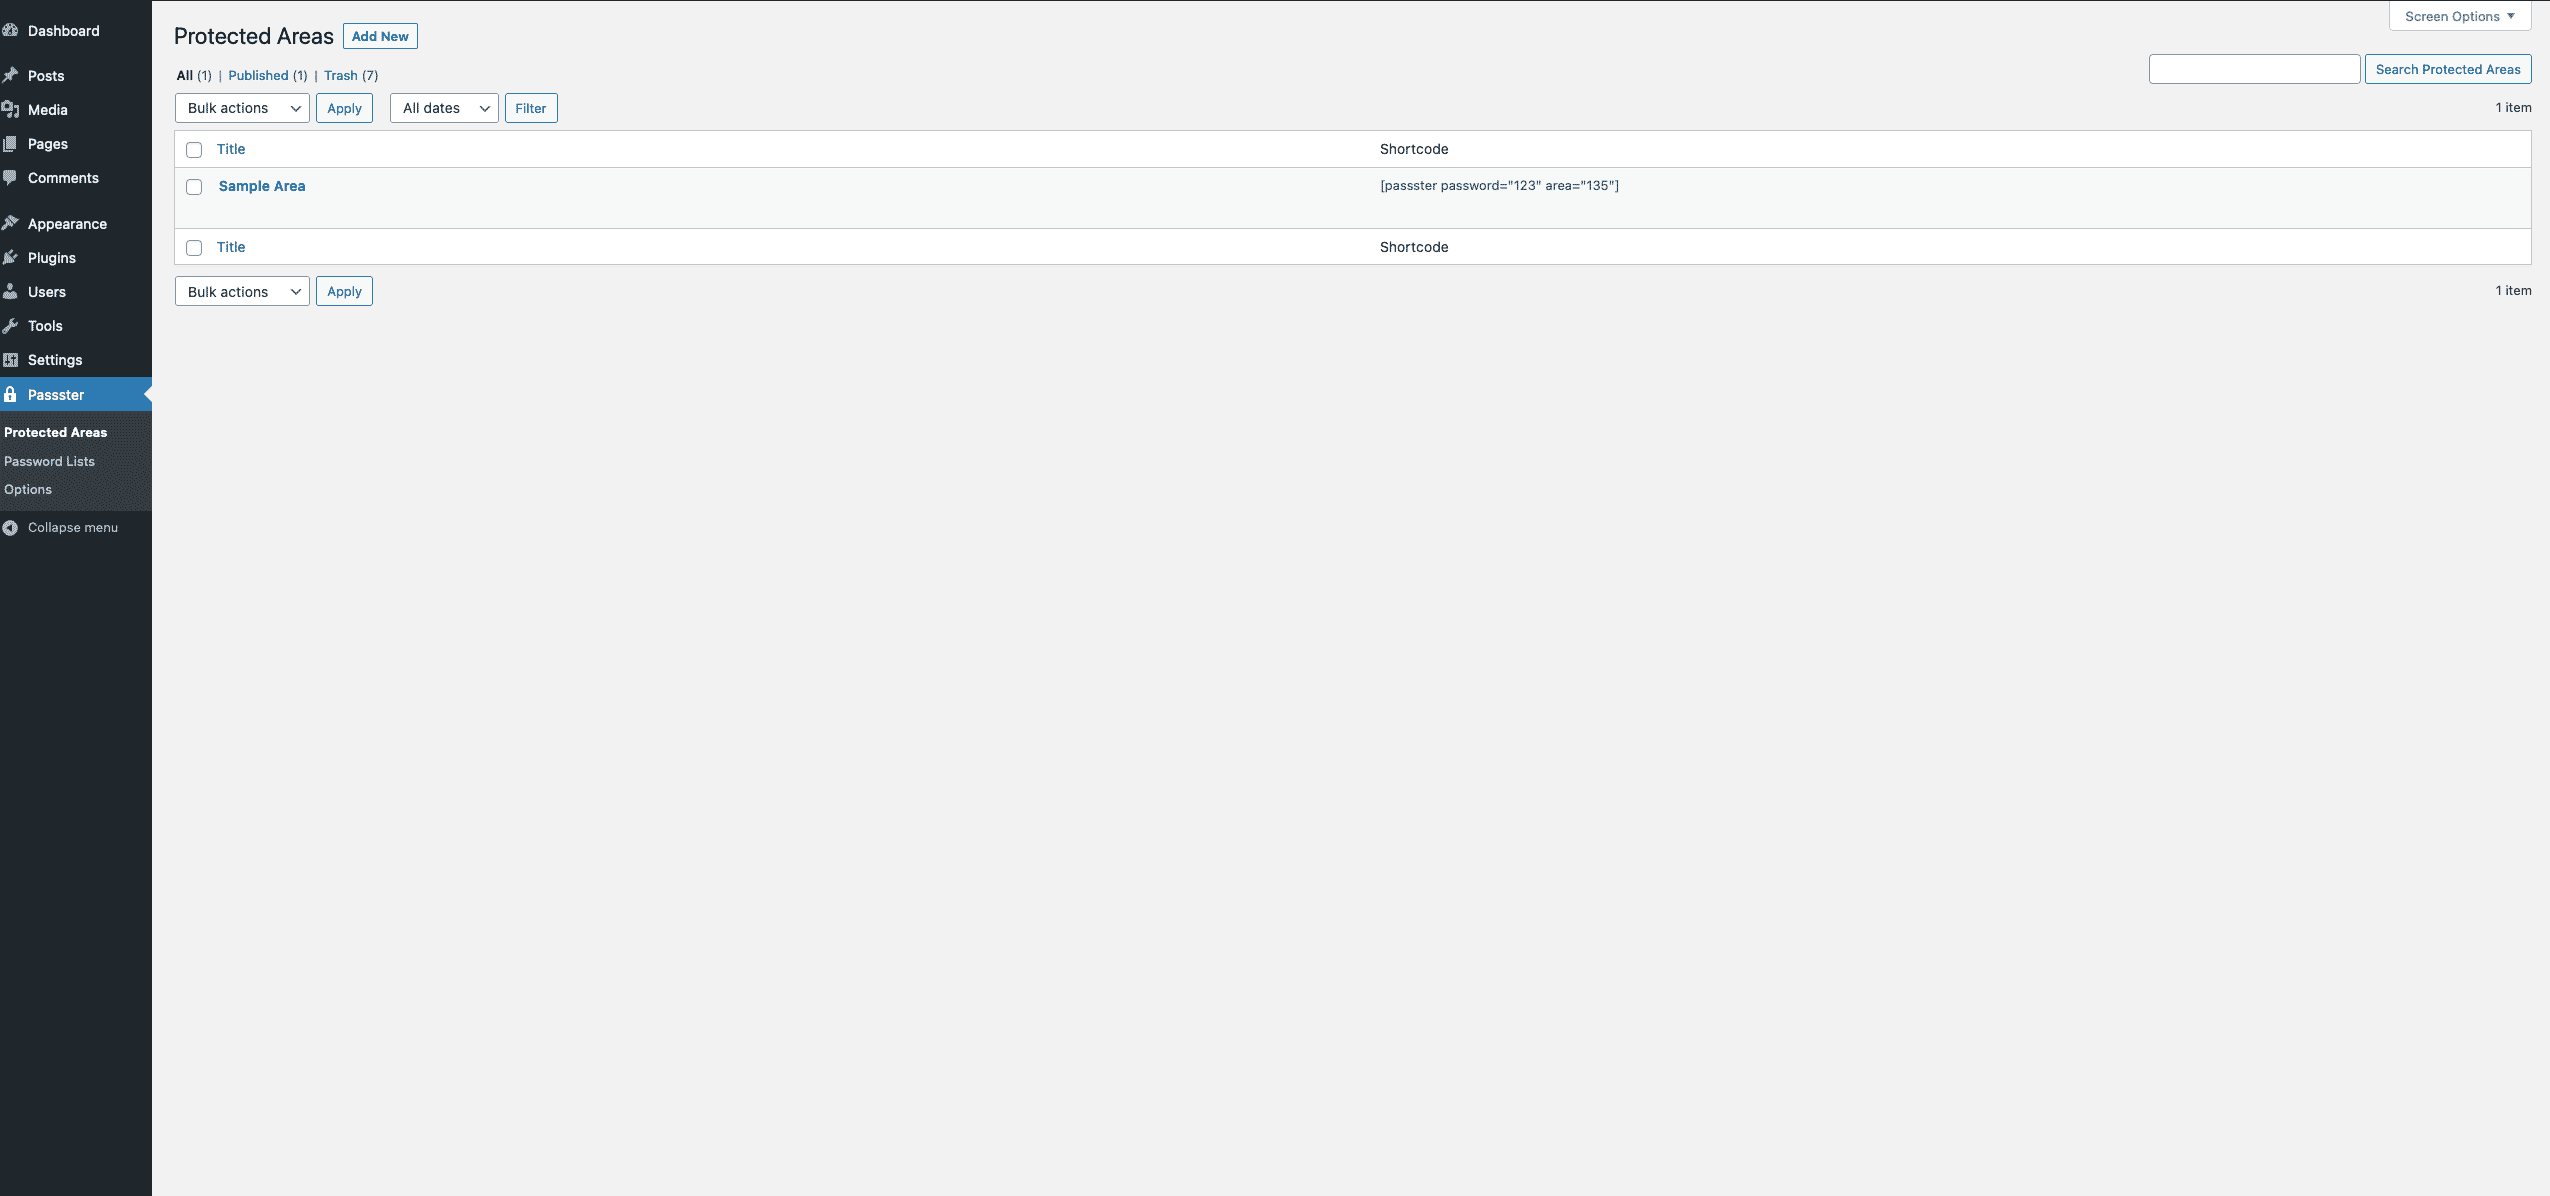
2. Configure the settings and add the content you want to protect.
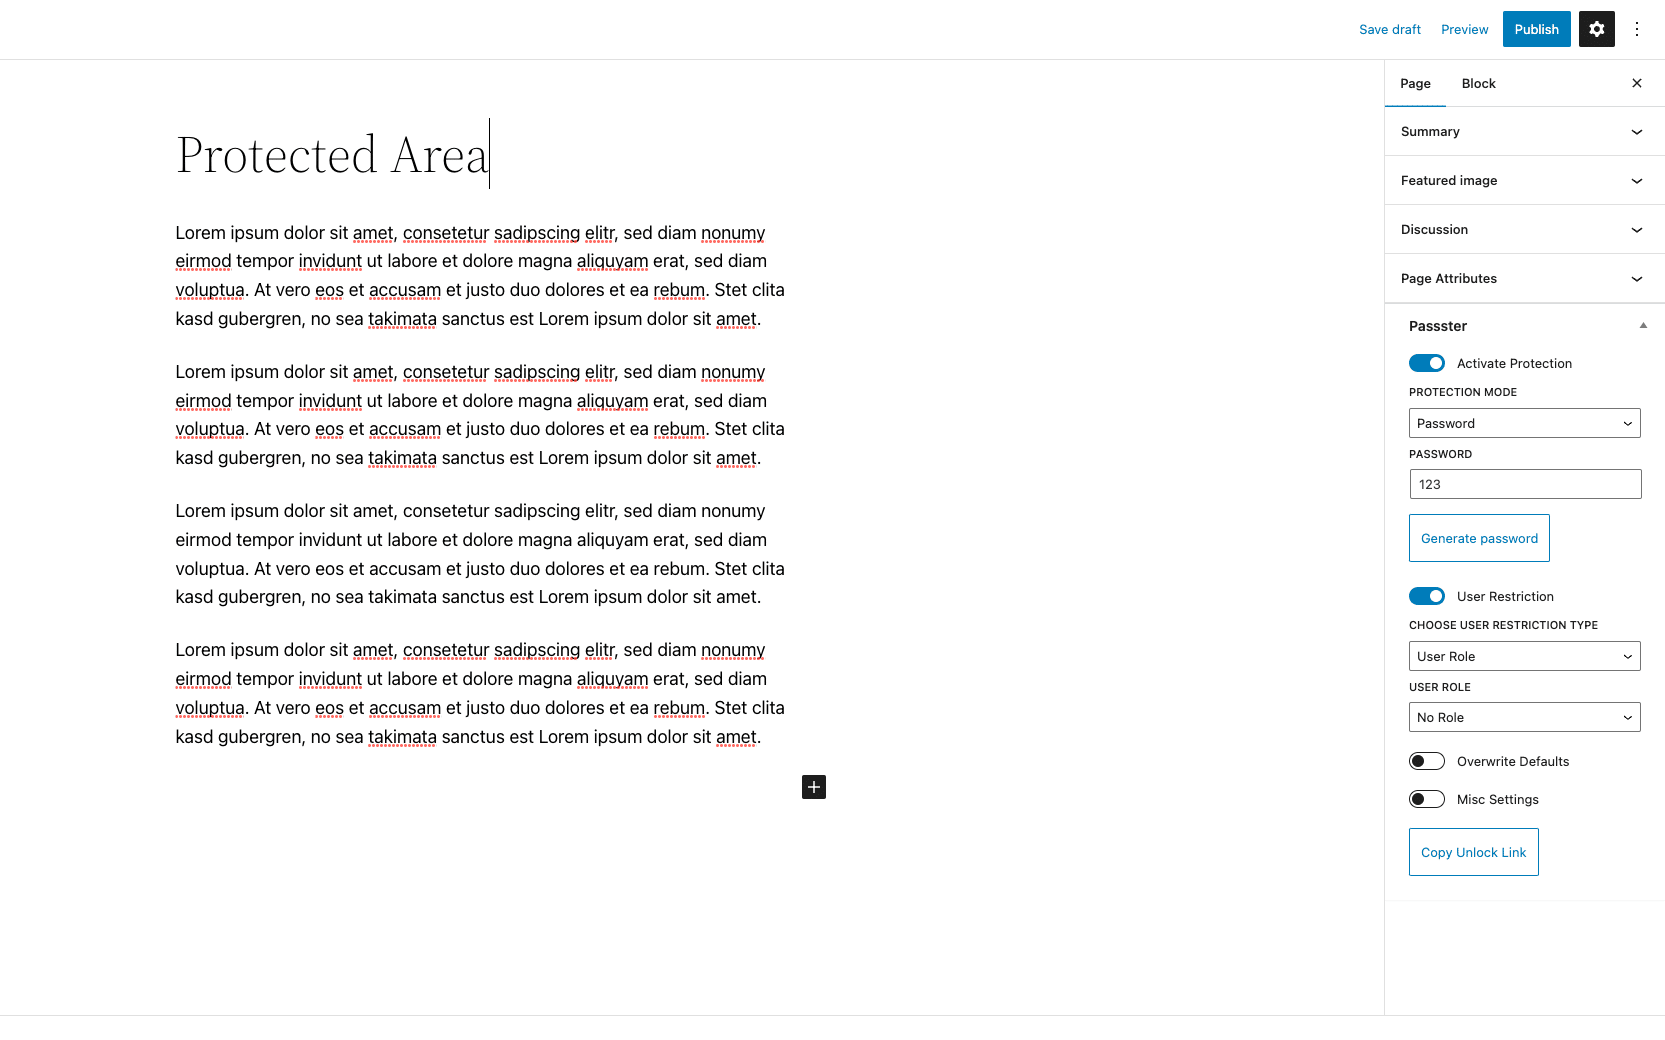
3. Choose your protection type:
- Single password — set one password directly in the area settings. Simple and fast.
- Multiple passwords — create a Password List under Passster > Password Lists (comma-separated values), then link it in the area settings. You can assign different passwords to different users and revoke individual ones at any time.
Passster also lets you expire passwords after a single use — useful for one-time access scenarios.

4. Save the area. Passster generates a shortcode in the Shortcode meta box — copy it.
5. Paste the shortcode into your Elementor page using the Shortcode widget.
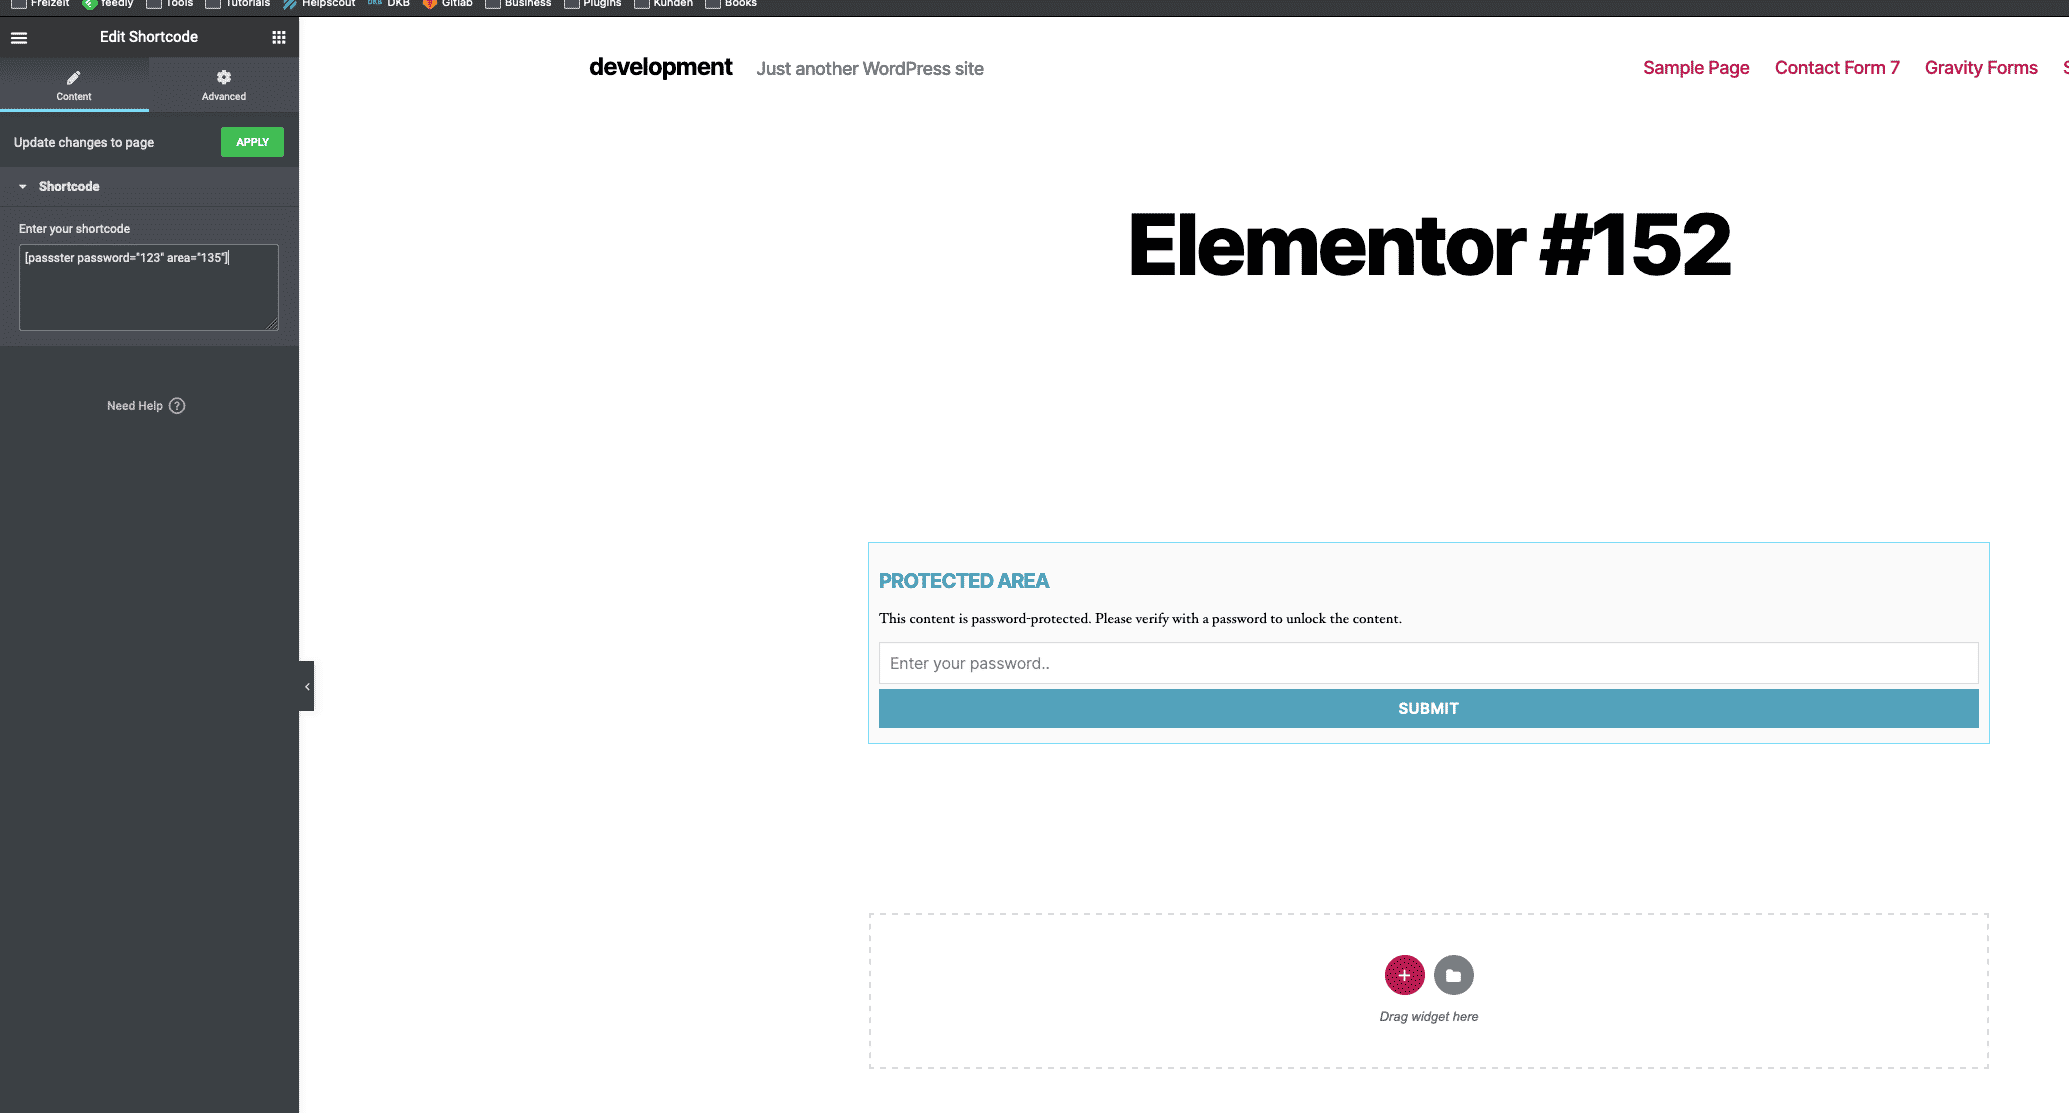
Passster now protects your content.
Designing the protected area with Elementor. You can open any Protected Area directly in Elementor, so your password form and gated content can match your site’s visual design exactly. To enable this, go to Elementor > Settings > General and check the box next to Protected Area under “Post Types.”
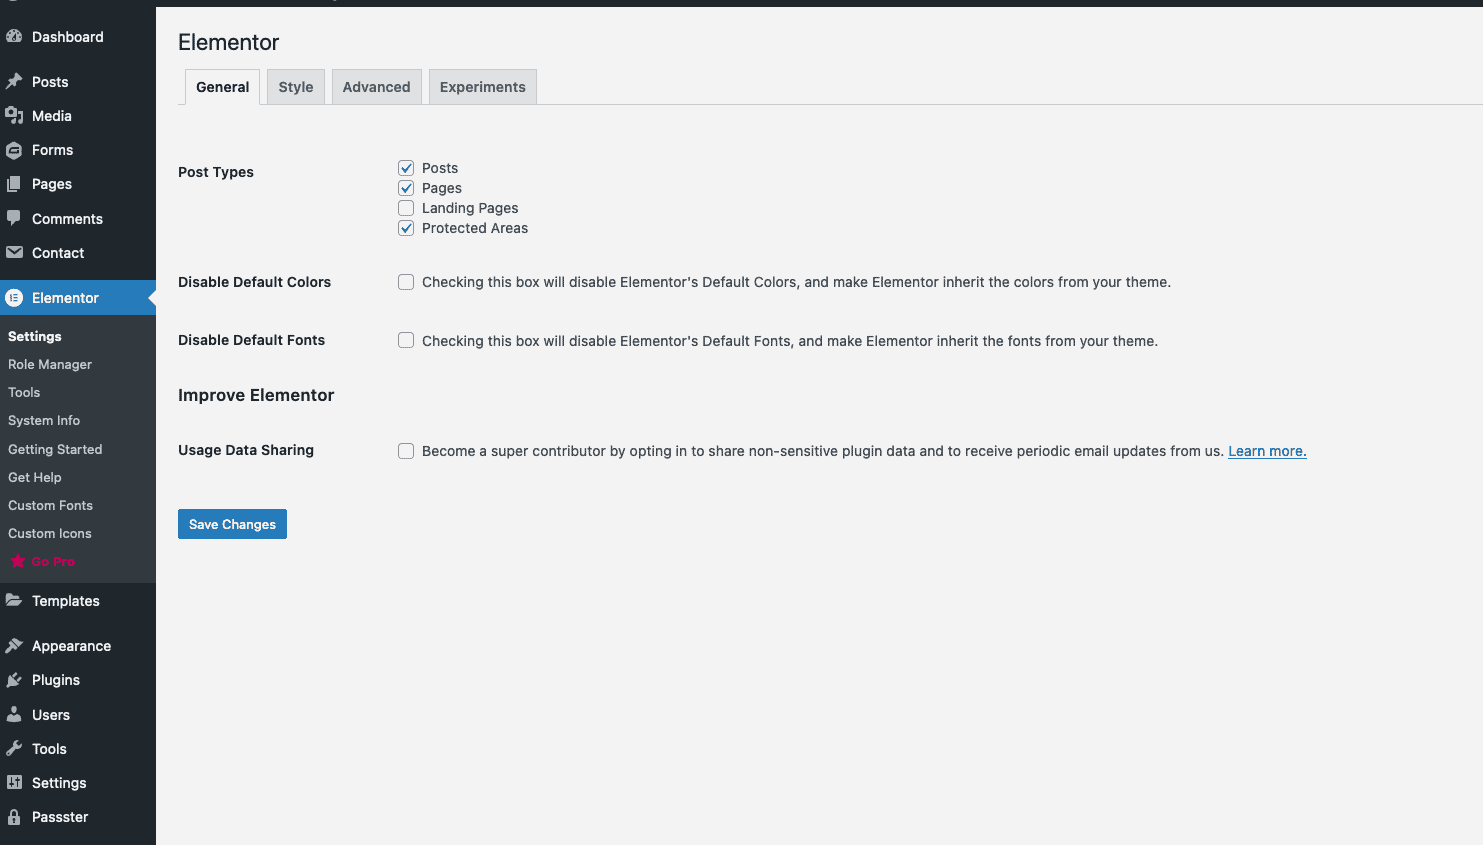
Once enabled, open any Protected Area in Elementor and design it like any other page — custom fonts, layouts, and colors all work as expected.
Session persistence: After a visitor enters the correct password, Passster stores access in a browser cookie. The Pro version lets you configure how long that cookie lasts, so visitors don’t have to re-enter the password on every visit.
SEO note: Search engines don’t index password-protected content. Before gating a section, confirm you don’t need it to appear in search results.
Other ways to restrict Elementor content with Passster
Passster supports three access-control methods beyond a standard password: Google reCAPTCHA, user role restrictions, and unlock links.
- Google reCAPTCHA — protect content against bots and spam. Visitors complete a CAPTCHA challenge to see the protected content.
- User role protection — restrict content to specific WordPress roles (administrator, editor, subscriber, or any custom role). Admins bypass the gate automatically; other roles can be selectively allowed. This is the right choice for member areas where users log in rather than enter a password.
- Unlock links — grant access without requiring a password, CAPTCHA, or login. The visitor clicks a unique link and the content unlocks instantly.
For detailed setup instructions for each method, see 6 Different Ways to Restrict Content in WordPress.
Frequently Asked Questions
No. Elementor has no native content protection feature. You need a plugin like Passster to add a password gate to Elementor pages or individual sections.
Create a Protected Area in Passster, add the content you want to gate, then paste the generated shortcode into a Shortcode widget inside the specific Elementor section. The rest of the page stays public; only the embedded area requires the password.
Yes. Search engines don’t crawl or index password-protected content. Only gate content you don’t need to rank for in search results.
Yes. Enable the Protected Area post type under Elementor > Settings > General, then open the area in Elementor and design it like any other page — full visual control.
After entering the correct password, Passster stores access in a browser cookie. The free version uses a session cookie that clears when the browser closes. Passster Pro lets you set a custom cookie duration so visitors don’t need to re-enter the password on return visits.
Yes. Passster’s user role protection restricts content to specific WordPress roles — administrator, editor, subscriber, or any custom role. Admins bypass the gate automatically, making it the right choice for member sites where users log in rather than enter a password.
Password-protect content in Elementor
Passster is the most comprehensive option for restricting access to Elementor content, handling passwords, password lists, user roles, CAPTCHA, and unlock links — all from one plugin. Because Protected Areas are a native Passster post type, you can also design the full gate experience with Elementor’s visual editor, not just the protected content behind it.