WordPress powers an estimated 43% of all websites globally (W3Techs, 2025), and its default is to make everything publicly visible. To make your WordPress site private, you have three practical options: WordPress’s built-in privacy settings, a password protection plugin like Passster, or a maintenance mode plugin.
This guide covers all three methods in detail — including a private WordPress blog setup — and helps you pick the right one for your situation. Each section covers what the method can and can’t do, so you can choose the right approach from the start.
🔐 Passster — Protect your entire website, entire pages, or just parts of your content with one or more passwords. Get it now
—
Why Make Your WordPress Site Private?
Making your WordPress website private restricts public access to its content while the site stays online — a need common enough that purpose-built solutions like Passster have more than 10,000 active installs on WordPress.org. You define who gets in — through a password, a user role, or a plugin rule.
To run a membership website
A members-only site gates your content so visitors must sign up — or pay — before accessing tutorials, videos, webinars, or a community forum. That exclusivity drives sign-ups and, if you charge for access, creates a direct revenue stream.
To protect sensitive information
If your site holds employee records, client contracts, financial data, or medical information, leaving it open to the public isn’t an option. Restricting access ensures only authorized people can reach that content.
To run a private blog
Personal diaries, family photo albums, travel logs shared with close friends — a private WordPress blog is one of the most common use cases here. Blog privacy works the same way as site privacy. You can lock the entire blog with a single password, protect individual posts so only certain entries are gated, or keep your public posts open and restrict a members-only category. The same three methods in this guide apply to all those scenarios.
To use your website for testing or staging
Software teams building WordPress plugins or themes need a test environment that stays hidden until the product is ready. In that case, making the site private keeps work confidential and prevents unfinished content from appearing in search results.
Who should consider making their site private?
Beyond the scenarios above, these roles benefit most:
- Freelancers who work with sensitive client data or deliver digital products to specific clients.
- Artists and creatives sharing portfolios with a select group, such as buyers or collaborators.
- Consultants providing exclusive resources to paying clients.
- Startups keeping early-stage ideas and plans confidential.
- Event planners sharing logistics and updates with attendees only.
—
Which Privacy Method Is Right for You?
The three methods for making a WordPress site private differ in scope, permanence, and depth of access control. Choosing the wrong one is a common mistake — especially confusing “hide from search engines” with genuine access restriction.
| Method | Best for | Privacy scope | Key limitation |
|---|---|---|---|
| WordPress built-in settings | Hiding individual pages from public view | Per page or post only | Can’t lock the whole site; “search engine hiding” doesn’t block access |
| Passster | Whole-site, page-level, or section-level control | Full site → pages → content blocks | Requires a plugin (PRO version for global protection) |
| Maintenance mode plugin | Temporary unavailability during a redesign | Whole site | Not real access control — just an “under construction” screen |
For most real-use scenarios — a membership site, a private blog, a client portal, a staging environment — Passster is the only option that provides full, ongoing access control. The built-in settings are fine for locking a handful of pages. Maintenance mode is for short-term work windows only.
—
How to Make Your WordPress Site Private
WordPress offers three distinct methods for controlling site access, each suited to a different scope and privacy depth. The steps for each are below.
Method 1: Using built-in WordPress settings
WordPress lets you restrict visibility on individual pages and posts without any plugin. Two distinct settings are worth understanding before you use them.
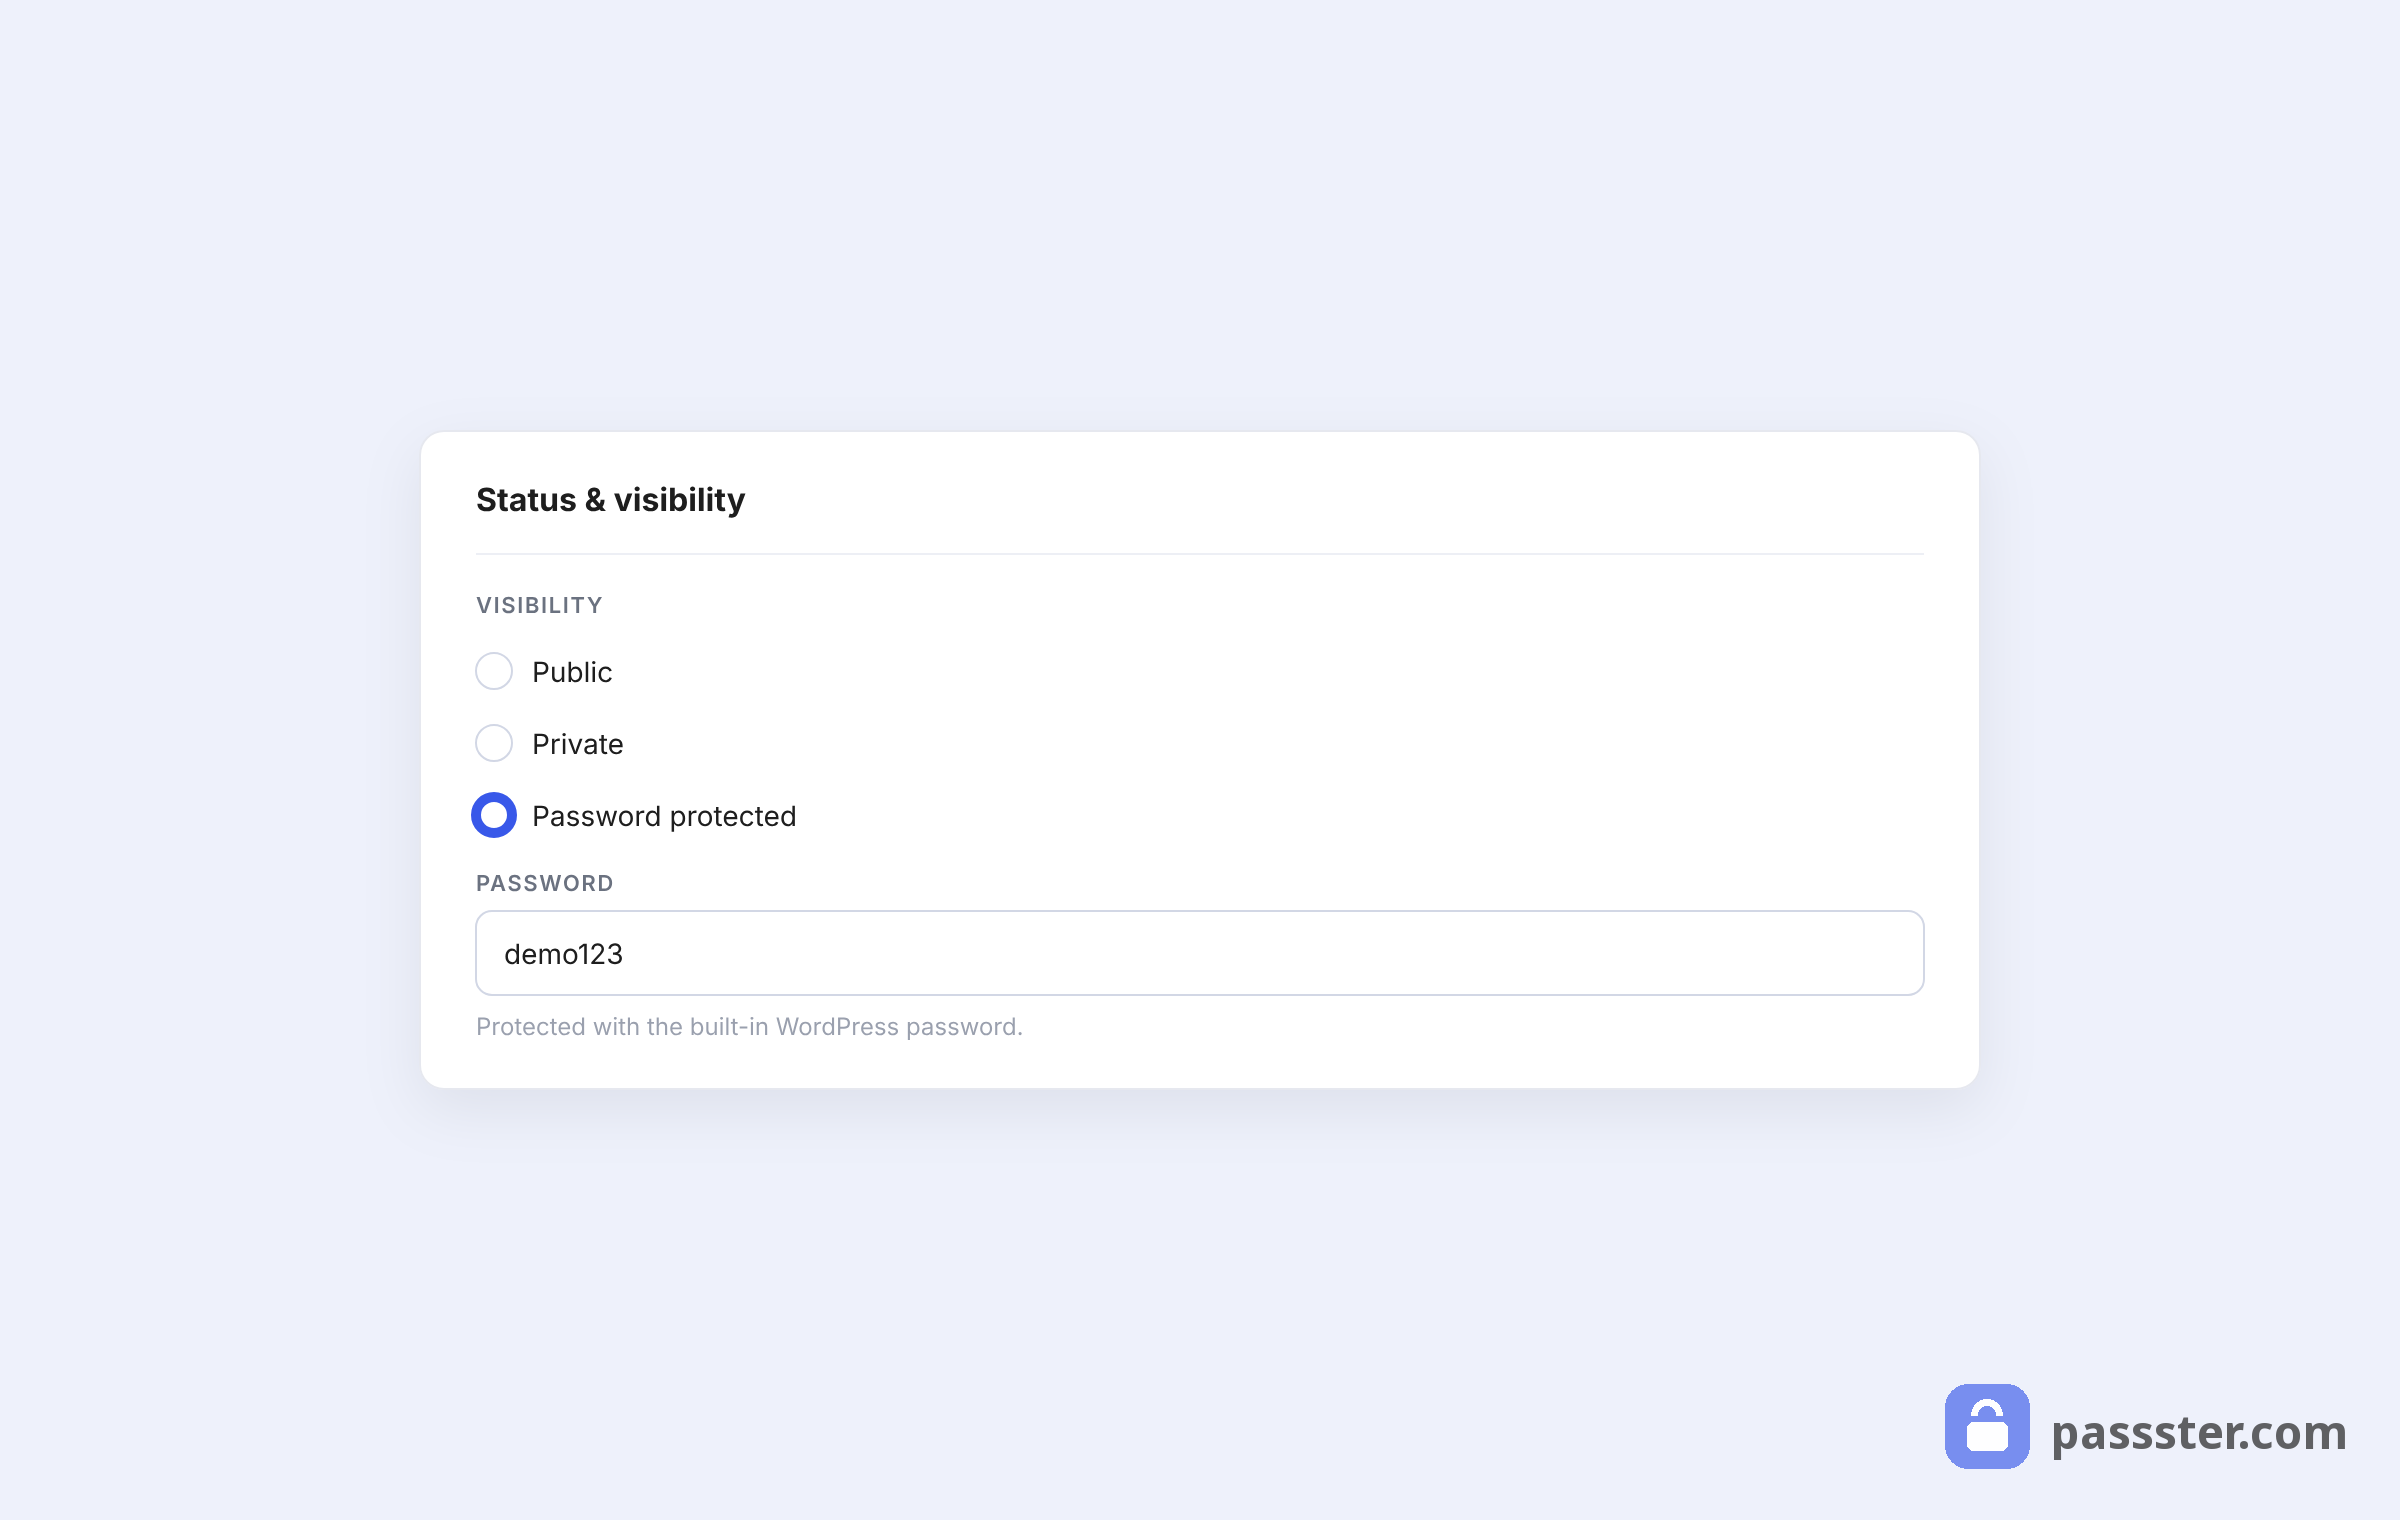
Visibility options for a WordPress private page:
- Private: the page is visible only to site Administrators and Editors. No one else sees it, even with a direct link.
- Password Protected: you set a password and any visitor who enters it can view the page. They don’t need a WordPress account.
Steps to make a page or post private:
- Go to Pages in your WordPress dashboard and hover over the page you want. Click Edit.
- In the right sidebar, under the Page tab and Summary section, click the link next to Visibility to expand the options.
- Select Private or Password Protected (enter a password if you choose the latter).
- Click Publish to save.
Steps to discourage search engine indexing:
- Go to Settings > Reading in your WordPress dashboard.
- Scroll to Search engine visibility and check Discourage search engines from indexing this site.
- Click Save Changes.
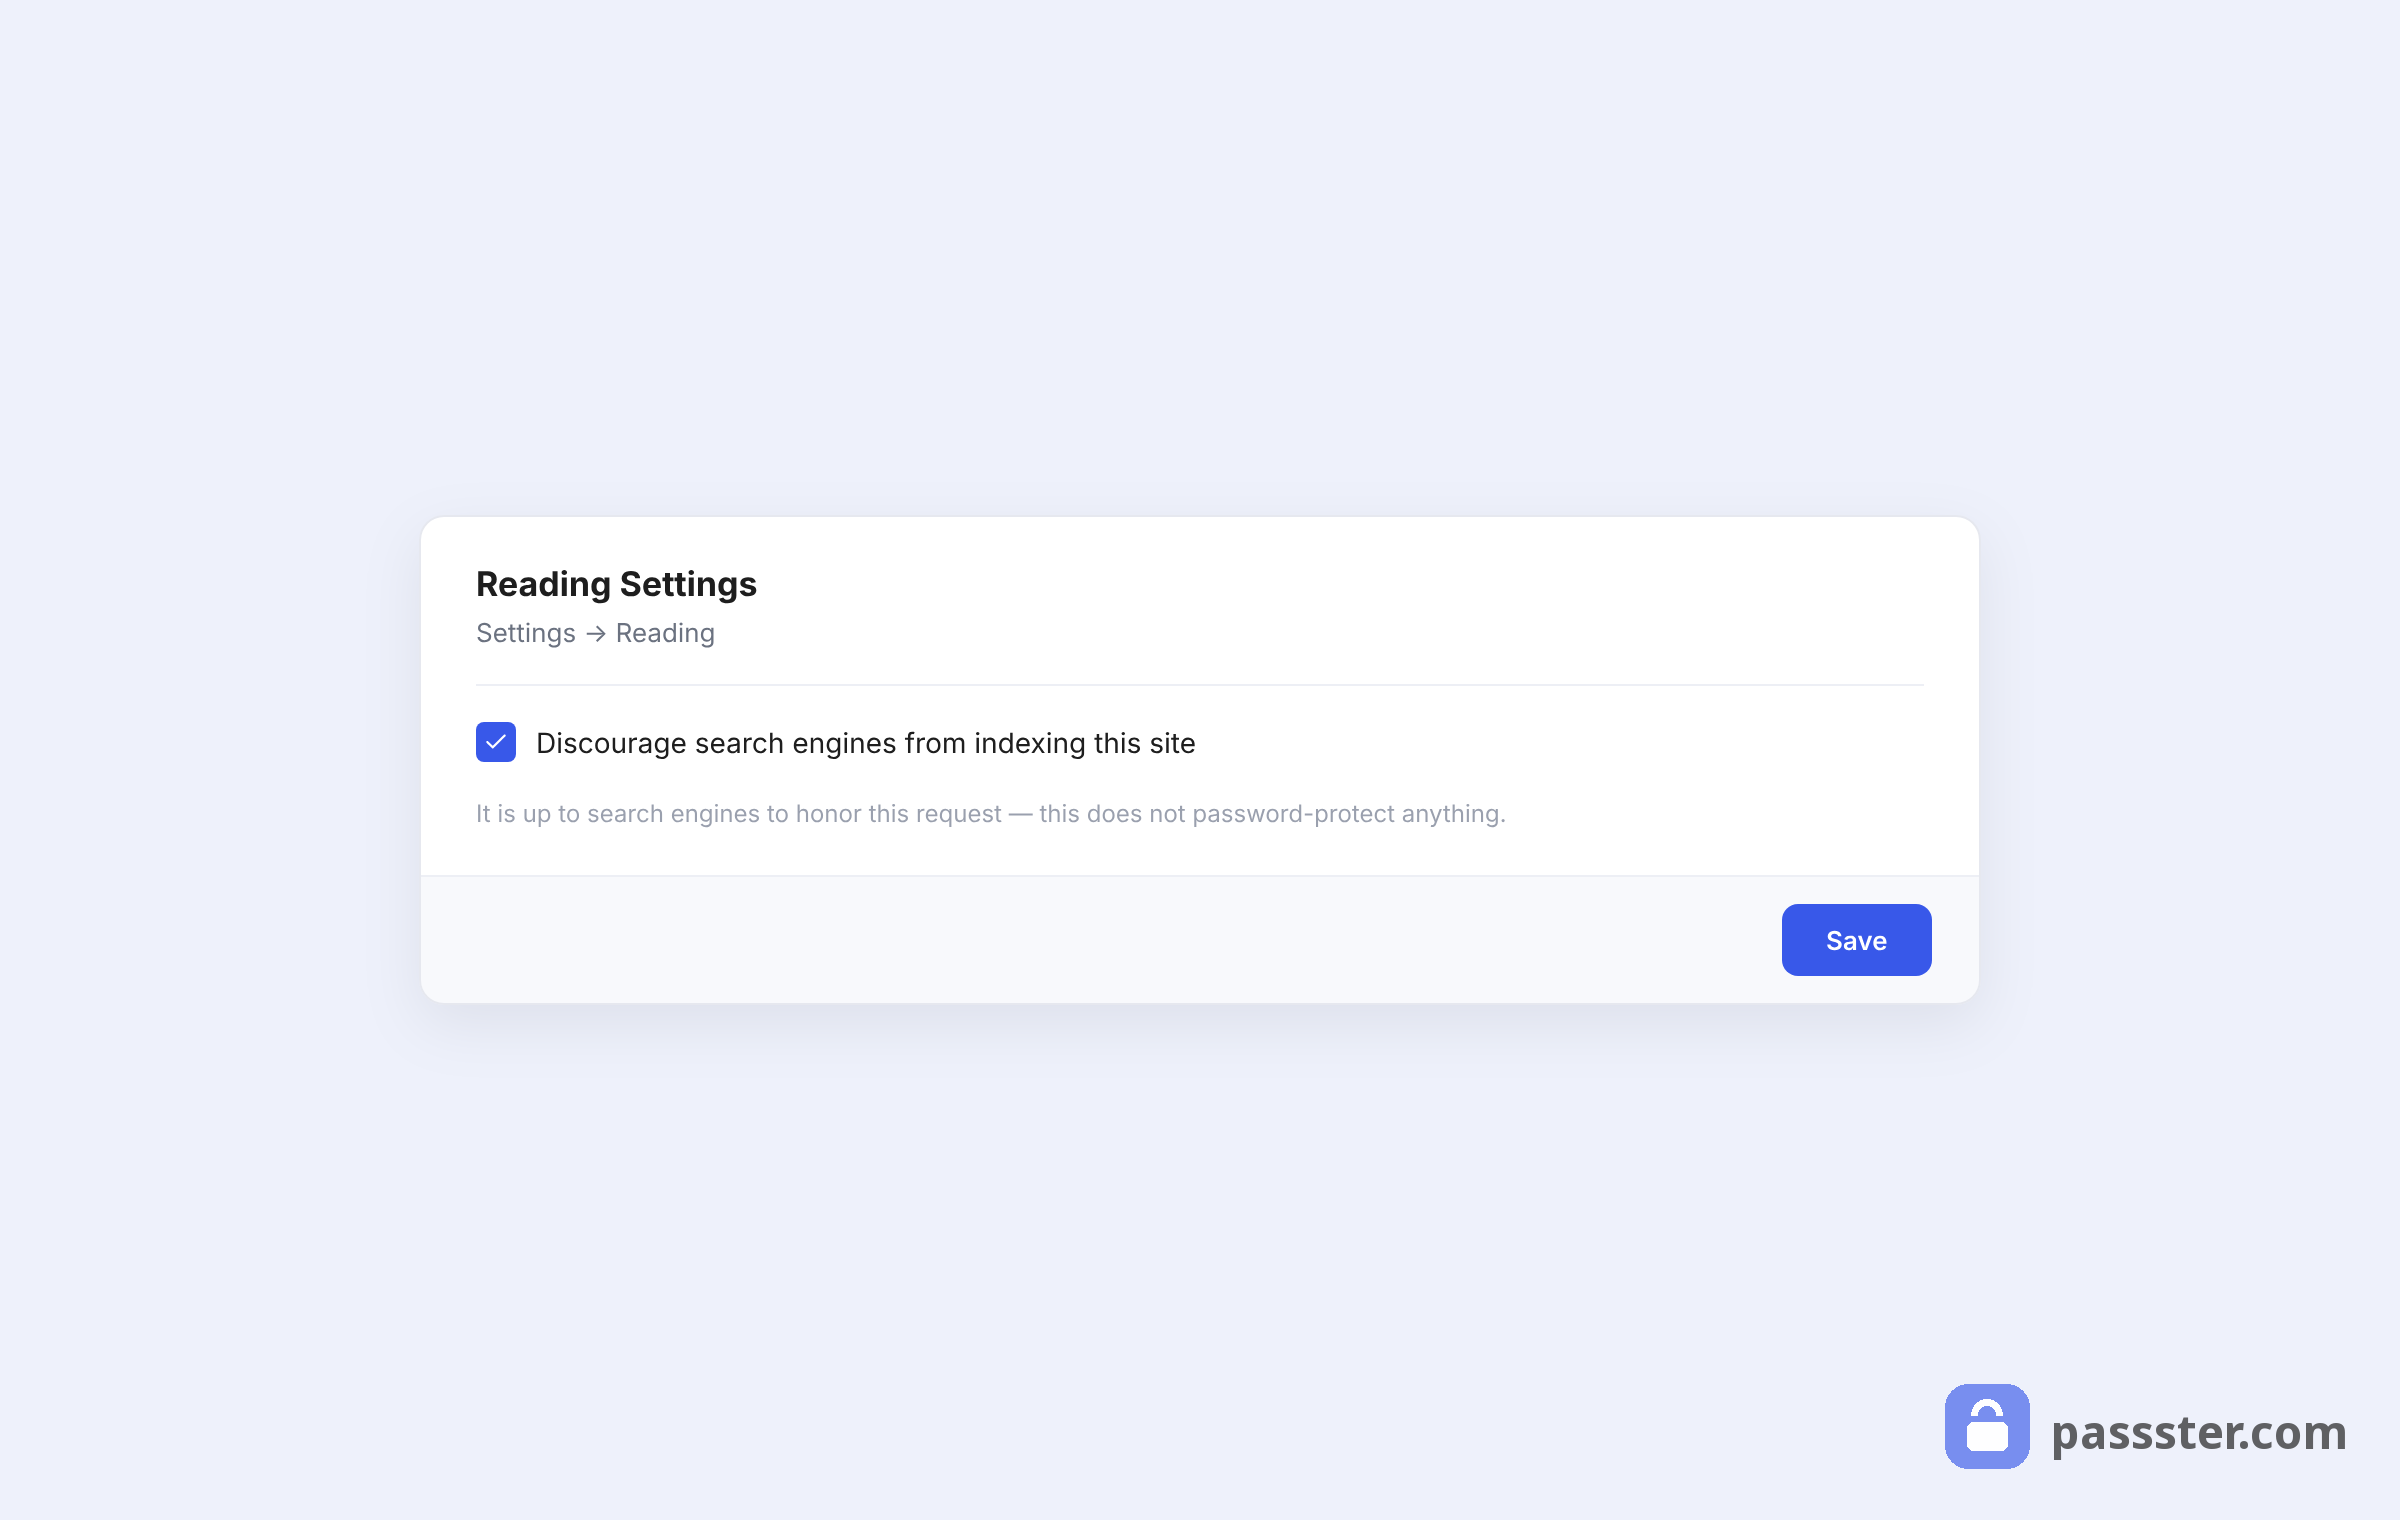
Important: This setting is a request to search engines — it isn’t access control. Any visitor with a direct URL can still load your site. If you need genuine privacy, use the Password Protected visibility option, or use Passster.
User roles in WordPress
The Private visibility option shows a page only to two specific user roles — Administrators and Editors. Understanding WordPress roles, then, clarifies who can and can’t see a private page.
WordPress has five built-in user roles, managed under Users in your dashboard. Roles can be updated at any time after a user account is created.
- Subscriber: lowest access level; can only manage their own profile.
- Contributor: can write posts but cannot publish them.
- Author: can write and publish their own posts.
- Editor: can manage all posts across the site.
- Administrator: full admin control over the site.
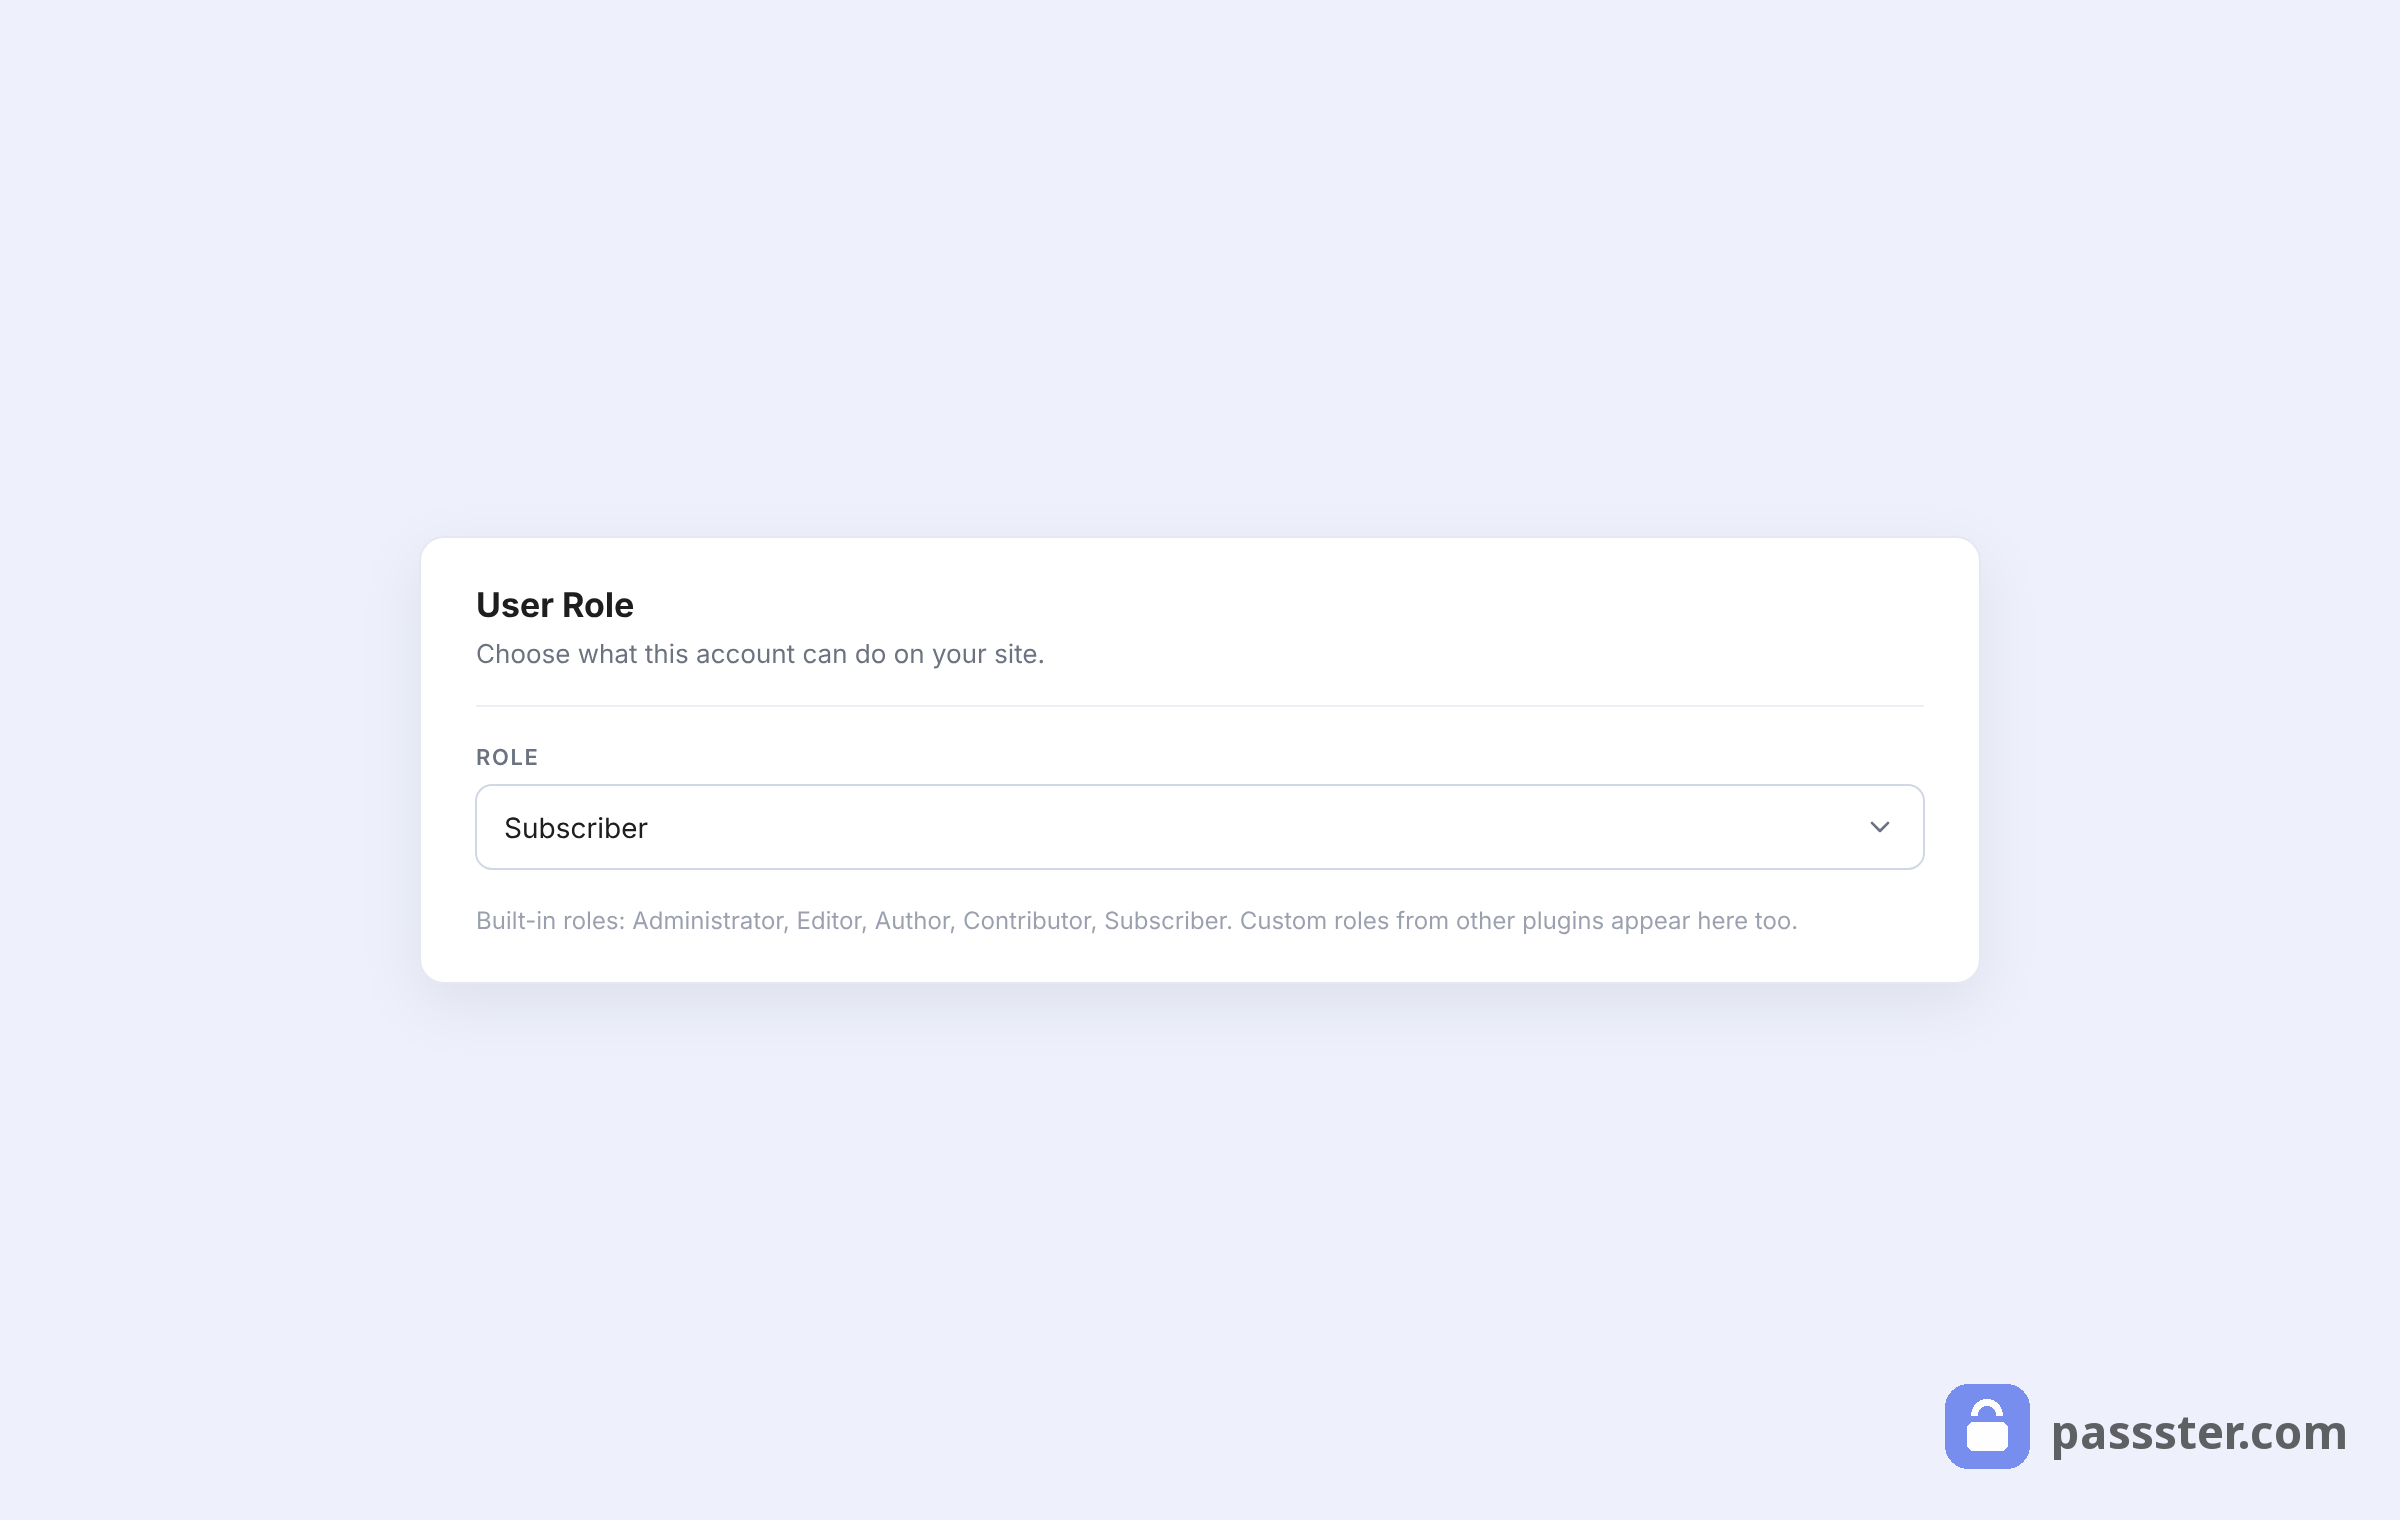
For more detail, see the official WordPress roles and capabilities documentation.
Because the built-in Private setting limits access to Editors and Administrators only, it’s too narrow for most community or membership scenarios. If you need Subscribers, Customers, or custom role users to access protected content, Passster handles that.
—
Method 2: Using Passster to password protect your WordPress site
Passster is a WordPress password protection plugin purpose-built for access control. It lets you password protect your entire site, individual pages and posts, or specific sections within a page. In short, it covers a full privacy spectrum that the built-in settings can’t match.
Privacy levels Passster supports:
| Protection scope | What it covers |
|---|---|
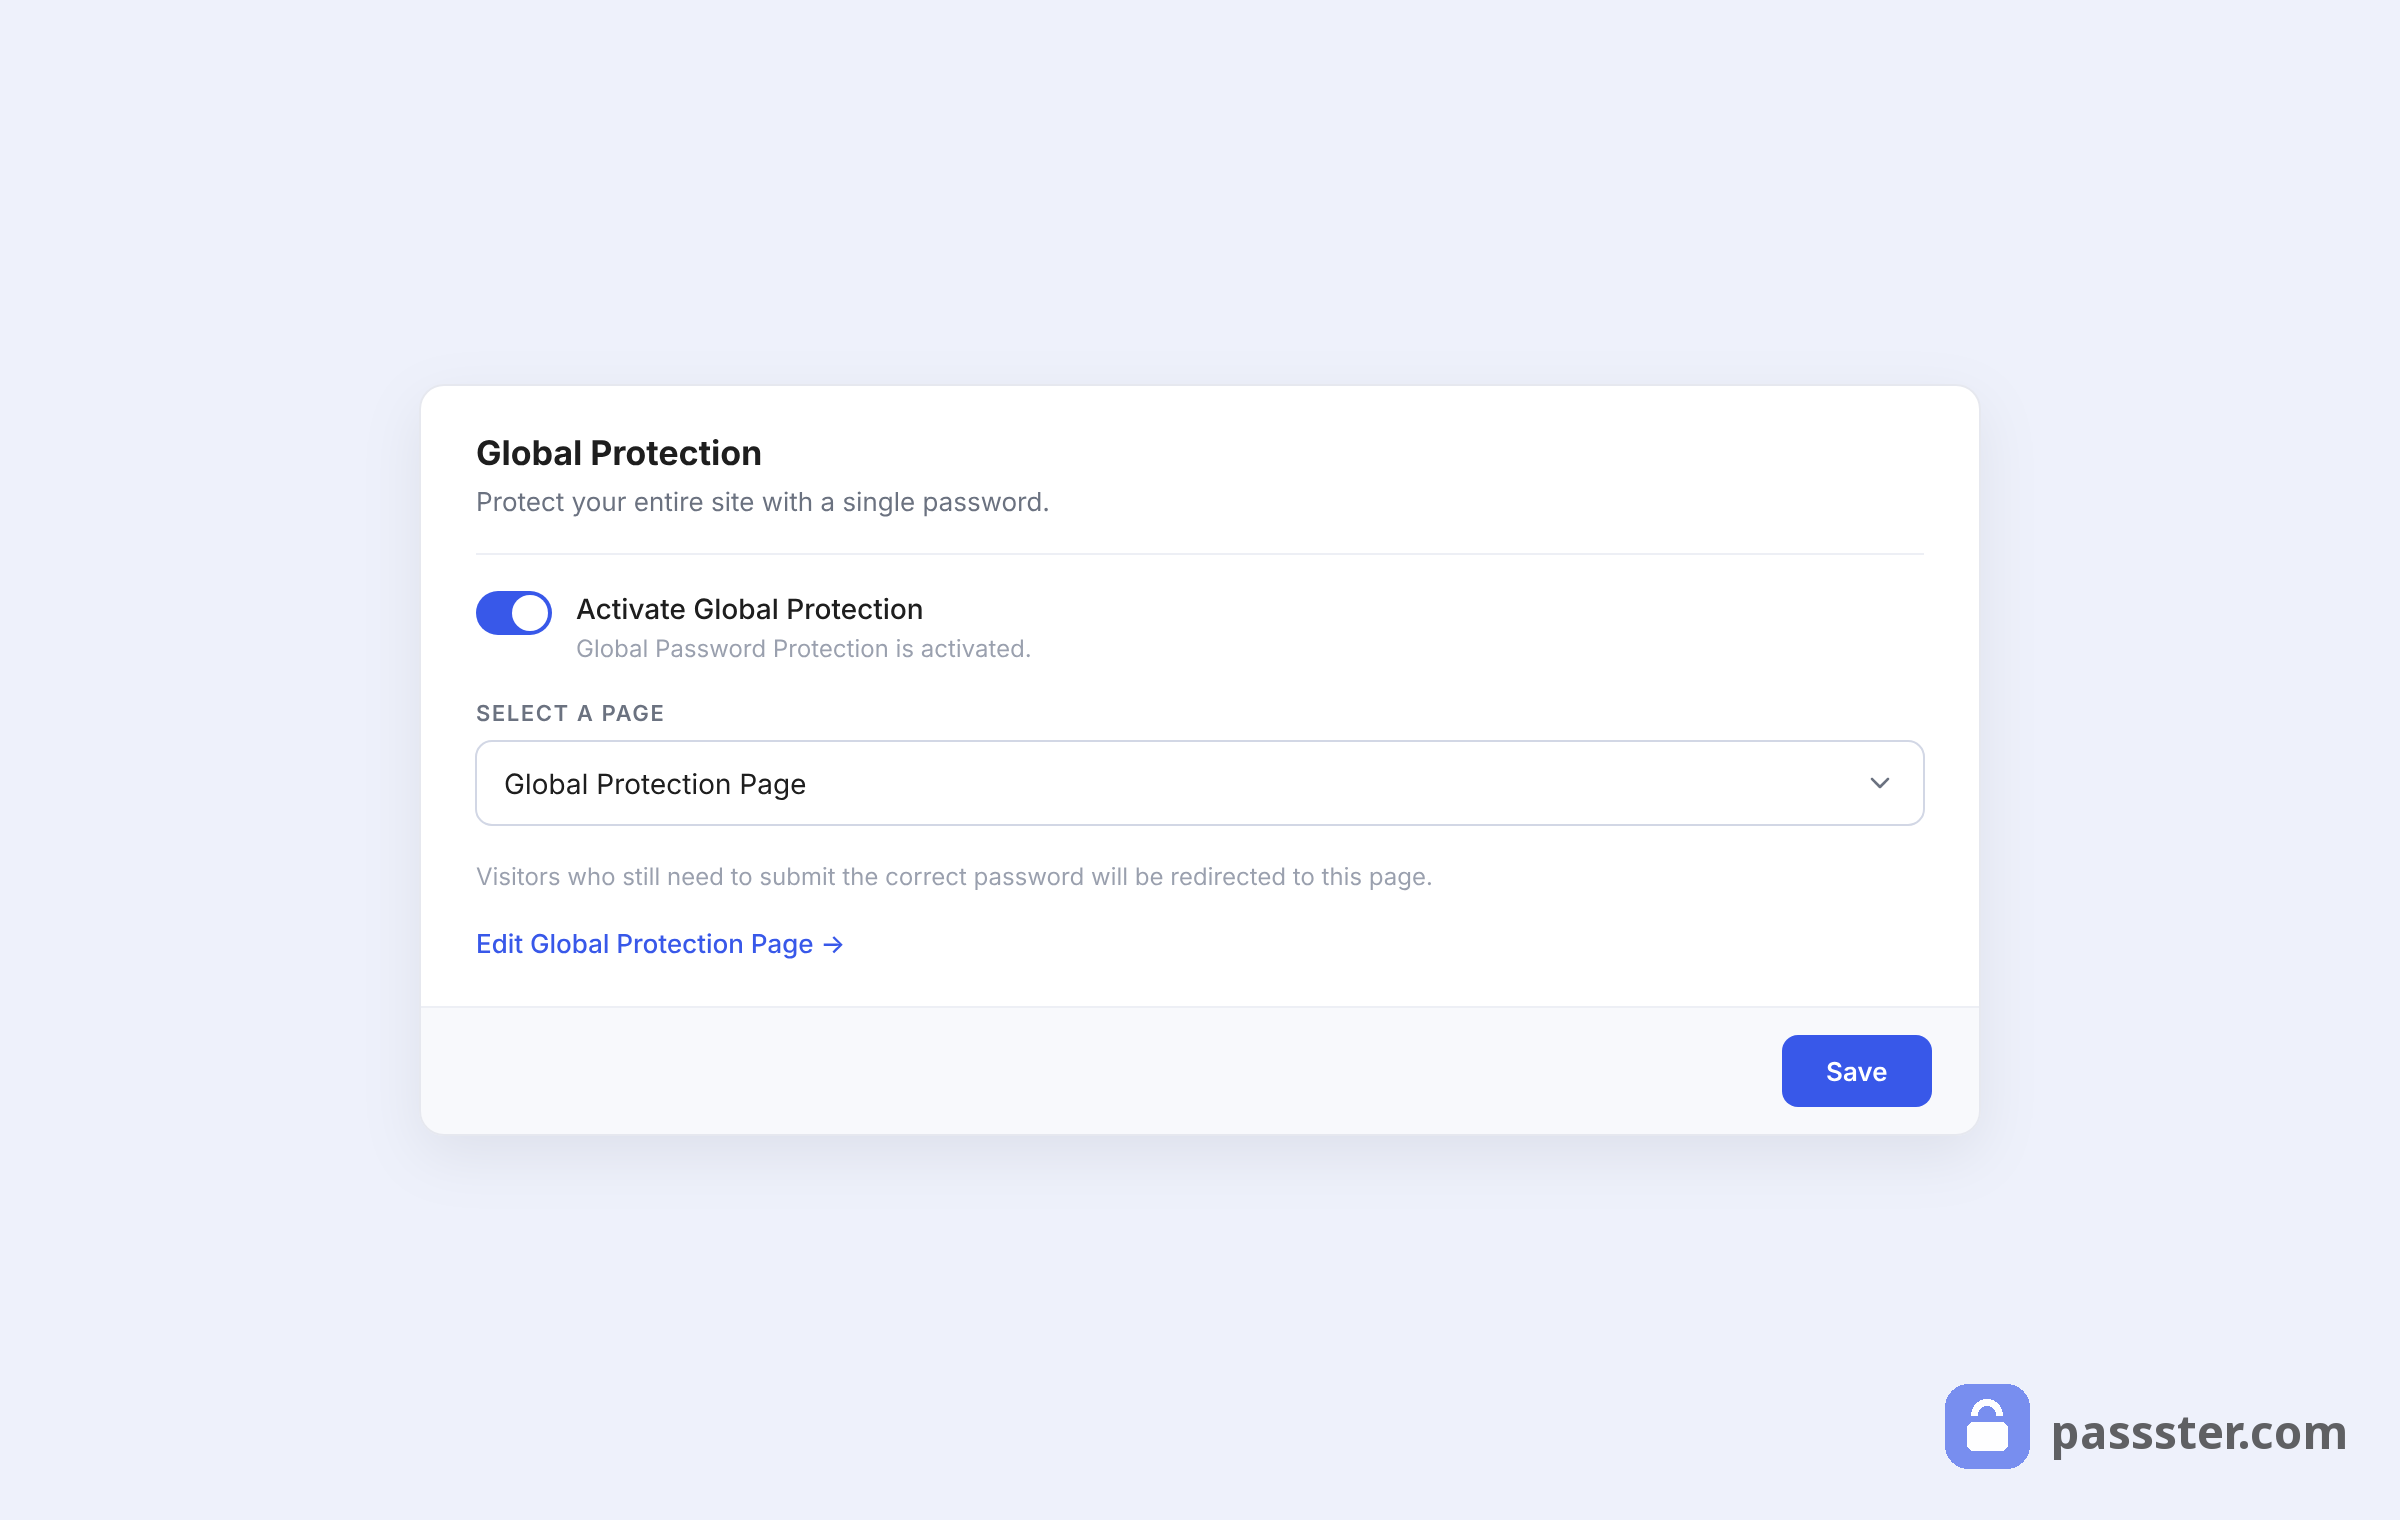
| Global Protection | Your entire website — every visitor must authenticate before seeing anything |
| Page or post | A specific page or post, while the rest of the site stays public |
| Page section | A block of content within a page — useful for gating download links, pricing, or premium paragraphs |
This layered model means you can run a public-facing site with a private members area inside it, without any extra complexity.
Access control options:
- Single password: one code for the site or page.
- Multiple passwords: different codes for different team members or customers.
- Password list: draw from a pre-created pool of valid passwords.
- Google reCAPTCHA: require visitors to pass a CAPTCHA, blocking bots without a shared password.
You can also restrict access by user role and specify individual usernames that may enter protected content.
Improving the experience for returning visitors:
- Cookies: once a visitor authenticates, a cookie auto-unlocks gated content on future visits.
- Encrypted links via bit.ly: send a direct link that bypasses the password prompt entirely.
Passster also works with WooCommerce, letting you password protect products or restrict them by user role. It’s compatible with custom post types, Advanced Custom Fields, and the WordPress block editor.
Step 1: Install Passster on your WordPress website
Buy the PRO version on the Passster pricing page. After purchasing, download the .zip file from your confirmation email.
- In your WordPress dashboard, go to Plugins > Add New.
- Click Upload Plugin and upload the .zip file.
- Click Install Now, then Activate.
🔐 Passster — Protect your entire website, entire pages, or just parts of your content with one or more passwords. Get it now
Step 2: Make your WordPress site private
To activate Global Protection (whole site):
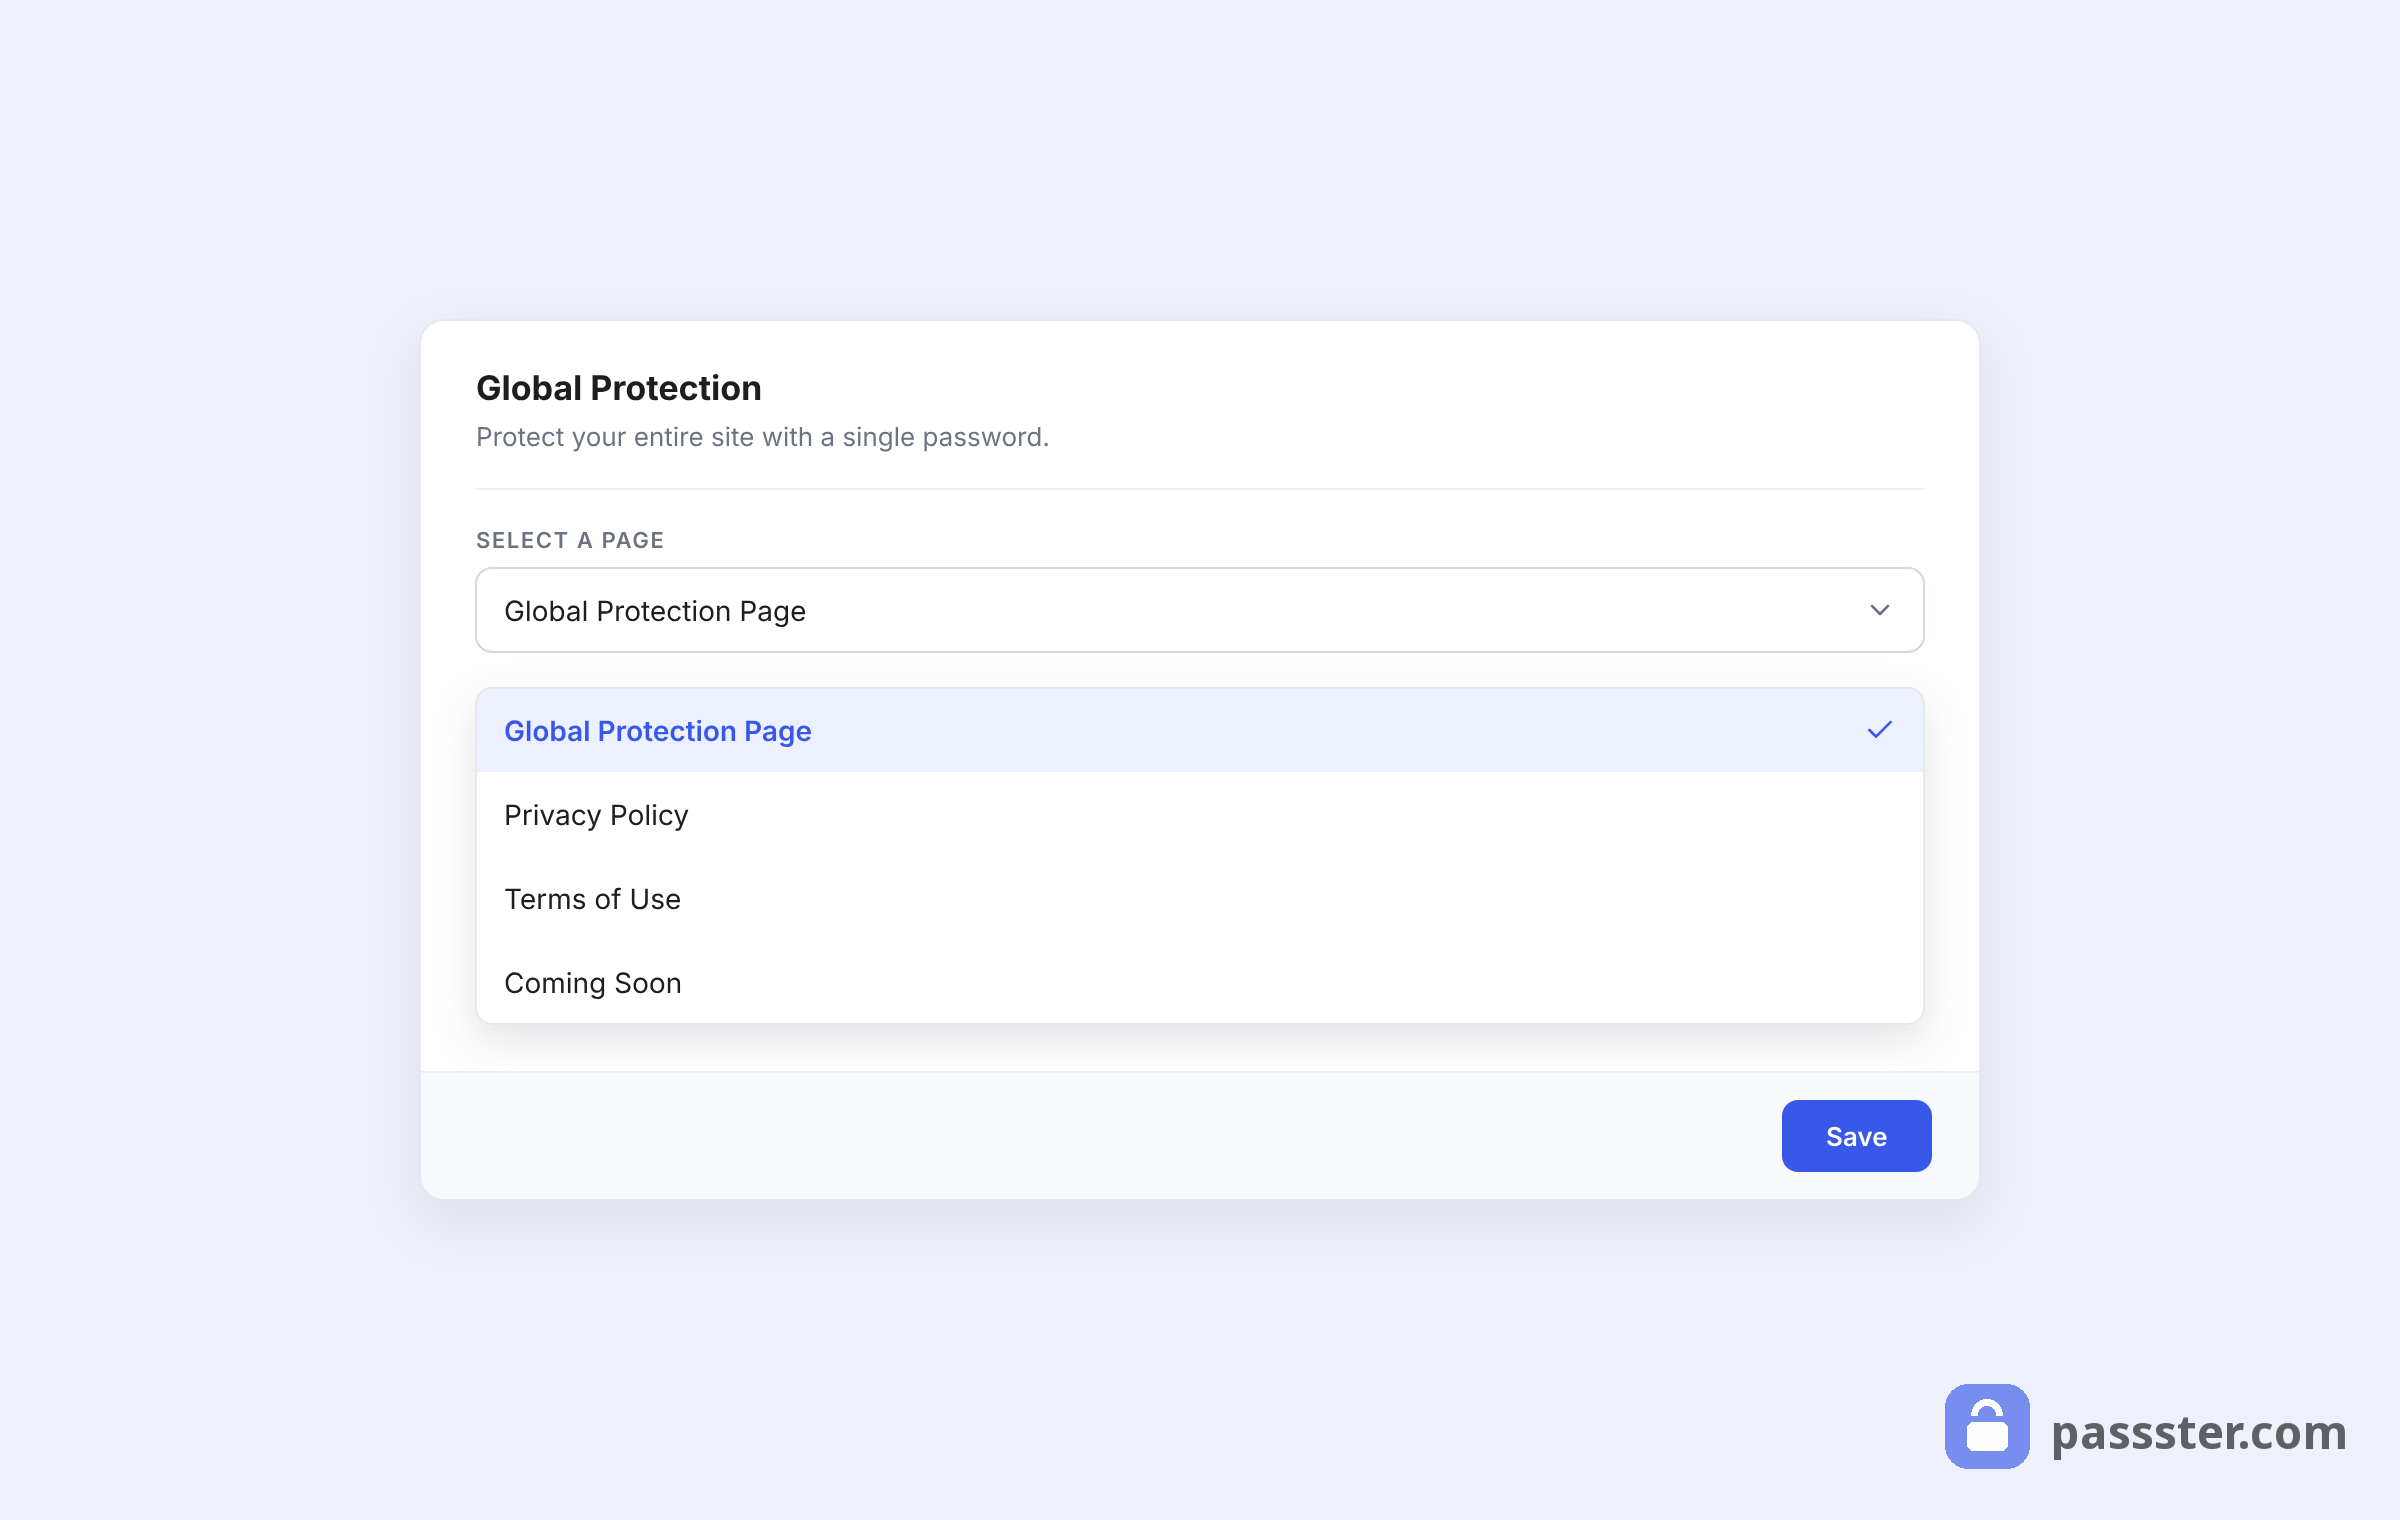
- Go to Passster > Settings > General in your WordPress dashboard and scroll to the Global Protection section.
- Toggle Activate Global Protection to enable it, select the page to use as your protection page, and click Save.
- Click Edit Global Protection Page to open that page in the editor.
- Set a password in the right sidebar.
- Click Publish to save.
To protect an individual page or post:
- Open the page or post you want to protect in the WordPress editor.
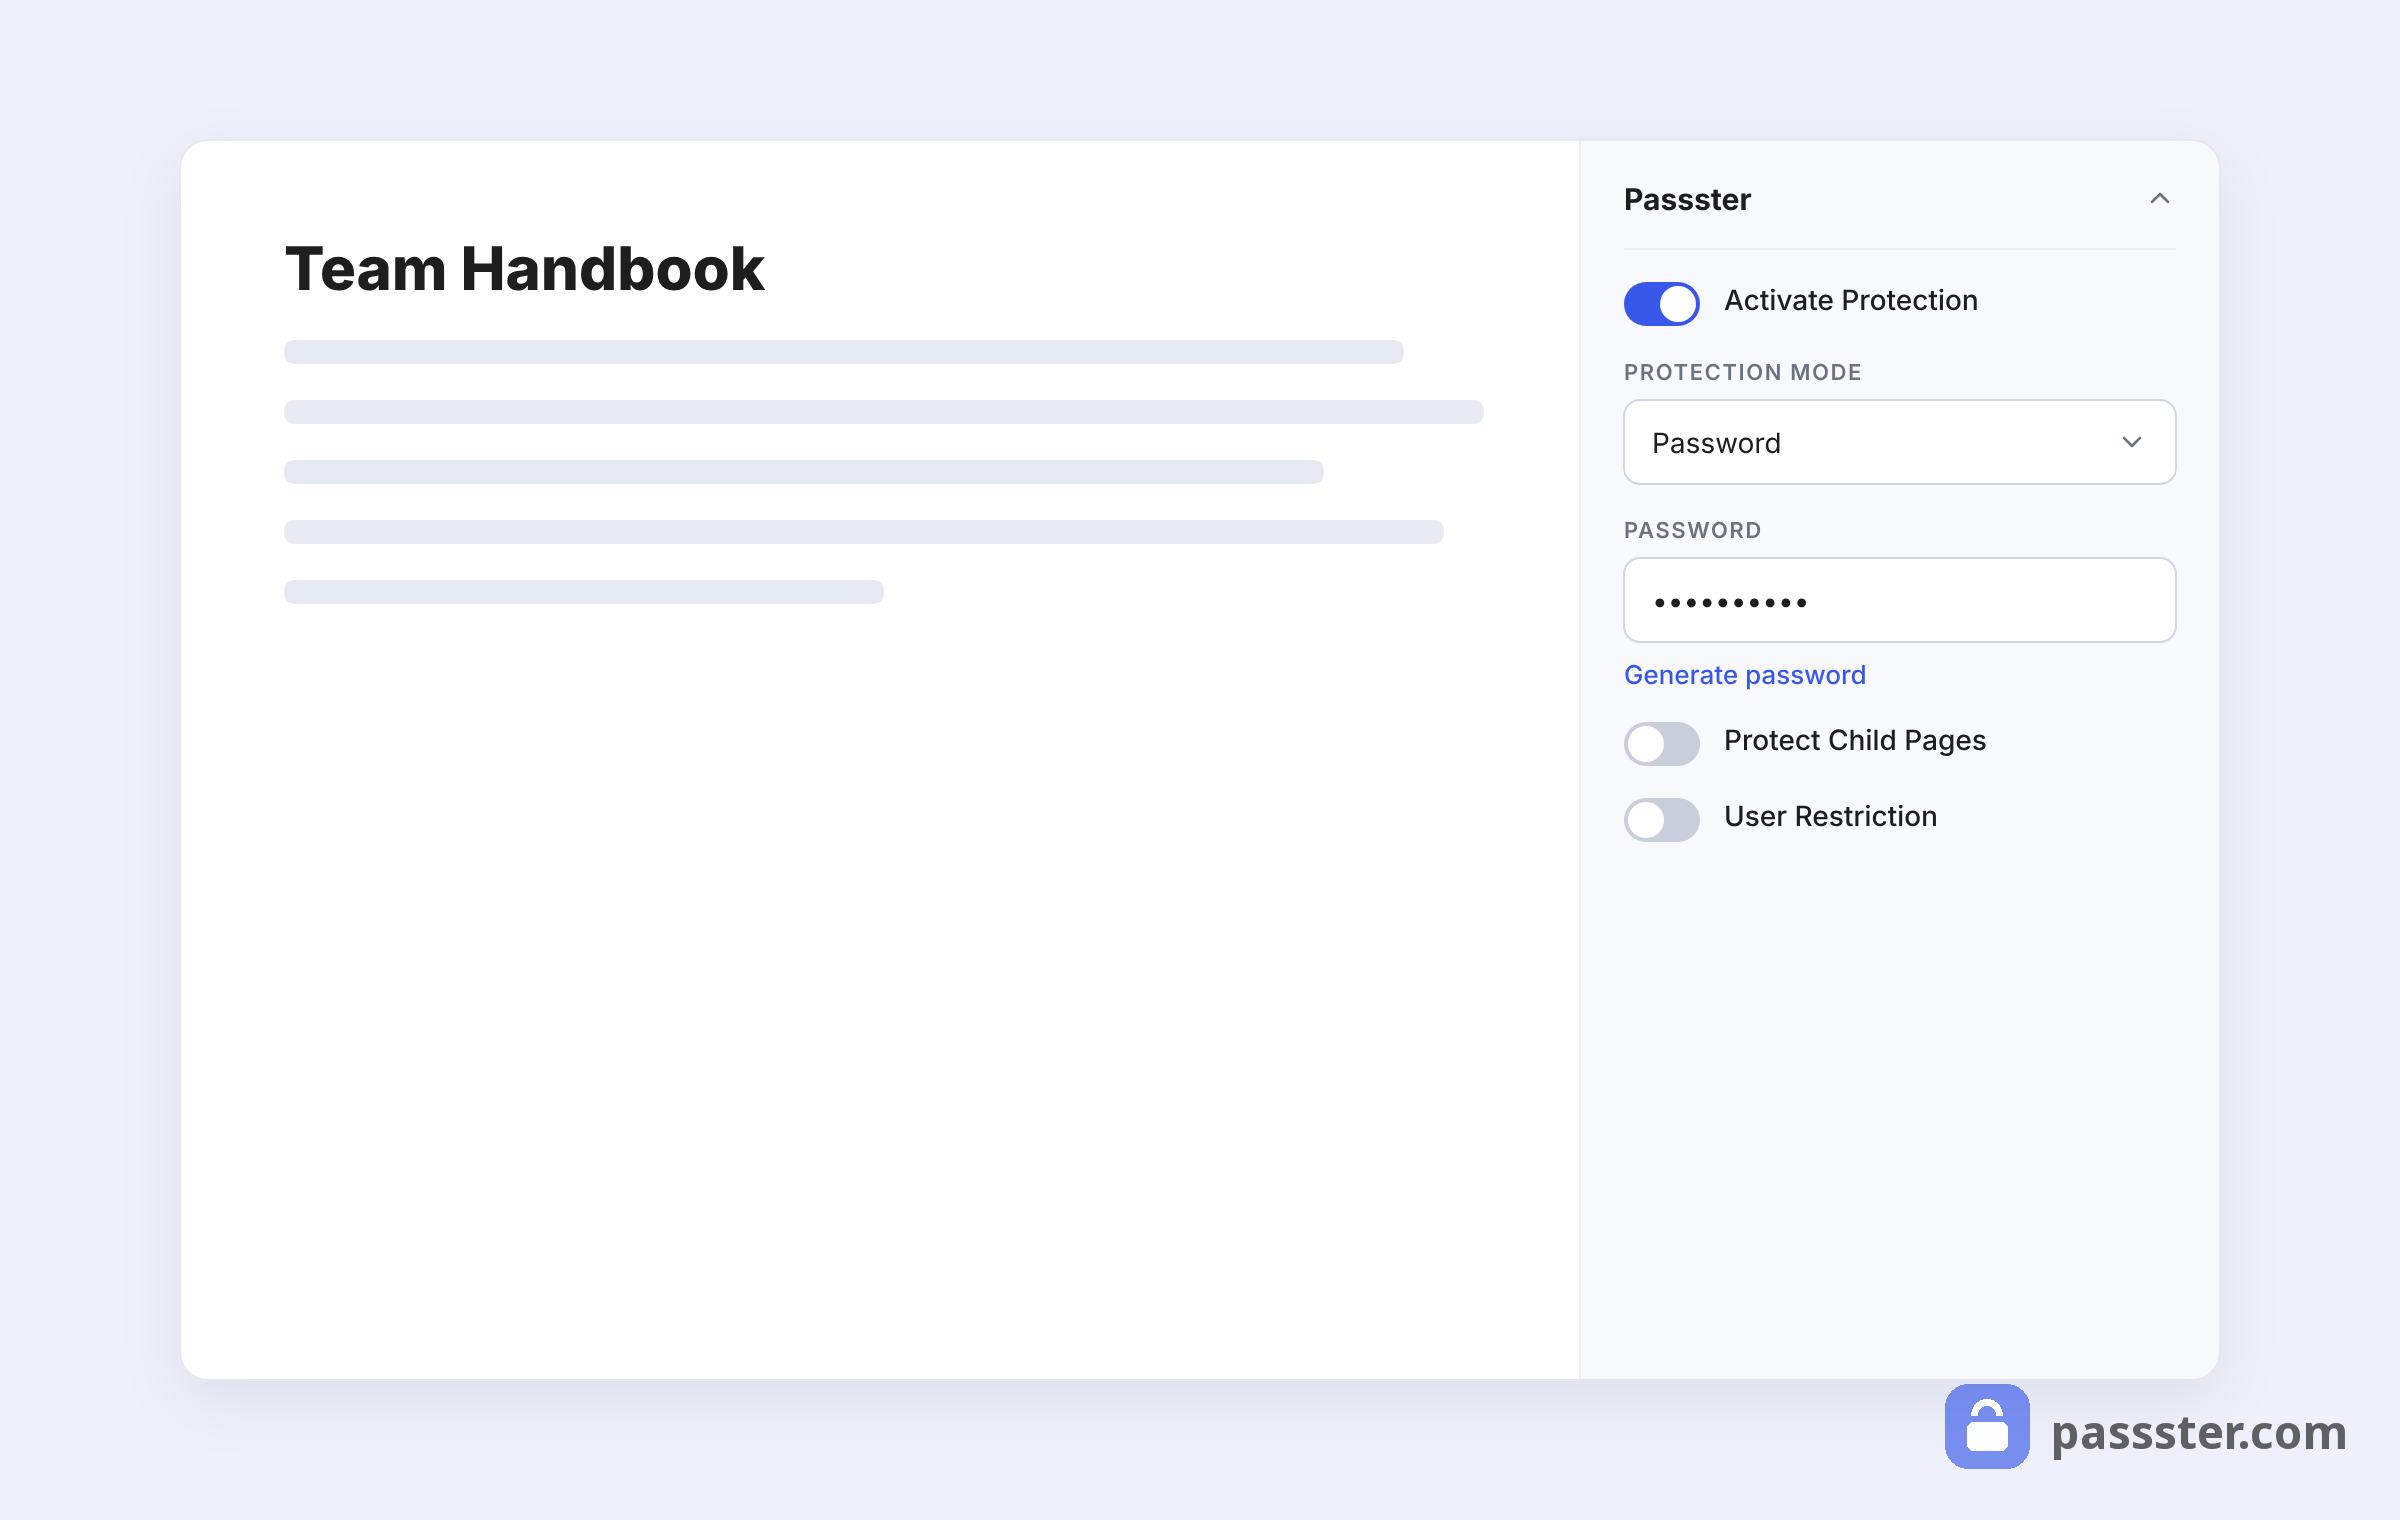
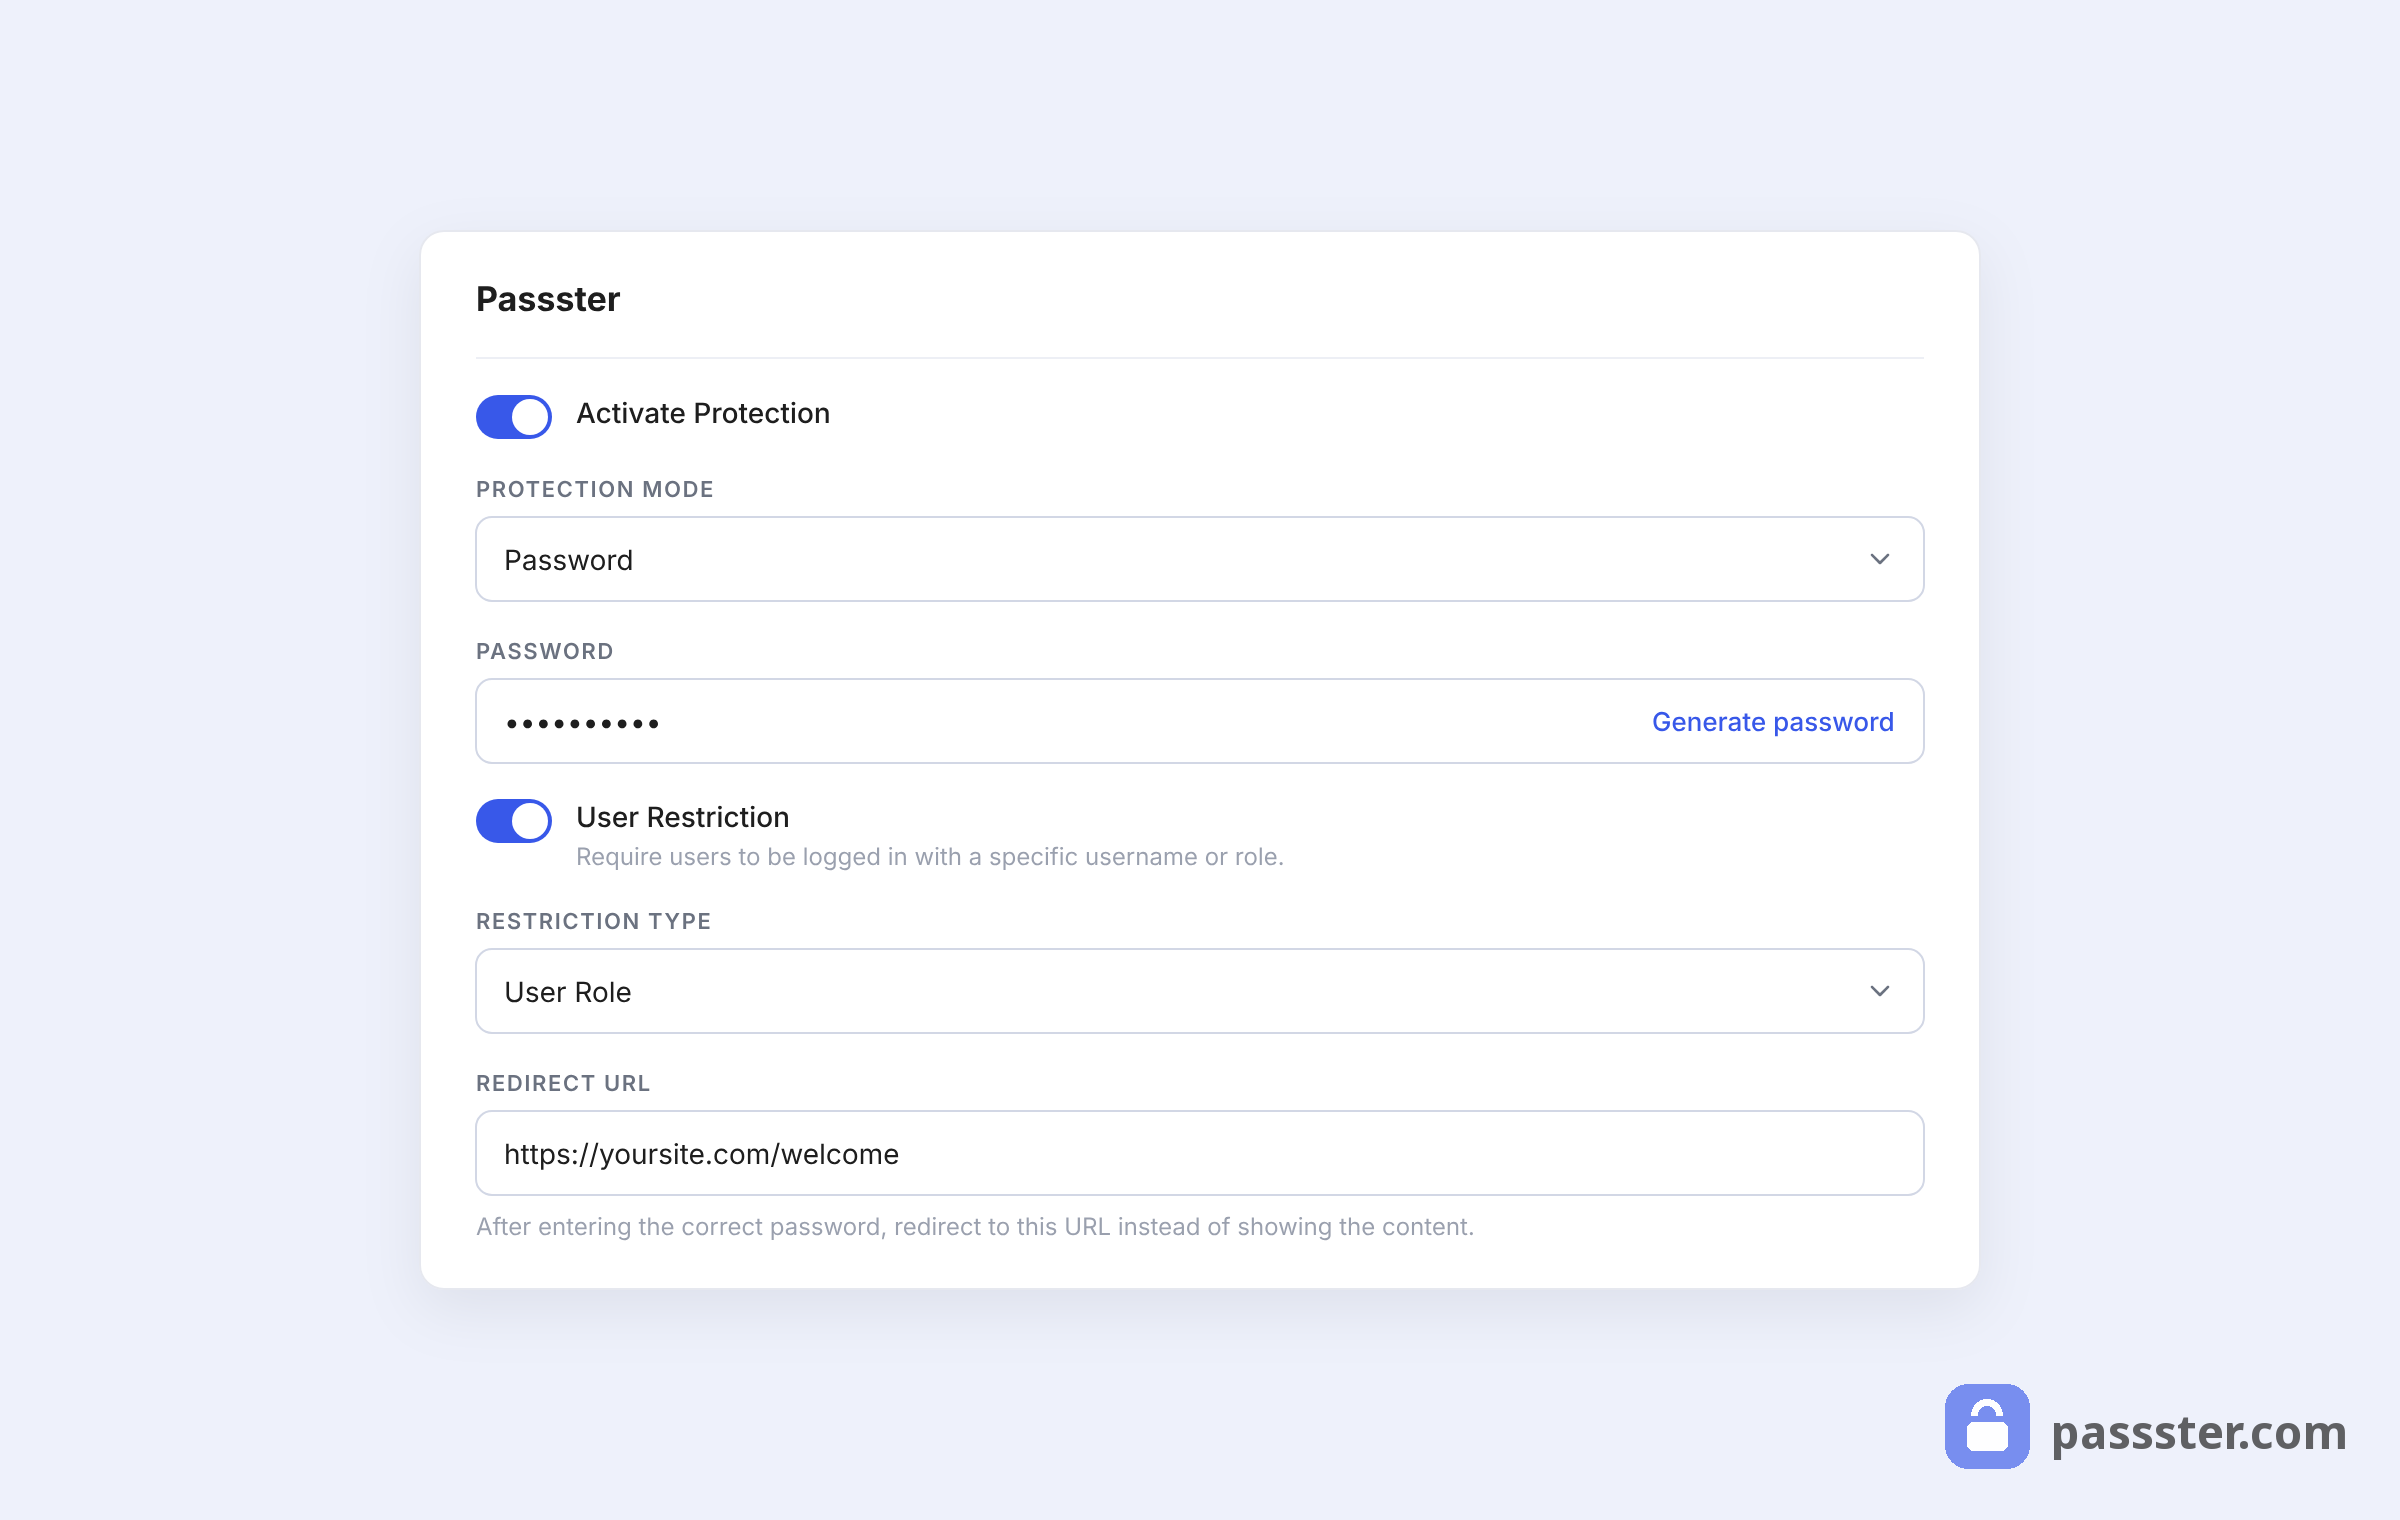
- In the right sidebar under Passster, toggle Activate Protection.
- Use the Protection Mode dropdown to select a protection type: Password, Passwords, Password List, reCAPTCHA, or Turnstile.
- In the Redirect URL field, under the advanced options, set the URL where users land after successful authentication.
- To restrict by user role, toggle User Restriction and define the allowed roles or usernames.
- Click Publish to save.
Step 3: Customize your private mode login form
Passster lets you edit both the content and the appearance of the password form so it matches your site.
To edit form content:
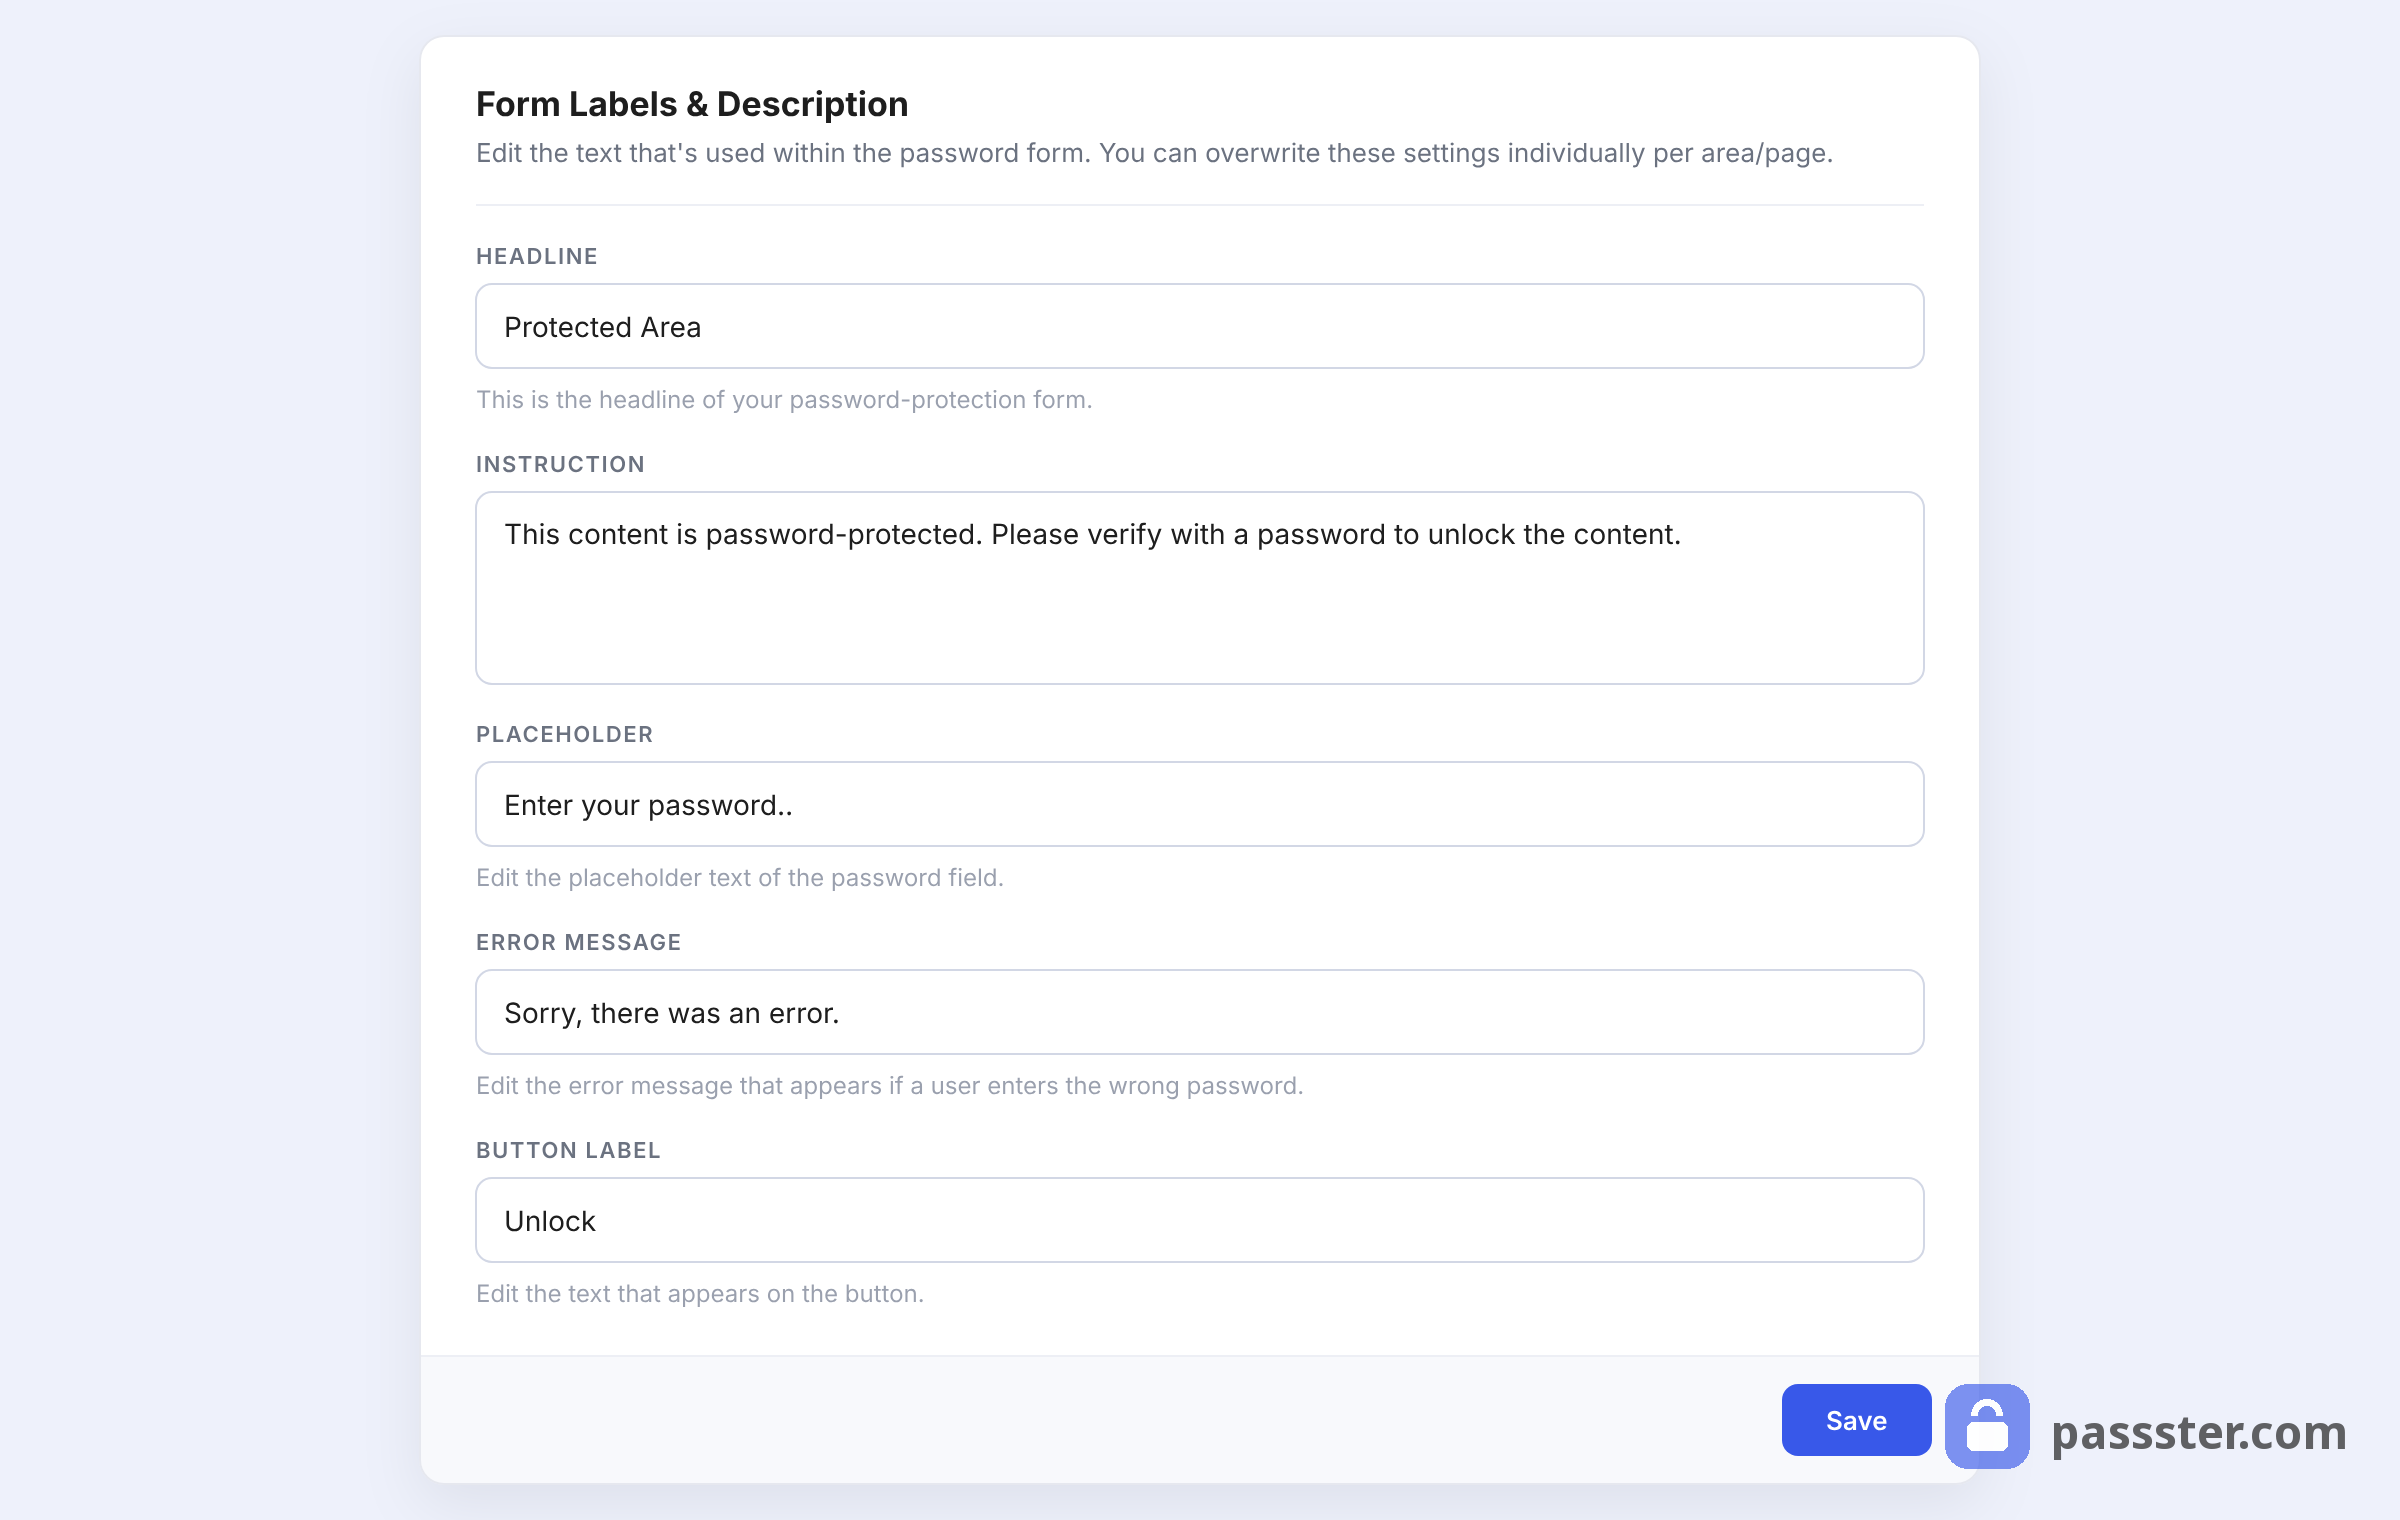
- Go to Passster > Settings > General.
- Under Form Labels & Description, update the headline, instruction text, and button label.
- Click Save.
To edit form design:
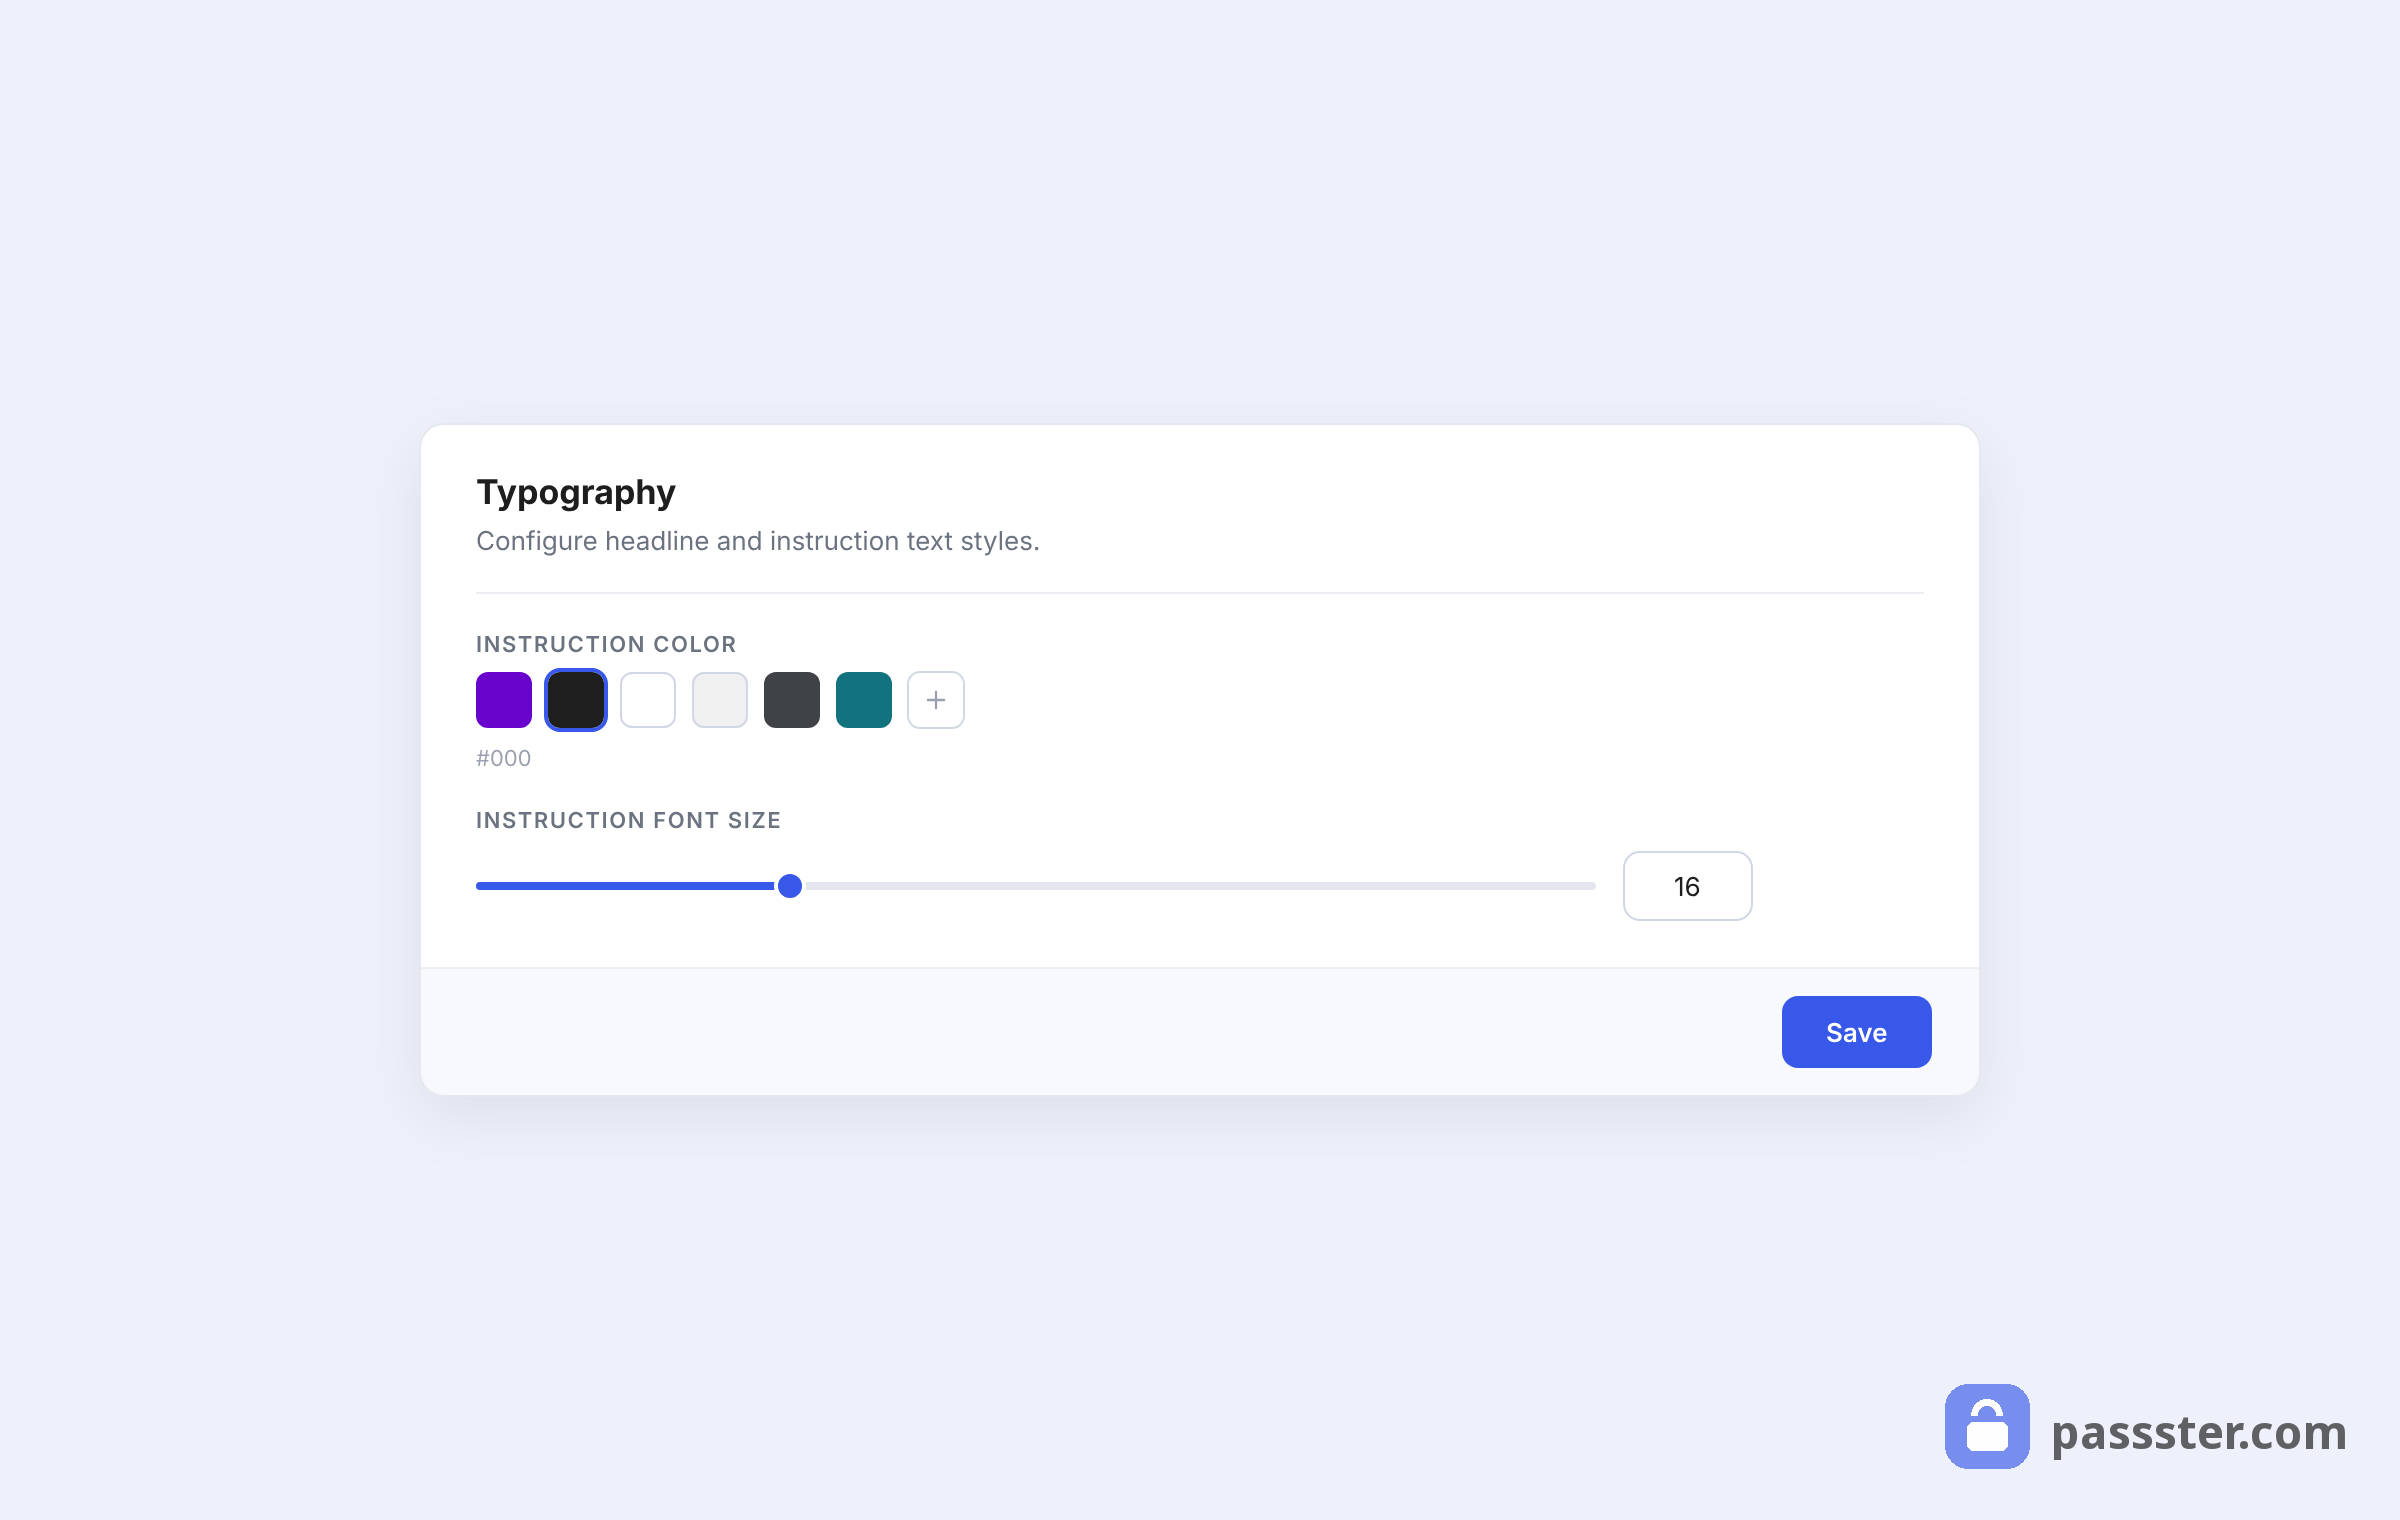
- Go to Passster > Settings > Design.
- Adjust width, colors, spacing, border radius, and font sizes to fit your brand.
- Click Save in each section you change.
—
Method 3: Using a maintenance mode plugin
Maintenance plugins show visitors an “under construction” or “coming soon” screen instead of your site content. They’re the right tool during a redesign or pre-launch phase — but they’re not a real access control solution.
To get started, search for Maintenance in the WordPress plugins directory. Coming Soon Page, Under Construction & Maintenance Mode is a widely used example. Once activated, it intercepts all public requests and displays the maintenance screen until you turn it off.
Use this method for short-term work periods only. For ongoing privacy — a members area, a private blog, a client portal — use Passster’s Global Protection instead.
—
Frequently Asked Questions
“Private” restricts a page to Administrators and Editors only — no visitor can see it regardless of the URL. “Password Protected” lets any visitor who enters the correct password through, with no WordPress account required. Neither option applies to your whole site; both only affect the individual page or post you set them on.
Yes. A fully private site can’t be indexed, so it won’t appear in search results. That’s fine for a closed community or internal tool. If you want some pages public and others gated, use Passster’s page-level protection — keep your homepage and landing pages open, and lock only the content that needs it. That way you preserve your search visibility where it matters.
No. Passster uses password-based access, not WordPress user accounts. Visitors enter the password on the protection form — that’s it. You can optionally layer user role restrictions on top, but visitors don’t need to register on your site first.
Yes — that’s Passster’s core advantage. You can leave most of your site public and gate a specific page, a set of posts, or a content block within a single page (such as a download link or premium pricing section). This lets you run a public-facing site with a private members area inside it, without any separate subdomain or complex setup.
Make Your WordPress Site Private Today
Restricting your WordPress site comes down to matching the right method to your use case. For basic per-page privacy limited to Administrators and Editors, WordPress’s built-in settings work fine. Maintenance plugins, meanwhile, handle temporary site unavailability during a redesign. Passster handles everything else — whole-site Global Protection, page-level passwords, section-level gating, user role restrictions, and a fully customizable login form.
If you need real, ongoing control over who can see your content, Passster is the tool built for it.
🔐 Passster — Protect your entire website, entire pages, or just parts of your content with one or more passwords. Get it now