

A private page in WordPress is a page that isn’t visible to the public — only to approved users. Depending on your setup, that might mean just your editors, anyone with a password, or specific user roles on your site.
This guide walks you through all three methods for how to create a private page in WordPress, plus the key limitations to understand before you start.

These methods work for:
- Subscriber-only content that only paying members can access
- Members-only or membership sites that gate premium material
- Sensitive information shared with specific people only
- Private websites you want to lock down entirely
—
Table of Contents
What “private” means in WordPress
WordPress uses the word “private” in two different ways, which causes a lot of confusion.
The Private visibility setting (found in the page editor’s Status & Visibility panel) makes a page invisible to everyone except site Administrators and Editors. Logged-in subscribers, authors, or visitors see nothing — not even a login prompt. If they hit the URL directly, they get a “page not found” message.
In contrast, Password-protected is a separate option in the same panel. It keeps the page accessible at its URL but requires a password to read the content. Anyone who has that password can get in — no WordPress account needed.
Neither option is always better — the right choice depends on who you’re sharing with and how much control you need.
—
Why you might want to create a private page in WordPress
WordPress private pages serve four common scenarios: content under review, sensitive information sharing, members-only access, and personal or team-only pages. Here’s when each case applies.
You have a page or post that’s in review
While running a WordPress website, there inevitably comes a time when a page isn’t ready — a blog post awaiting a third-party review, or a page that still needs design tweaks.
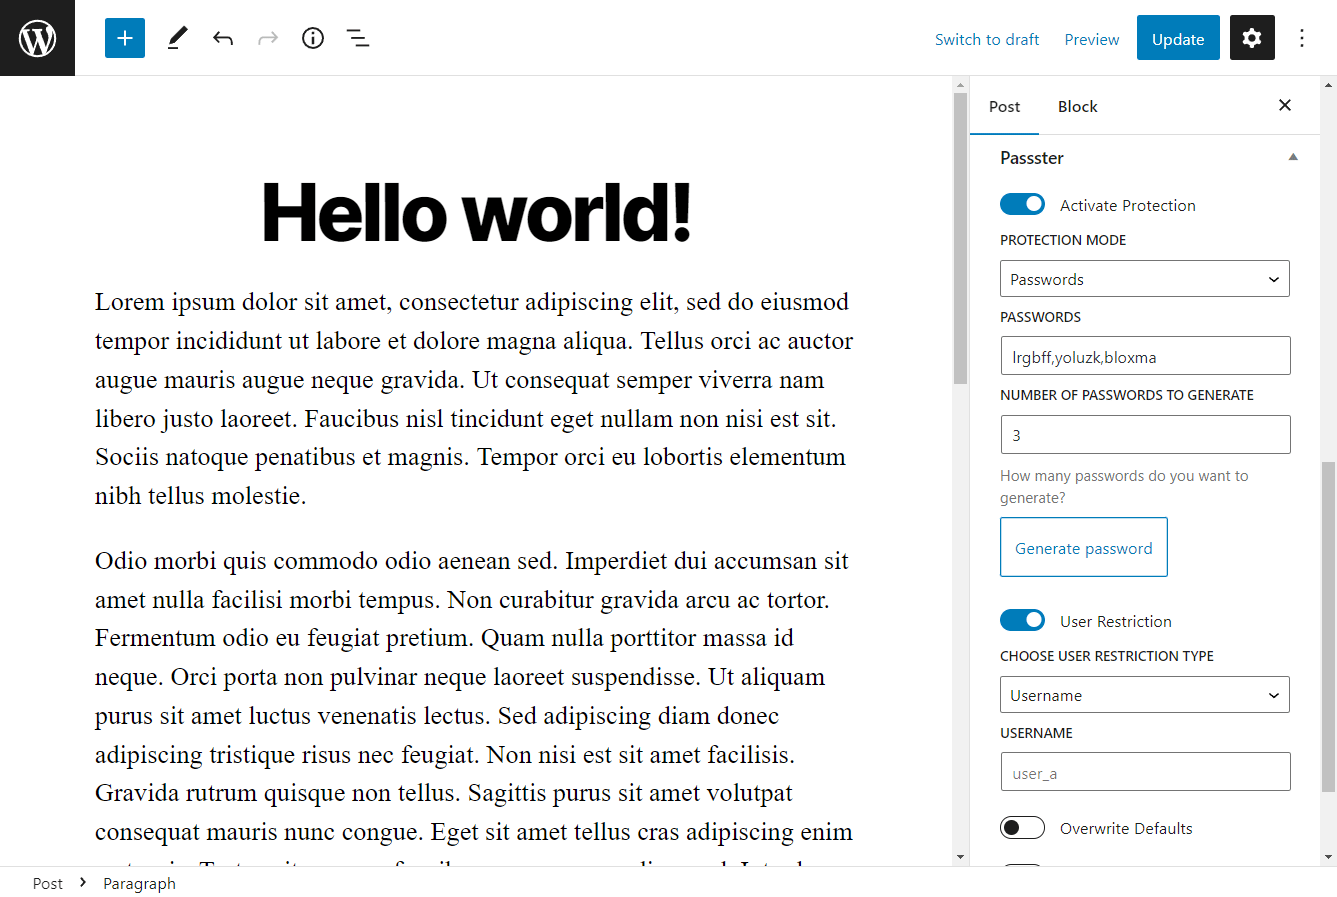
In that case, you’ll want to restrict access to the right people only: a contributor, a logged-in colleague, or an outside reviewer. Password protection works well here, since you can share the password without giving anyone a WordPress account.
You want to share sensitive information safely
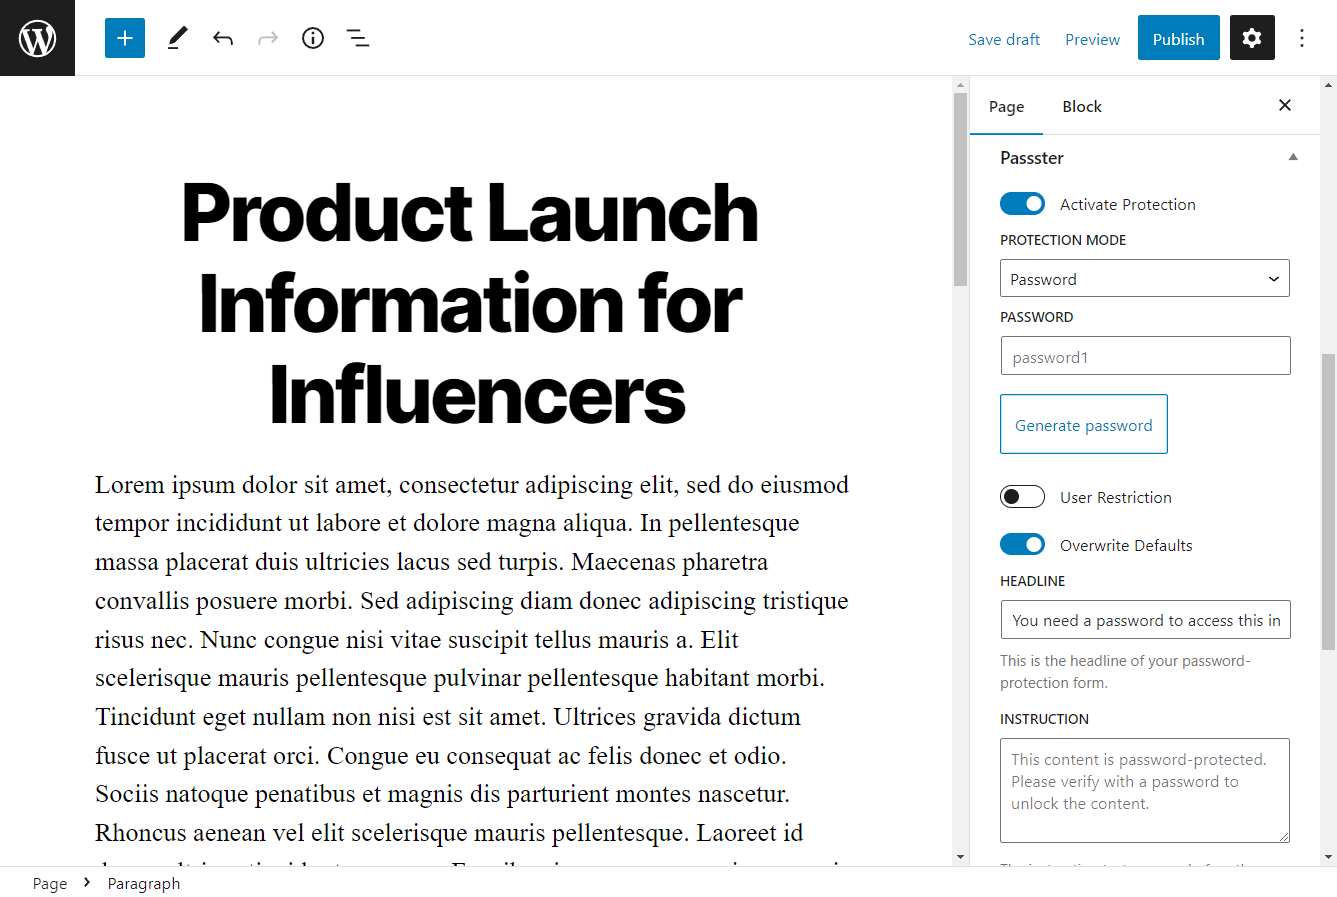
You might have contact details that should only reach people with a specific link, or a product launch that select reviewers need to see before the announcement.
WordPress’s built-in password protection gives you one shared password. Once you share it, there’s no way to control forwarding or limit how many times it’s used. For truly sensitive content, you’ll want encrypted links, usage limits, or CAPTCHA to block bots.
That said, making a page “private” in WordPress does not make its media files private. Images uploaded to that page remain publicly accessible via direct URL. If the content is genuinely sensitive, be aware of this gap — more details in the “5 things to know” section below.
You want to protect members-only or subscriber content
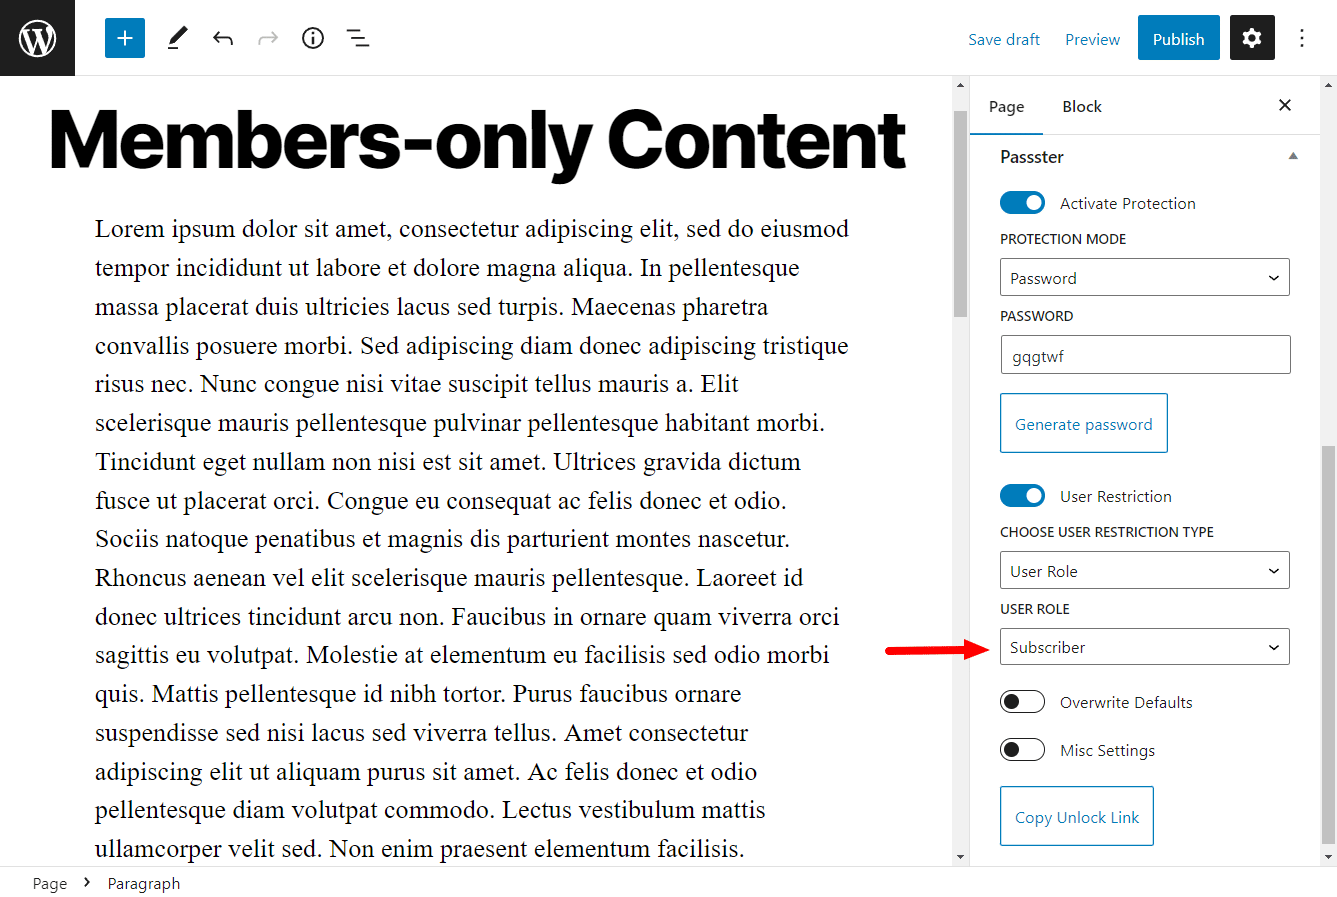
If you’re running a membership website, private pages are central to your offering. You need a reliable way to restrict a WordPress page to specific user roles — subscribers, paying members, or custom roles.
WordPress doesn’t support role-based page restrictions natively, so you’ll need a plugin. Passster lets you restrict by username or user role, so only accounts with the right level can access the page.
You want to keep the page to yourself
Finally, you might want certain pages visible only to you — a private blog that a few friends can read, or a place to store photos and personal content. A simple Private visibility setting or a full-site lockdown (covered below) handles that.
—
Private vs password-protected: what’s the difference?
WordPress offers two distinct visibility controls — Private and Password Protected — that restrict access in fundamentally different ways. They appear next to each other in the editor, which is why they’re easy to mix up.
| Private | Password Protected | |
|---|---|---|
| Who can access it | Admins and Editors (logged in) | Anyone with the password |
| What visitors see | “Page not found” | Password entry form |
| Indexed by search engines | No | Title may be indexed |
| Appears in navigation menus | No | Yes |
| WordPress account required | Yes | No |
Use Private when you want a page accessible only to your site’s admin-level team — drafts, internal notes, or staging content.
By contrast, use Password Protected when you’re sharing content with people who don’t have a WordPress account, like clients, reviewers, or subscribers getting a preview.
—
5 things to know before making a WordPress page private
WordPress’s built-in privacy settings carry five limitations the editor never surfaces, and they routinely catch site owners off guard.
- Media files stay public. Images and other files attached to a private page are still accessible to anyone who has the direct URL. Making a page private restricts the page itself, not its media. If the content is sensitive, this is a real gap.
- Pages Google already indexed may still appear in search results. If a page was public before you set it to Private, search engines may have already cached it. The page won’t appear in new crawls, but it can linger in results until Google revisits it. For guaranteed removal, submit a removal request via Google Search Console.
- Private pages don’t appear in navigation menus. WordPress automatically hides private pages from dynamic menus — the right behavior in most cases, but worth knowing if Editors need to navigate there quickly.
- Only Admins and Editors see Private pages by default. Authors can see their own private posts, not other authors’. Subscribers and Contributors see nothing. This matters if you’re planning to share drafts via a contributor-level account.
- Private pages won’t appear in your WordPress sitemap. Most sitemap plugins (including Yoast) skip private pages automatically. That’s correct — you don’t want private content indexed — but it’s worth confirming if you’re auditing your coverage.
—
How to create a private page in WordPress
WordPress offers four main methods to create a private page, ranging from the simplest built-in option to full plugin-based control.
Method 1: Admin-only visibility (WordPress Block Editor)
This restricts the page to site Admins and Editors only. No password needed — they access it through their WordPress account.
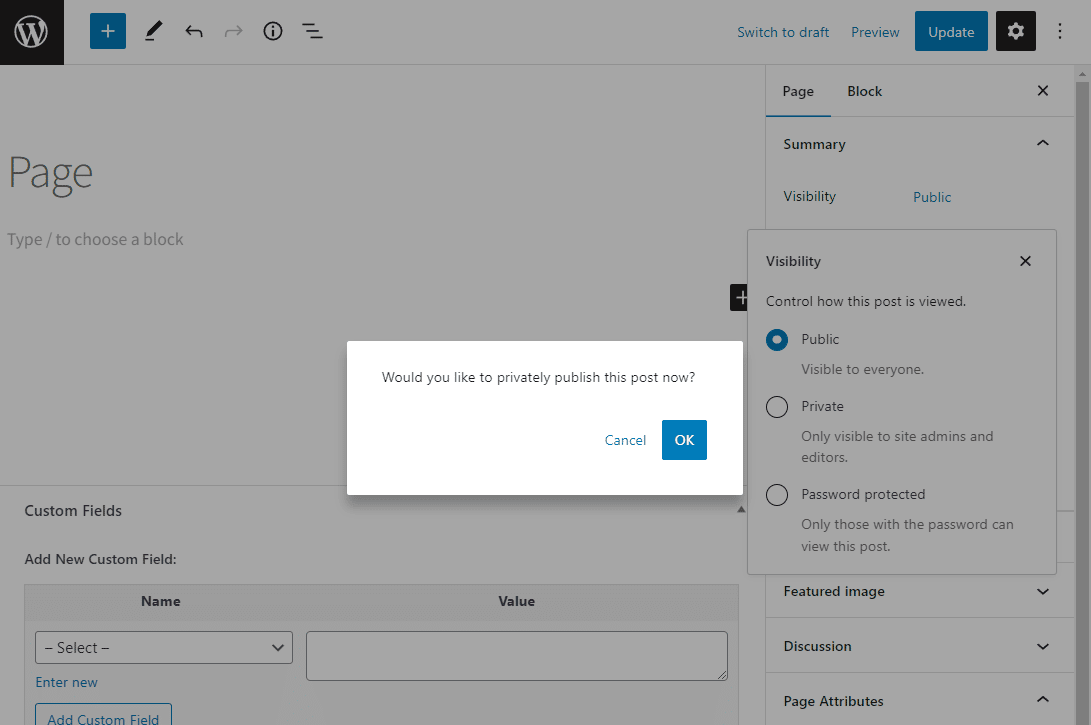
- From your WordPress dashboard, go to Pages > All Pages and edit an existing page or click Add New.
- On the right-hand sidebar, find the Summary section and click the link next to Visibility.
- Select Private from the popup.
- Click OK when WordPress asks you to confirm private publishing.
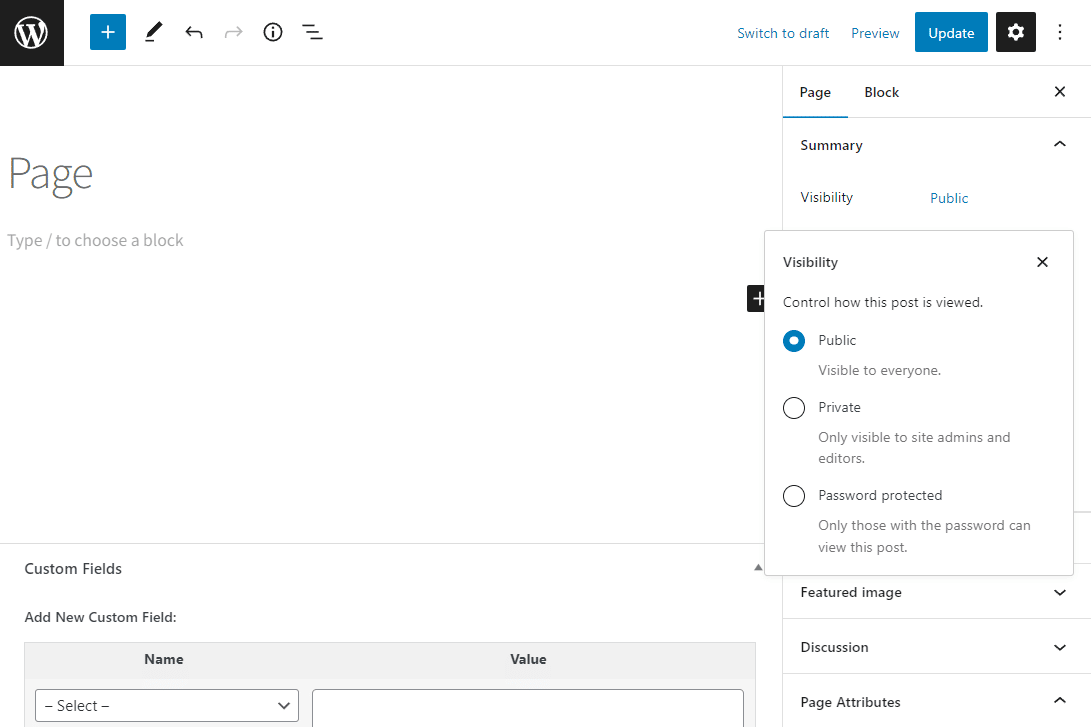
The page is now live, but only Admins and Editors can see it.
#### Using the Classic Editor
If you’re using the Classic Editor, the steps differ slightly:
- Open the page for editing.
- In the Publish meta box (top right), click Edit next to the Visibility setting.
- Select Private and click OK.
- Click Update or Publish.
Method 2: Password-protect a page in WordPress (built-in)
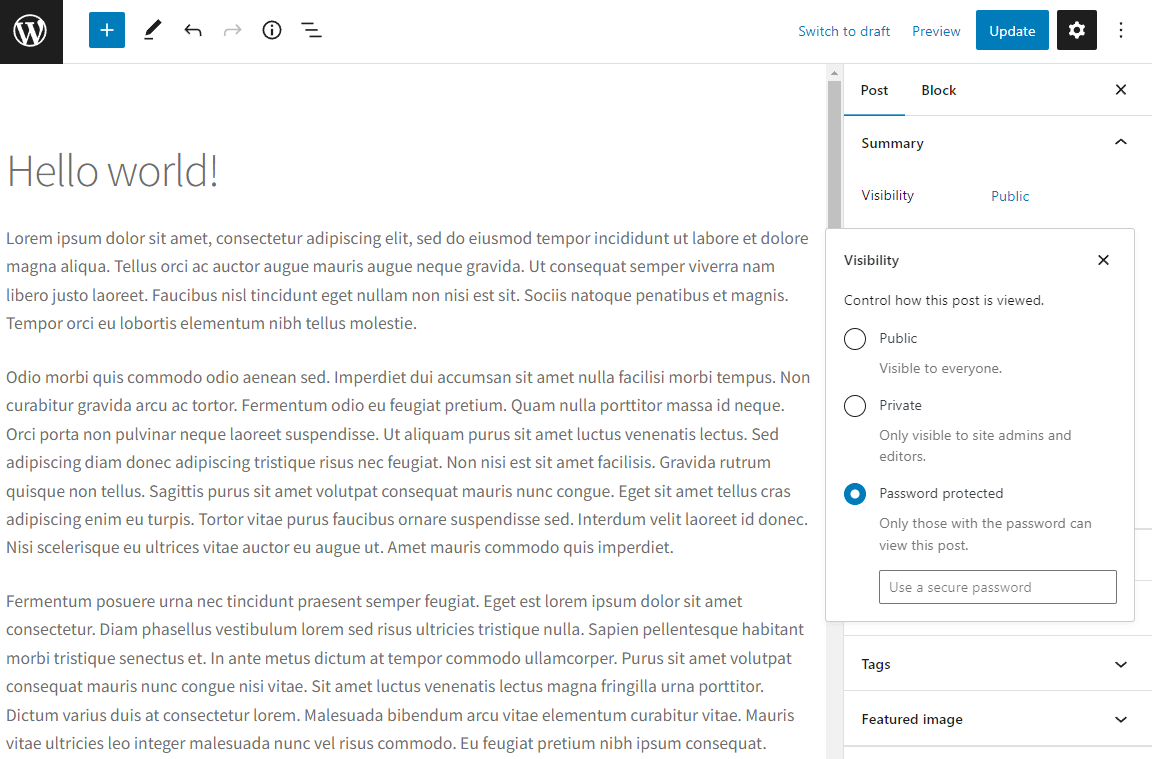
If you’d like to password-protect a page without requiring a WordPress account, use the Password Protected option in the same Visibility panel.
Follow the same steps as above, but select Password protected instead of Private. Enter a password in the field, then publish or update the page.
The result is a password entry form that anyone can use to unlock the content.
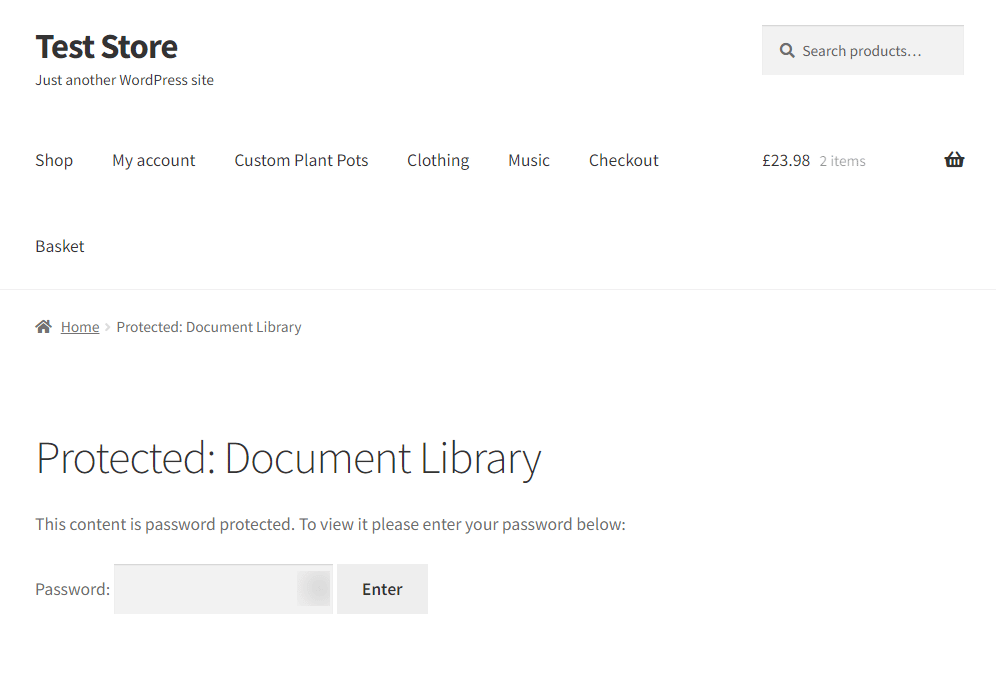
The limitation: you get one shared password, and there’s no way to set an expiry, limit uses, or see who accessed the page.
Method 3: Advanced password protection with Passster
For more control — password lists, expiry dates, encrypted links, CAPTCHA — you’ll need a plugin. Passster handles everything directly from the page editor.

Here’s how to password-protect a page using Passster:
- Go to Pages > All Pages and edit a page, or click Add New.
- On the right-hand side, find the Passster section and click the Activate Protection toggle.
- Select your Protection Mode. Choose Password for a single password, or use a password list to manage per-password usage limits and expiry dates.

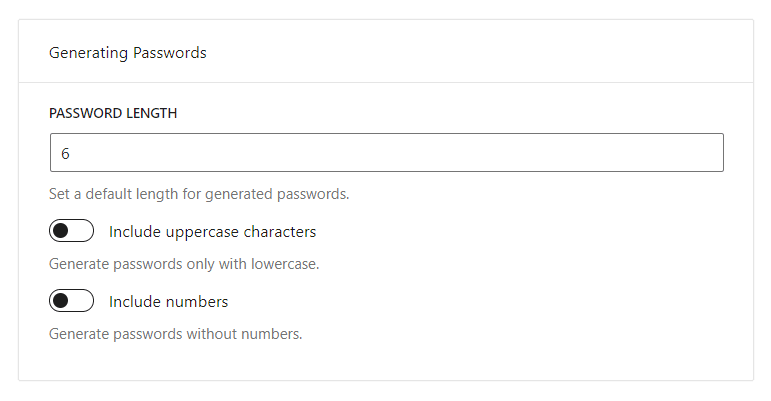
- Click Generate password to have Passster create one automatically. You can adjust the password format in Passster’s settings.
- Optionally, click Copy Unlock Link to generate an encrypted link. When a user clicks it, the page unlocks automatically — no password entry required. This approach works best for sensitive content, since it ties access to a specific link rather than a shared password that anyone can pass along.
- Click Update or Publish when done.
Method 4: Restrict a WordPress page by user role with Passster
WordPress doesn’t support role-based page restrictions natively. Instead, Passster adds this through its User Restriction setting.
Here’s how to restrict a page by user role or username:
- Go to Pages > All Pages and edit the page.
- Find the Passster section and click Activate Protection.
- Scroll to the User Restriction section and enable the toggle.
- In the restriction type dropdown, select Username or User Role.

- If you chose Username, type the usernames who should have access. If you chose User Role, select the roles from the dropdown.
- Click Update or Publish.
This works well for restricting content by role on membership sites where Subscribers should access certain pages but not others.
—
How to make other areas of your WordPress website private
Beyond individual pages, WordPress (with Passster) lets you lock down your entire site or restrict specific WooCommerce products — using the same protection controls available for pages.
Make your entire WordPress site private
To lock down your entire WordPress site — every page, not just one — use Passster’s Global Protection: it redirects all unauthenticated visitors to a single protection page you control. We cover the full setup, including which pages to exclude and maintenance-mode alternatives, in our step-by-step guide to making your WordPress site private.
Make specific WooCommerce products private
If you want to restrict WooCommerce products — for a pre-launch preview, an influencer access window, or role-gated purchasing — Passster adds protection directly to the product edit screen.
Here’s how to protect WooCommerce products with Passster:
- Go to Products > All Products and open the product you want to protect.
- Find the Passster widget on the left. Click to expand it, then click Activate Protection.
- Choose your protection method — password, password list, user role restriction, or others.
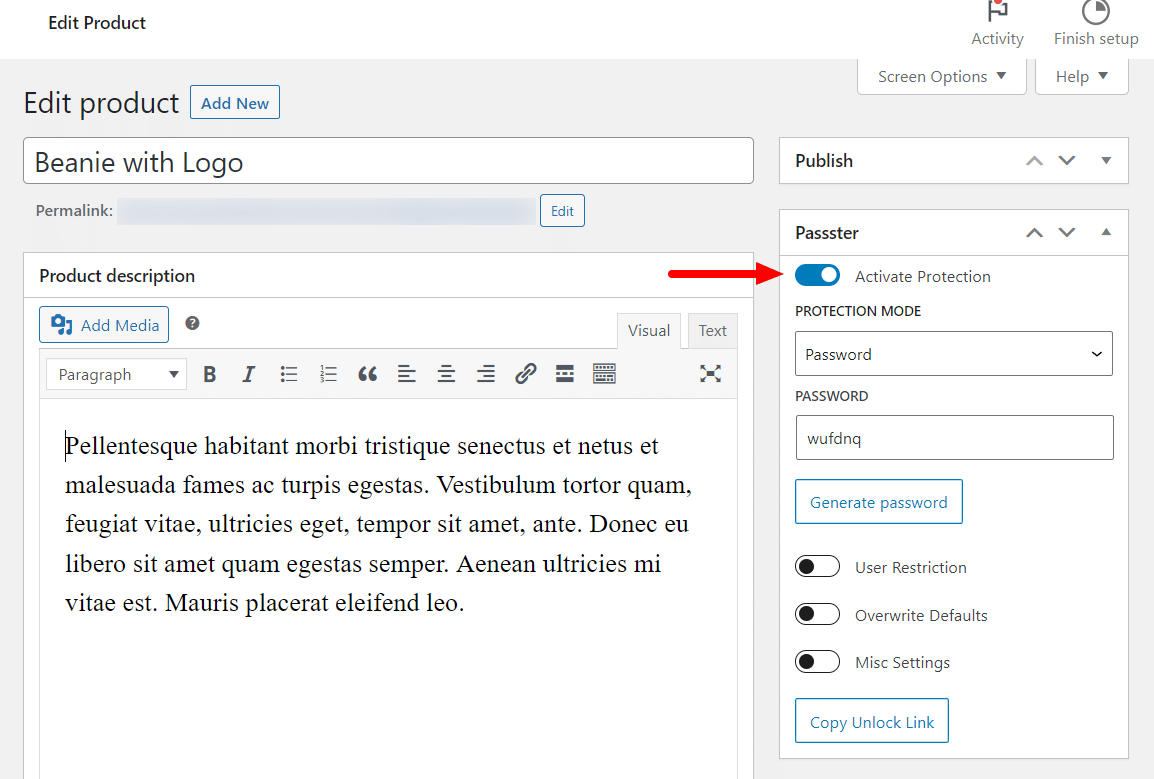
- Click Update or Publish to save.
—
Frequently Asked Questions
No. WordPress sets private pages to noindex automatically, so they won’t appear in new search results. That said, if a page was public before you made it private, Google may have already indexed it. To speed up removal, submit a removal request via Google Search Console.
No — and this catches a lot of people off guard. Making a page private hides the page itself, but any media files (images, PDFs, videos) attached to it remain accessible via their direct URL. For truly sensitive media, consider hosting files outside the standard WordPress media library or using a plugin that controls file access separately.
No. WordPress automatically excludes private pages from dynamic navigation menus. If an Editor needs to reach the page quickly, they’ll go through the dashboard or a bookmarked direct URL.
They see a “page not found” message — not a login prompt. WordPress doesn’t redirect unauthorized visitors to a login screen; it returns a 404-like response. If you want visitors prompted to log in instead, you’ll need a plugin that handles that redirect explicitly.
Authors can only see their own private posts, not those created by other users. In contrast, Editors and Admins can see all private posts and pages, regardless of who created them.
Not with WordPress’s built-in Private visibility setting, which covers only Admins and Editors. To grant access to Subscribers, Contributors, or custom roles, you need a plugin. Passster’s User Restriction feature lets you define exactly which usernames or user roles can view a page — without giving those accounts admin access.
No. Sitemap plugins — including Yoast SEO and Rank Math — automatically exclude private pages from the XML sitemap. This is the correct behavior: you don’t want private URLs submitted to search engines. If you’re auditing your sitemap coverage, verify that private pages aren’t showing up as missing rather than excluded.
—
Create a private WordPress page today
WordPress’s built-in visibility settings cover the basics: admin-only access and single-password protection. For anything more granular — password lists, role-based access, encrypted unlock links, or site-wide lockdowns — Passster fills the gaps directly from your page editor.
Whether you’re protecting a draft, gating subscriber content, or locking down your whole site, Passster handles it without requiring a full membership plugin.