

WordPress forms collect some of your most sensitive data — event registrations, contest entries, membership sign-ups, internal feedback. Left open, they’re easy targets. According to OOPSpam’s 2024 Annual Spam Report, contact forms account for 35% of WordPress spam attack targets, and sign-up forms account for 45%. Password protecting your forms keeps out bots and unauthorized users before they even see the submit button.
This guide shows you how to do it with Passster — a WordPress plugin that wraps specific content blocks in a password gate, leaving the rest of your page fully public.
Table of Contents
Why protecting a form differs from protecting a whole page
Short answer: WordPress’s built-in password protection locks the entire page. Passster works at the block level — you wrap only the form block in a password gate, leaving the rest of the page public. A visitor can read your event description but sees the registration form only after entering a password. Everything else on the page stays visible.
WordPress’s built-in password protection locks the entire page. Page-level protection is fine if the page exists solely for the form, but more limiting when the same page carries public content everyone should see — a banner, an introduction, a description — alongside the gated form.
Passster (10,000+ active installs, WordPress.org) works at the block level. You wrap only the form block in a password gate, so the rest of the page stays accessible.
A visitor can read your event description, then hit a password prompt only when they reach the registration form. Other tools in this category — WPForms Form Locker and native WordPress protection — both operate at the page level. By contrast, Passster doesn’t.
This distinction also answers a common question: can you password protect a form without protecting the whole page? With Passster, yes.
When you’d want a password-protected form
Password-protecting a form makes sense any time you need to control who can submit it, not just who can view the page. Here are the most common scenarios:
- Private event registrations. Share a password with invited attendees only. Anyone who finds the page can read about the event; only those with the password can register. This works particularly well for seminars and conferences.
- Contest submissions. Restrict entries to eligible participants — for example, a library spelling bee where only cardholders can enter. Each card number can double as a unique password.
- Internal feedback forms. Require team members to enter a password before submitting surveys or feedback, keeping results clean and internal.
- Exclusive membership sign-ups. If you serve both retail and B2B customers, send the sign-up password only to wholesale buyers.
Beyond controlling access, password protection also cuts spam. Bots account for 37% of all internet traffic (Imperva Bad Bot Report 2024) — and they can’t submit a form they can’t reach.
How to password protect forms in WordPress using Passster
Passster password-protects any WordPress form block in three steps: build the form, install the plugin, then activate protection in the Gutenberg sidebar. Here’s what you need:
- A WordPress website
- A form plugin (Gravity Forms or Contact Form 7 both work)
- The Passster plugin
Step 1: Create your form
Start by building the form you want to protect. In Gravity Forms, go to Forms > New Form, enter a title and description, then click Create Form.
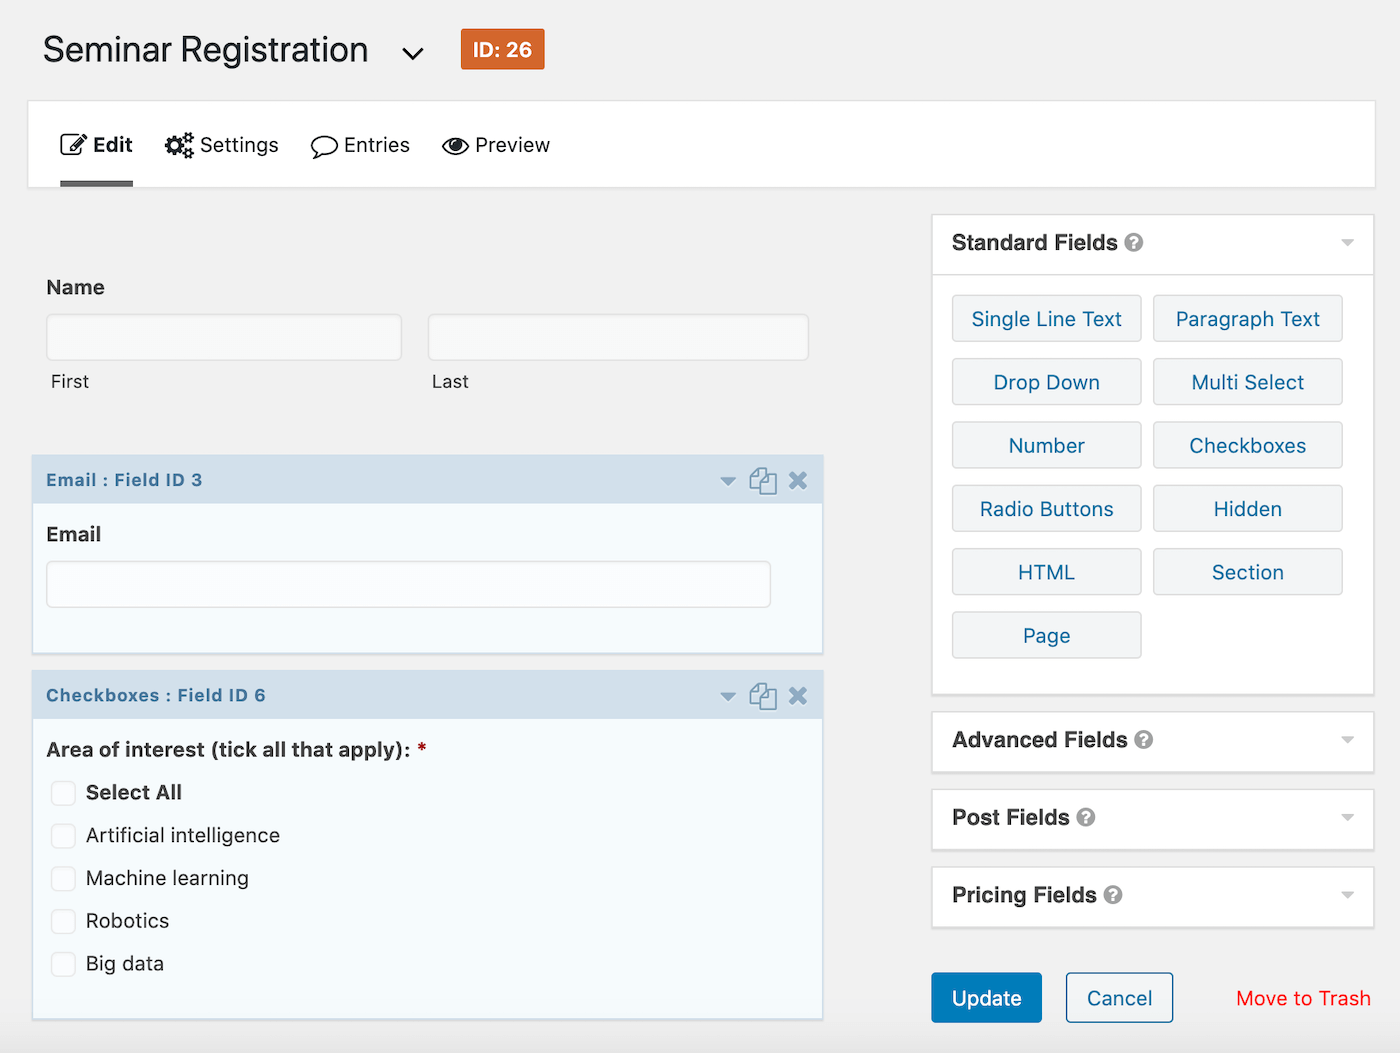
From the form editor, drag and drop your fields — Name, Email, Single Line Text, and so on — then click Update.
Step 2: Install the Passster plugin
Next, install Passster on your WordPress site. The free version covers single password protection. For multiple passwords — where each user gets a unique key — you’ll need the premium plan.

Step 3: Password-protect the form
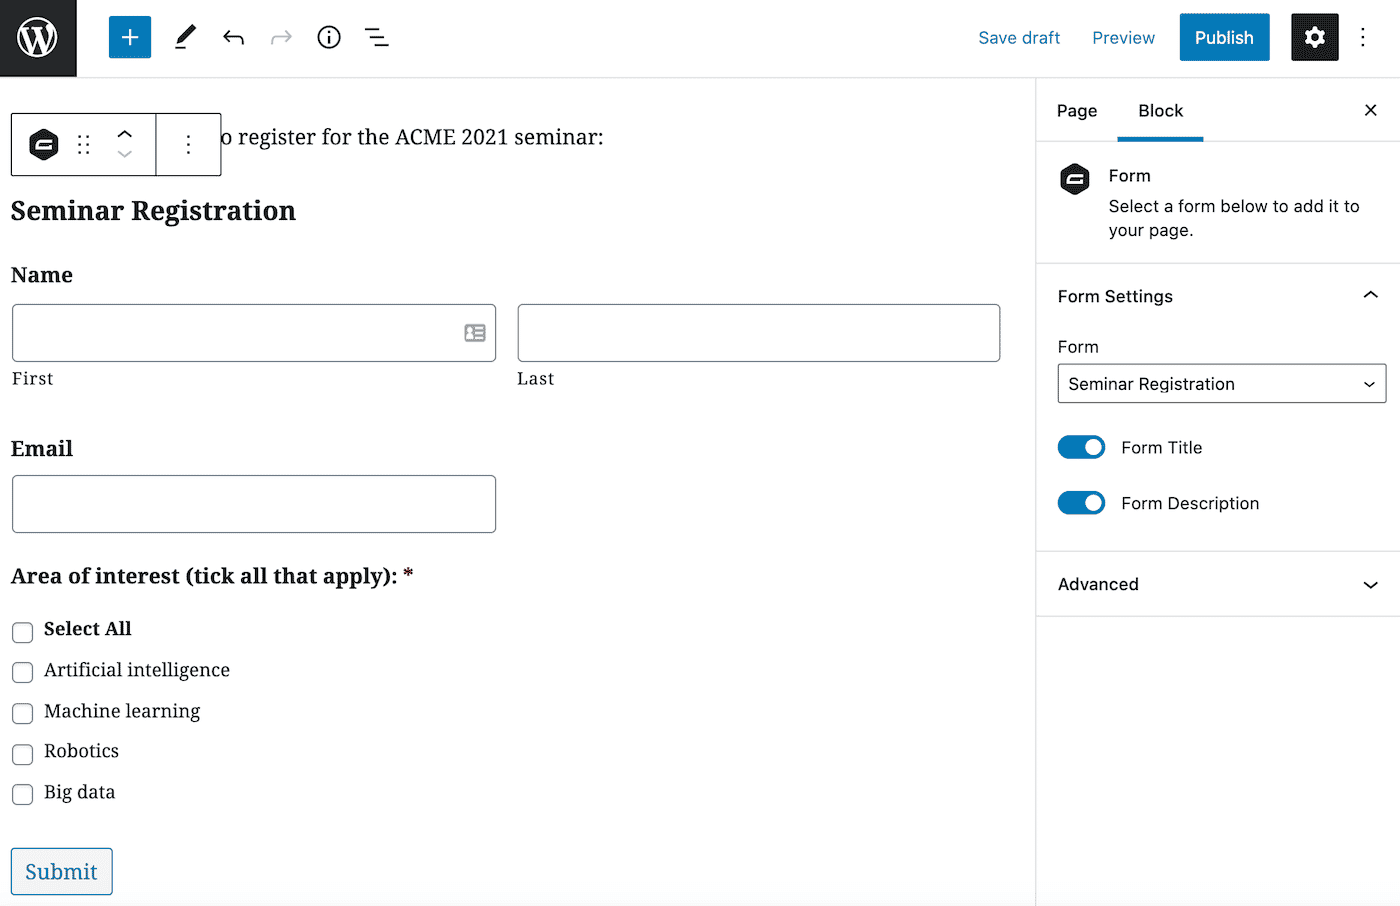
With your form built, add it to a page. Go to Pages > Add New and open the Gutenberg editor. Search for the Forms block, drop it in, and select your form from the dropdown.
Now scroll down to the Passster panel in the page sidebar.
For single password protection, configure these settings:
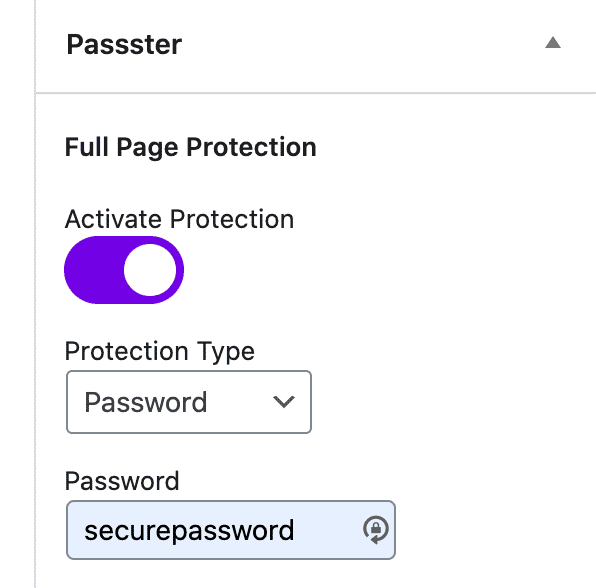
- Toggle Activate Protection on.
- Set Protection type to Password.
- Enter the password you want visitors to use.
Click Publish. On the front end, visitors see a password prompt before the form appears:

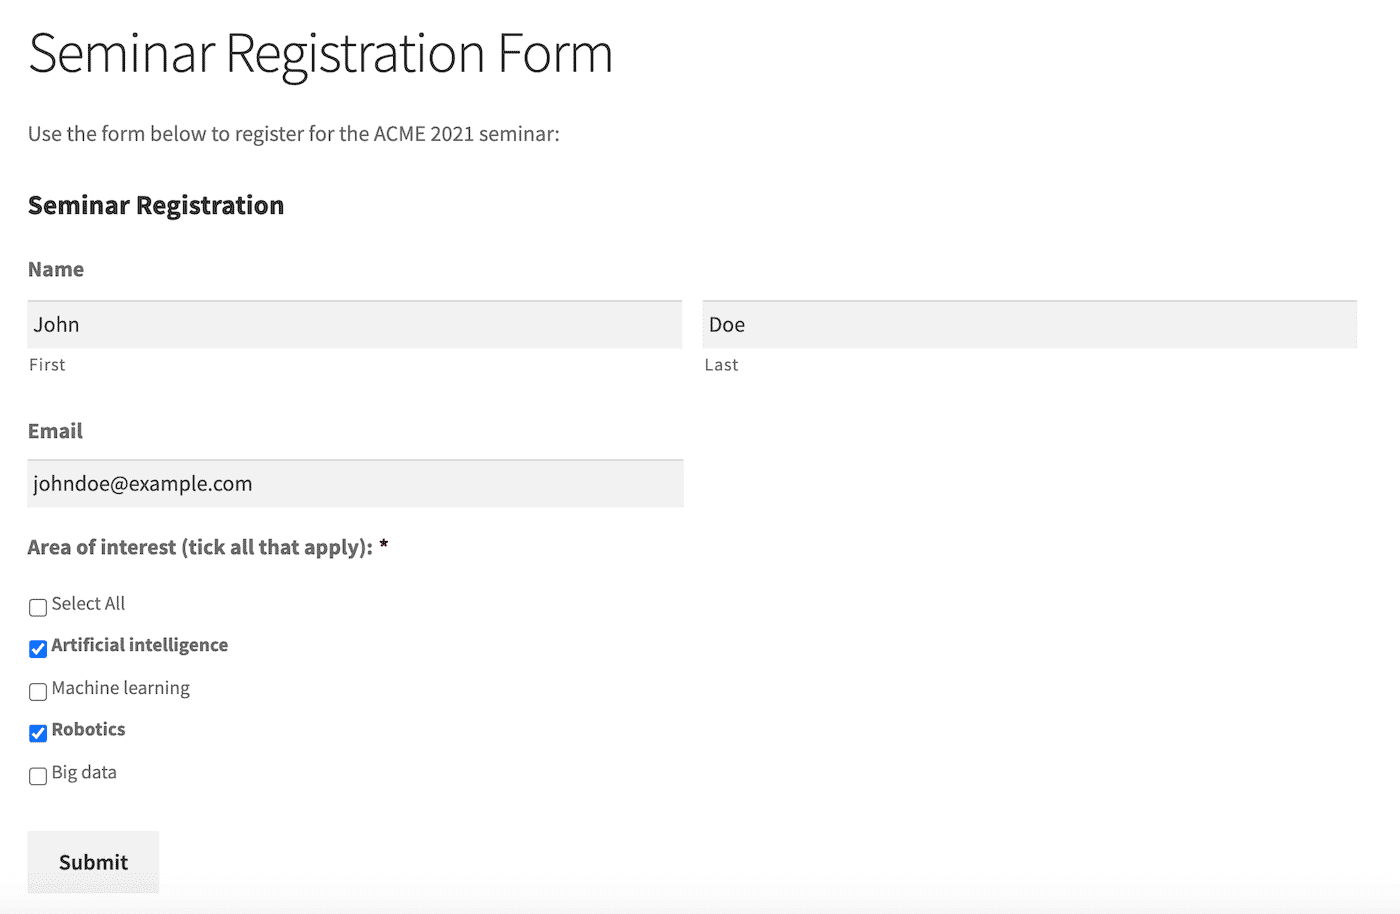
Once the visitor enters the correct password, the form becomes visible:
For multiple password protection, first create a password list. Go to Passster > Password Lists > Add New, give the list a title (e.g., Seminar Registration Passwords), and add the individual passwords you want to distribute.
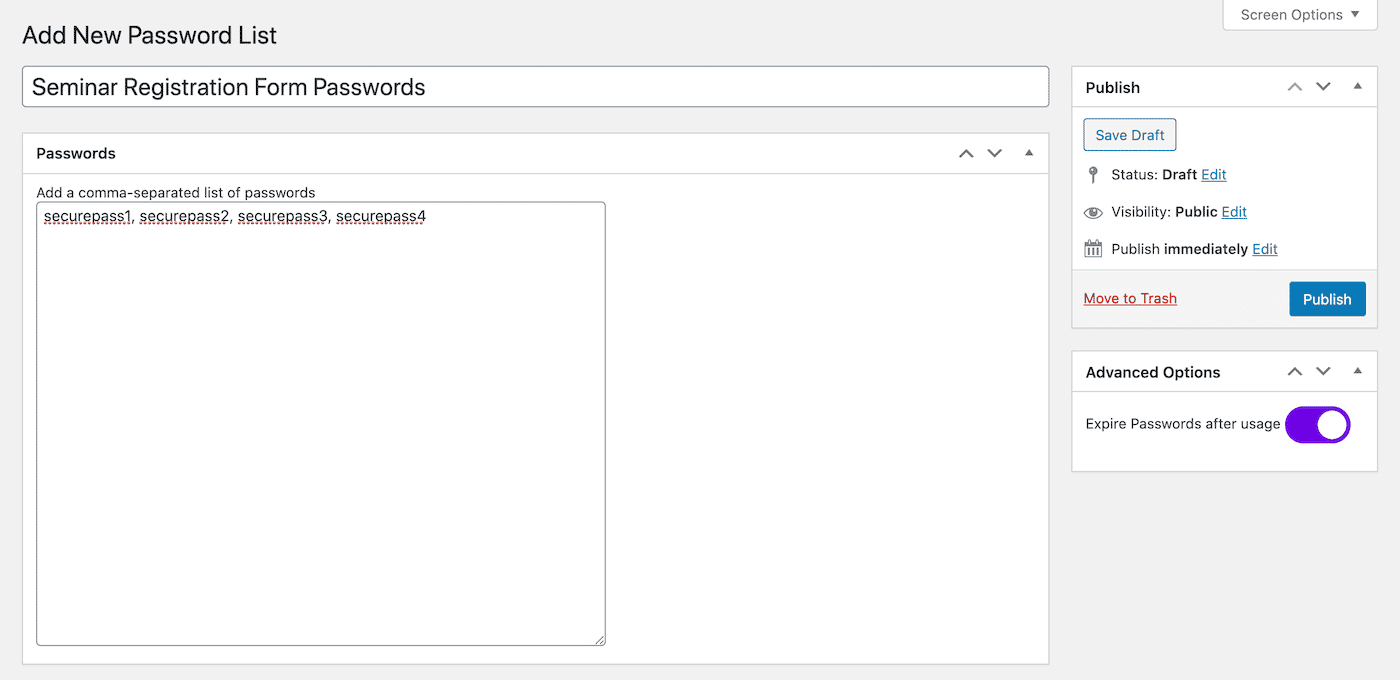
Under Advanced Options, you can toggle Expire Passwords after usage on. This limits each password to a single use — once someone submits the form, their password stops working. It’s a clean way to restrict form submissions in WordPress to one per person without any custom code.
Click Publish, then go back to your page and update the Passster sidebar:
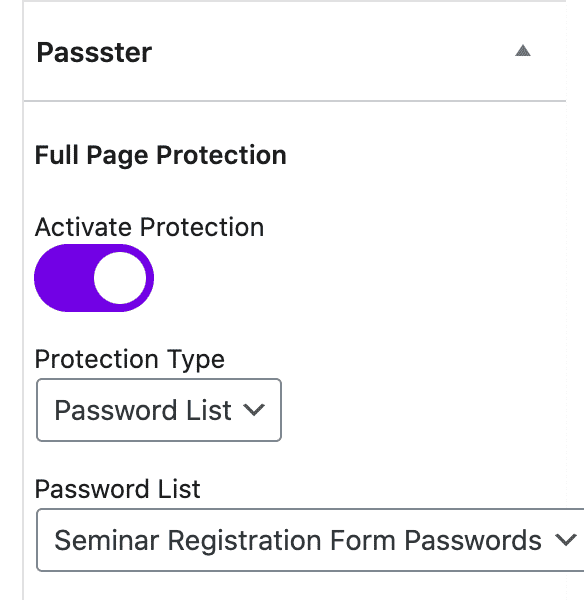
- Toggle Activate Protection on.
- Set Protection type to Password List.
- Select the list you just created.
Click Publish to finish. Adding or removing a password from the list grants or revokes access instantly — no page edits required.
Other Passster protection modes
Password protection isn’t your only option. Passster also offers three alternatives worth knowing about:
- CAPTCHA/reCAPTCHA. Stops bots before they reach the form. Users complete a CAPTCHA box, then the form appears.
- User role protection. Restricts access to specific WordPress user roles — for example, Manager but not Employee.
- Unlock links. Generate an encrypted URL; anyone who clicks it gets direct access without typing a password.
For step-by-step instructions on all three modes, see how to restrict access to online forms using Passster.
Troubleshooting: Contact Form 7 and Gravity Forms shortcodes
When Contact Form 7 or Gravity Forms appears blank after the visitor enters the correct password, the cause is AJAX timing: the shortcode renders before Passster’s password gate resolves. Passster’s Third-Party Shortcodes setting pre-renders the shortcode server-side so the form is ready the moment the gate opens.
Shortcode: A WordPress tag enclosed in square brackets — such as
[contact-form-7 id="123"]— that inserts dynamic content like a form into a page without writing PHP.
To configure it:
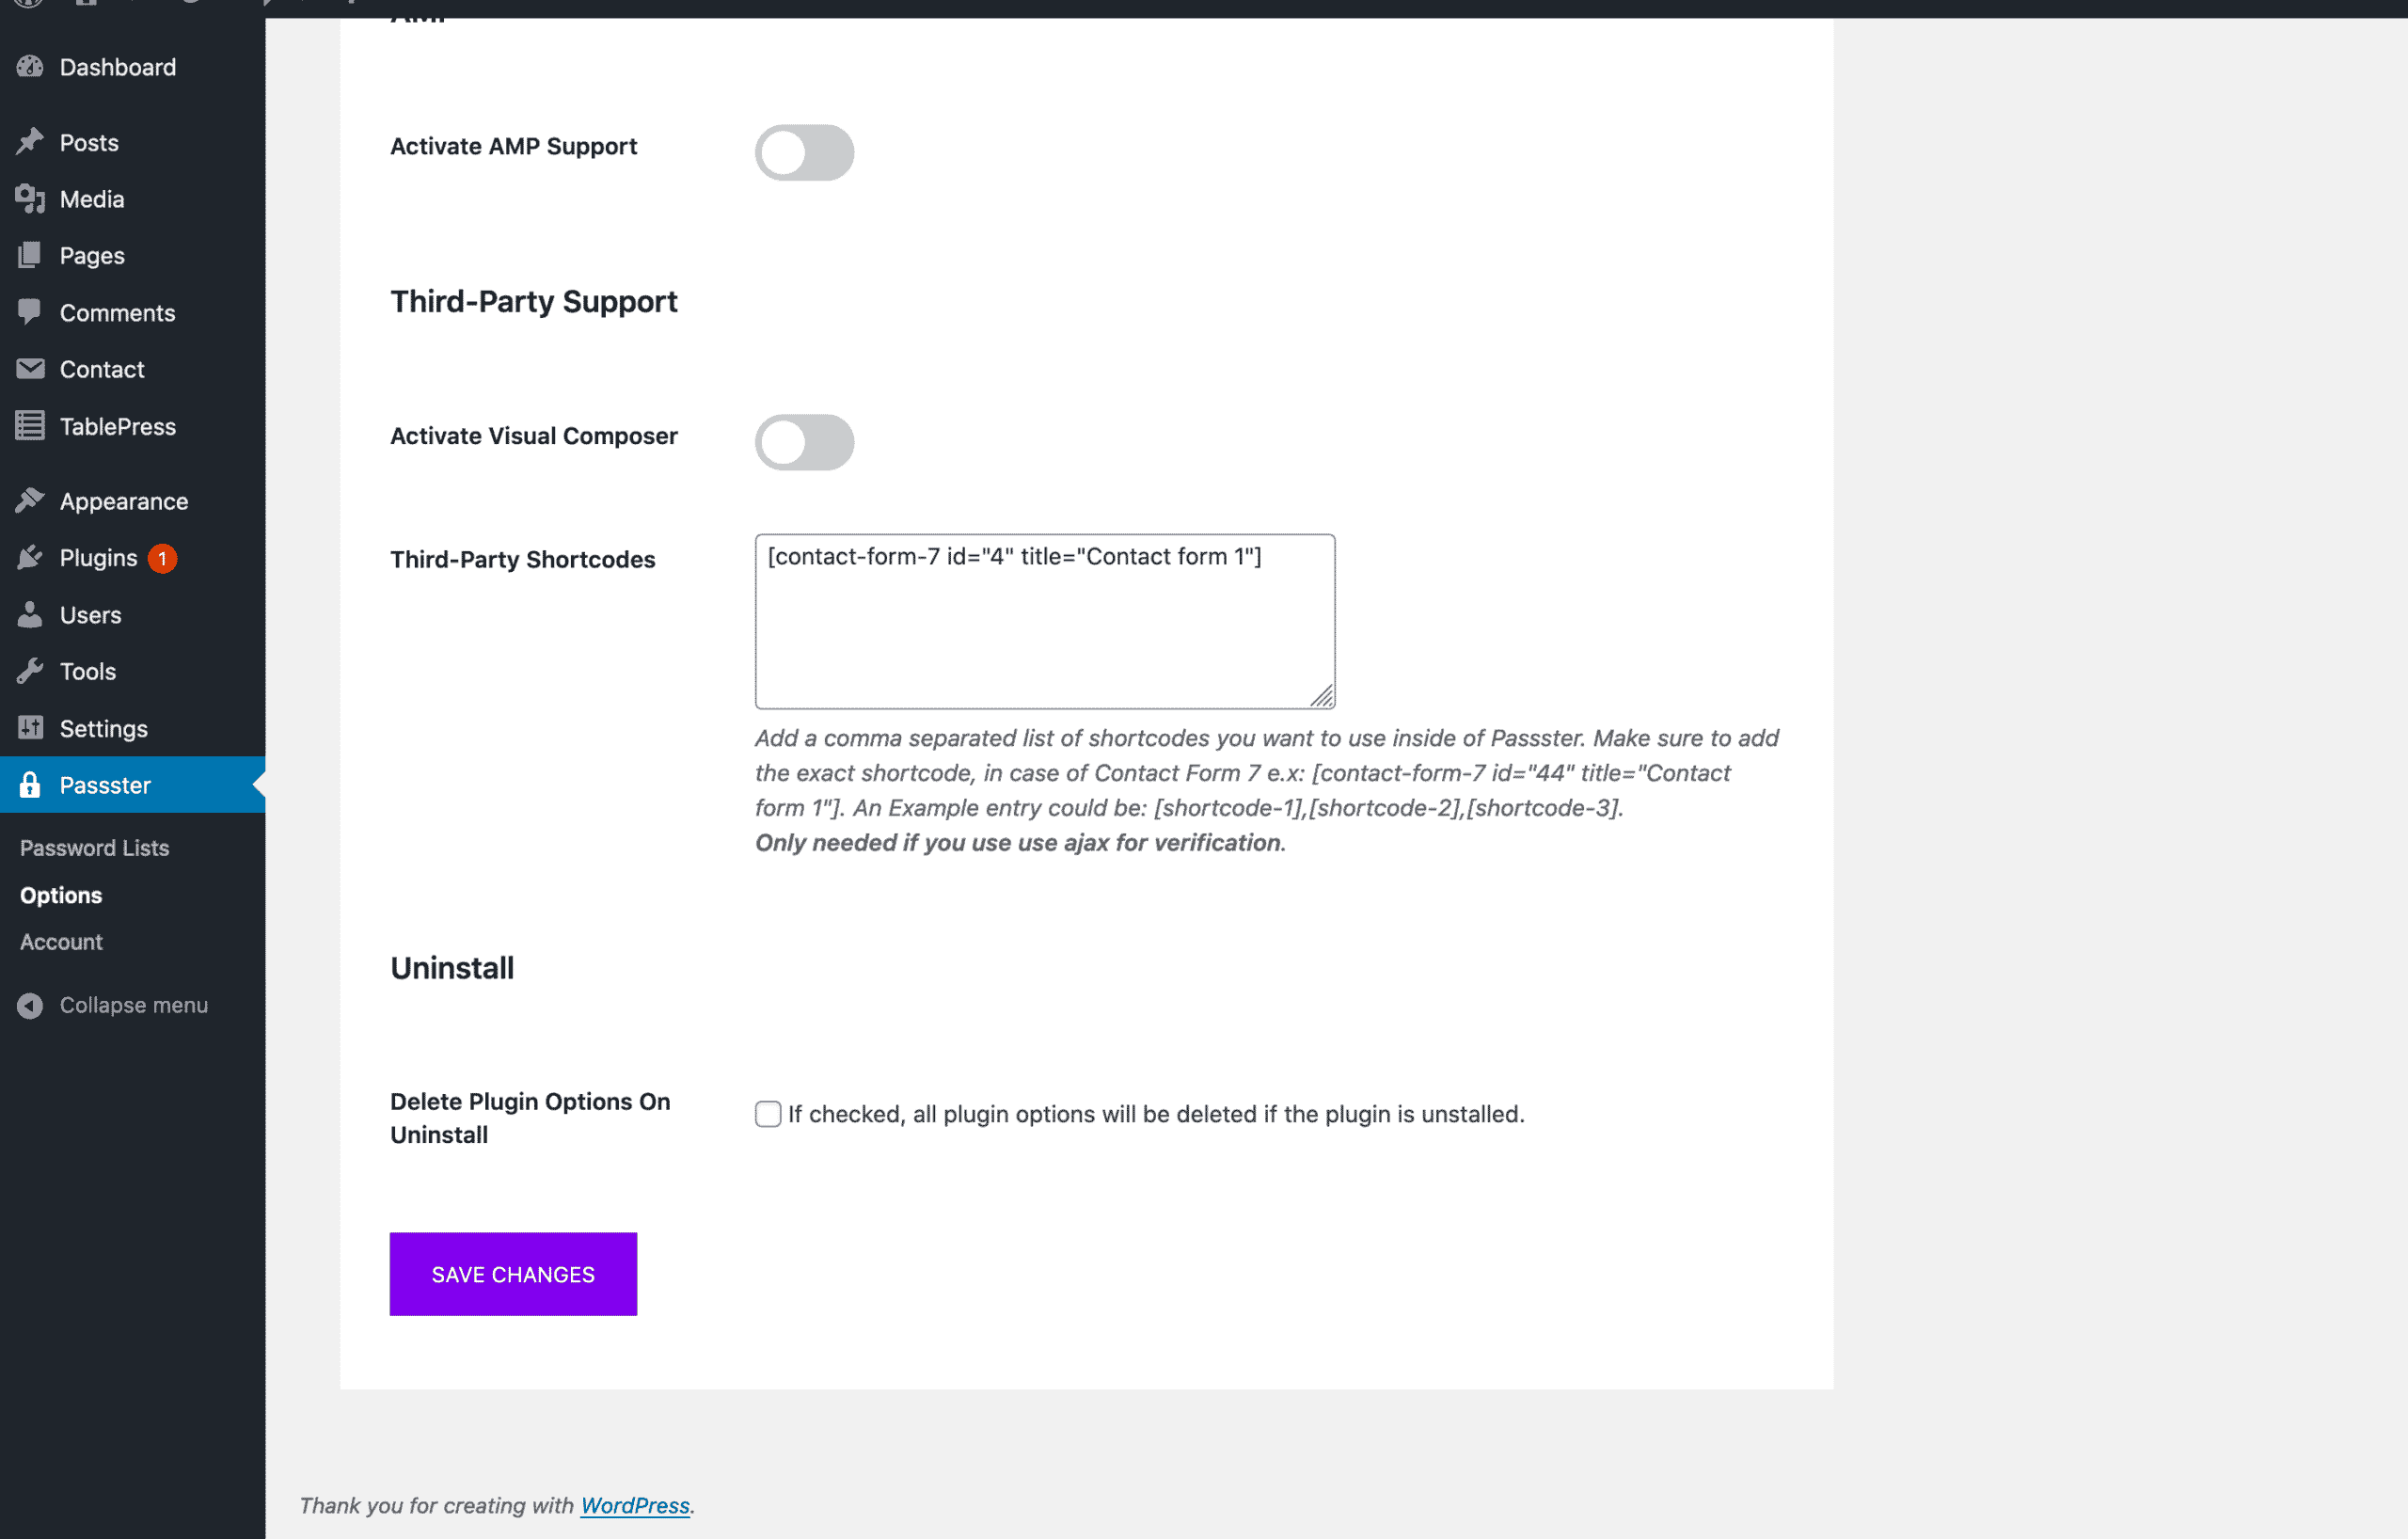
- Go to Passster > Options in your WordPress admin.
- Find the Third-Party Shortcodes field.
- Paste the shortcode for your form — for example,
[gravityforms id="1"]or[contact-form-7 id="123" title="Contact form 1"].
This applies to password protect Contact Form 7 in WordPress just as well as Gravity Forms — any shortcode-based form plugin follows the same steps. If you use page-reload (non-AJAX) unlocking instead, you can skip this entirely; the form renders normally on page load.
Frequently asked questions
A password field is a question within the form — the user fills it in as part of their submission data. Password-protecting the form is access control: the visitor proves they’re authorized before the form appears at all. The two serve different purposes and don’t overlap.
Yes, unless you actively prevent it. In fact, the page itself is public — Passster gates only the form block, not the rest of the page. If you don’t want Google indexing the page, add a noindex directive via a plugin like Yoast SEO or AIOSEO, or add the page to your robots.txt.
No — password protection controls who can view a form, but it doesn’t encrypt stored submissions or provide audit logging. For genuinely regulated data (medical records, financial information), you’ll need server-side access controls and a compliance-grade data handling stack on top of any front-end protection.
With single passwords, change the password in the Passster sidebar and republish. With password lists, go to Passster > Password Lists, open the list, and delete the specific password. The user’s browser cookie clears naturally on their next visit, and their old password no longer works.
Yes. Enable Expire Passwords after usage under Advanced Options in your Passster password list. Each password works only once — the moment someone submits the form with that password, the key expires. For a capped total, create exactly as many passwords in the list as submissions you want to allow.
Wrapping up
Passster makes it possible to gate a single form block while keeping the rest of your page public — a targeted approach that covers most real-world access-control scenarios without locking down your entire page.
Single passwords work for simple scenarios. For more complex needs, password lists handle situations where each user needs a unique key, and the expire-after-use option turns that into a one-submission-per-person system. Add CAPTCHA or user role protection on top, and you have full control over who can reach your forms and how many times.