
Are you looking for ways to protect your WordPress website? Keeping your WordPress website private isn’t just about security. It’s about control.
Adding a password to your WordPress website is an effective method to control who can access it. It’s like providing a layer of extra security for your website.
Luckily, with WordPress, you can easily add passwords to your website or parts of it with just a few clicks. By default, it lets you keep your website private or password-protect your website pages.
Now you must be wondering what’s the difference between keeping your site private and password-protecting your pages. In this post, we’ll tell you the difference between the two and then walk you through the best ways to password-protect your website.
So let’s get started.
Private Vs. Password-protected – What’s the Difference?
By default, all the pages and posts you publish on your WordPress site are accessible to anyone once your website is online. But what if you want to limit user access to certain pages, posts, or your entire website?
WordPress lets you do it in 2 different ways –
1. Make the Webpages Private
When you make your WordPress web pages private, it will be hidden from the public. This means that even if visitors have your page URL, they won’t be able to access it. Only the users you’ve granted permission will be allowed to access this page. These are usually logged-in users, like admins or editors.
2. Password-protect the Page
When you password-protect your pages, your pages are accessible only to those with the correct password to it. Every time a user tries to access the page, a password-protected form will pop up. You’ll have to unlock this form with the right password to be able to access the website.
Let’s see how to do it with the default WordPress option.
Creating a Password Protected or Private Page with Default WordPress
As mentioned before, WordPress by default allows you to password-protect your pages. Let’s look at how to do that.
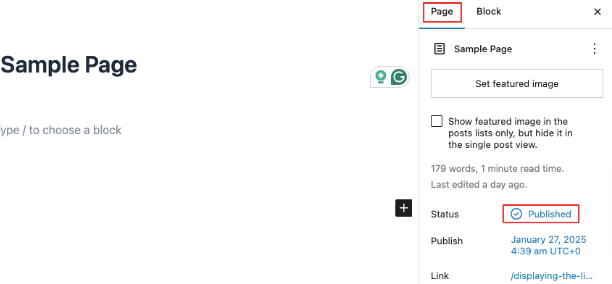
First, you’ll need to create a page. On the right side of this page, under the Page section, you’ll see the status of your page. If you haven’t published it you’ll see it labeled as Draft. If it’s a published page it’ll be labelled as Published.
Now click on the status of your page, in this case, it’s Published. You’ll see a small window labeled Status & Visibility popping up. Here just select the Password Protected option to password-protect it.
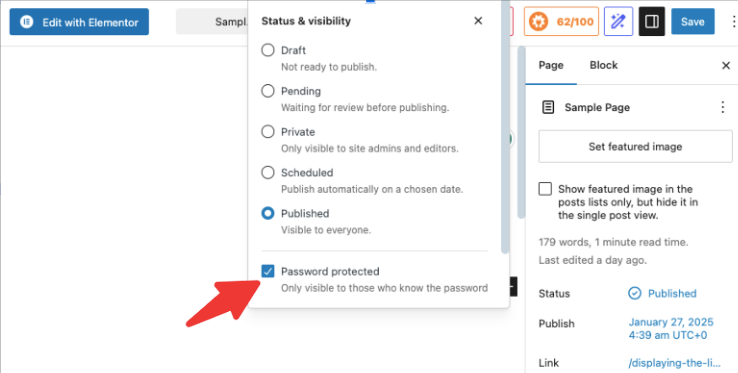
Once you’re done, click on the Save button at the top right corner of your screen. Now, you’ll see the option to create a password for your page. Add the password, and you’re done.
The problem, however, is that this feature comes with its limitations. Let’s look at some of those limitations in the following section.
Why the WordPress Default Option Isn’t Enough
As mentioned before, WordPress by default, allows you to set the visibility options of your posts or pages. But it has its own disadvantages.
- Limited Security – The default WordPress password protection offers very limited security. The passwords can be easily shared, leading to unauthorized access to your protected content. Since the passwords don’t expire, even unauthorized users will continue to access gated content until you change the password.
- Works Only for Pages – This feature allows you to control visibility specifically for your WordPress pages and posts. However, it does not support password protection for your entire website, specific sections, or portions of a page.
Now you might be wondering why you would want to keep your website password-protected. Let’s read the next section to find out.
Why Should You Password-Protect Your WordPress Website?
Not every website needs to be accessible to the public. There are many reasons why you might want to restrict access to your WordPress site. Here are some of them.
- Privacy and Security – If you’re working on a website that isn’t ready for launch, adding password protection keeps it hidden from visitors and search engines until it’s ready.
- Exclusive Content Access – If you ever create a members-only area, an online course, or private content for clients, a password-protected site ensures that only authorized users can view it.
- Client Work and Portfolio Protection –As a freelancer or agency, you may need to showcase projects to specific clients while keeping them hidden from the public. With this feature, you can password-protect select sections of your website, giving you full control over what information is visible and to whom.
- Limited-Time Events or Beta Testing – To prevent unauthorized access from leaked passwords, you can enhance security by setting user-specific passwords.
Now that you know why you might need to password-protect your website, let’s move on to see how to password-protect your WordPress Website.
How to Password Protect Your WordPress Website
Since WordPress doesn’t offer any default options to password-protect the entire website, we’ll have to use a plugin to do that. And that’s where Passster comes in.
So what is Passster?
What is Passster?
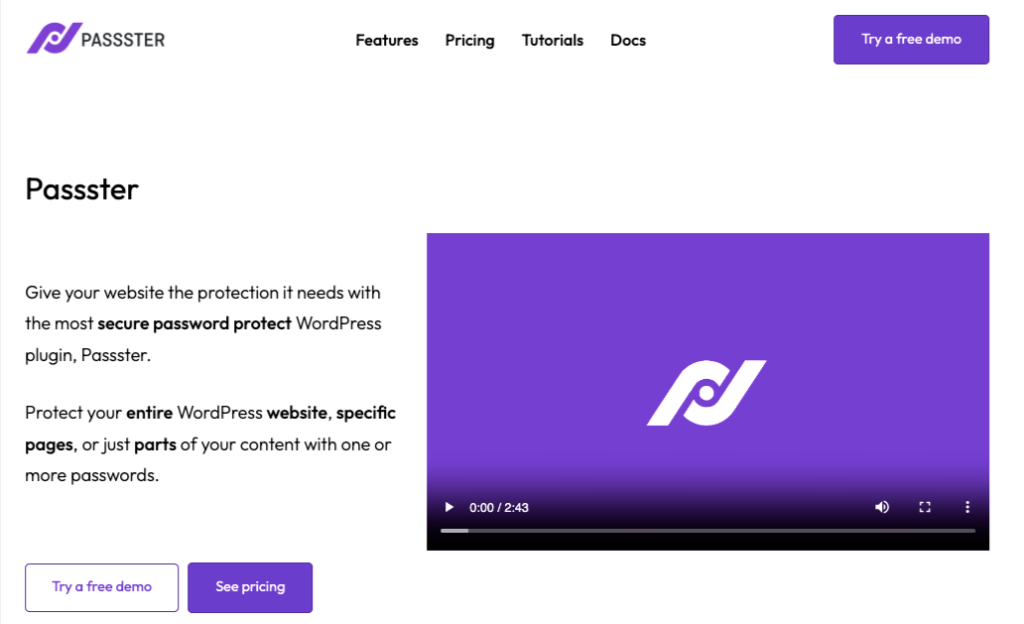
Passster is a powerful WordPress plugin that helps you enhance the security of your website and its content by password-protecting it. With this plugin, you can protect your entire WordPress website, specific pages, or just parts of your content with one or more passwords.
You can protect it with a single password, multiple passwords, password lists, or Google reCAPTCHA and hCAPTCHA. What’s more, is that it even allows you to customize the password-protection form that you’ll be using.
You can also track the usage of your password and its expiration. With many other amazing features, this plugin is the ultimate choice for anyone looking to create a password-protected website in WordPress.
Now let’s move on to understanding how to use Passster to password-protect your WordPress website.
How to Password Protect Your WordPress Website with Passster
In this section, we’ll talk about how to create a password-protected website with Passster in a step-by-step manner.
Step 1: Install and Activate Passster in WordPress
The first step is to install and activate Passster on your WordPress website. For that, log in to your WordPress dashboard and navigate to Plugins > Add New. Now in the search box, type Passster and hit enter.
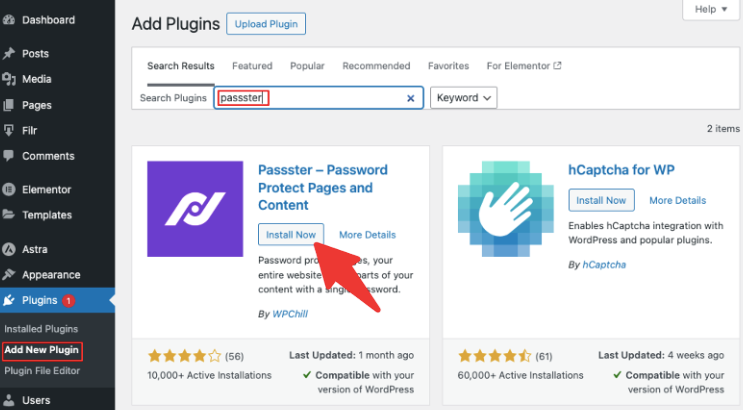
Now click on Install Now > Activate. Once you do that, the plugin will be activated on your website.
Step 2: Customize the Text of Your Password Form
In this section, we’ll edit the content displayed on your password protection forms. For that, on your WordPress dashboard, go to Passster > Settings. You’ll now see the following page on your screen.
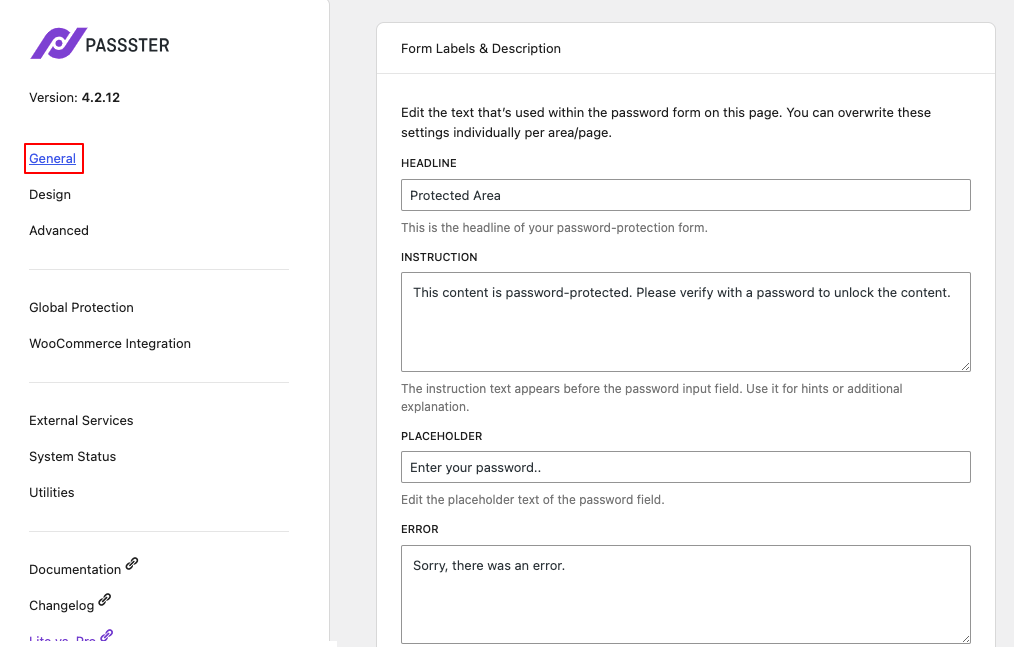
Click on the General tab. You’ll see Form Labels & Description opening on the right. Here you’ll be able to edit the following as needed.
- Headline – This is the title or headline of your password protection form.
- Instruction field – Here you can display a message instructing your users to enter a password to unlock the content.
- Placeholder – Here you can edit the placeholder text in the password field. For example, “Enter a password” to proceed.
- Error – In this box, you can display an error message if the user enters the wrong password.
- Button label – This is the text that will appear on the button. For example, ”Submit.”
Once you have made the changes click on the Save button to save your settings.
Step 3: Customize the Appearance of Your Password Protection Form
With Passster, you can even customize the appearance of your password protection form. In this step, we’ll do that. This step is not mandatory. You can follow it only if you want to customize the appearance of your form.
To begin, click on the Design button just below the General tab.
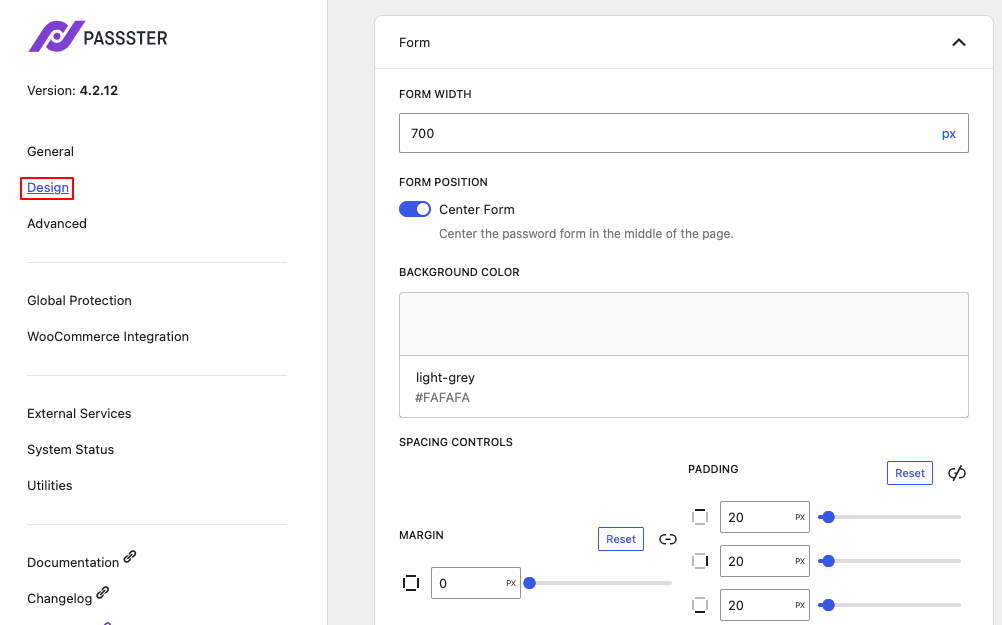
Here you can make the following adjustments –
- Customize the width, colors, spacing, etc., of the form.
- Change the font color, size, and weight of the headline and the instructions.
- Customize the hover states, color, margin, etc., of the button
Once you are happy with the changes, hit the Save button to save your settings. Now that you’ve made all the general settings, it’s time to protect your WordPress site with passwords.
Step 4: Set a Password for Your WordPress Website
Now it’s time to set a password to your entire WordPress website. For that, on your WordPress dashboard navigate to Passster > Settings > Global Protection. Now click on the Activate Global Protection option.
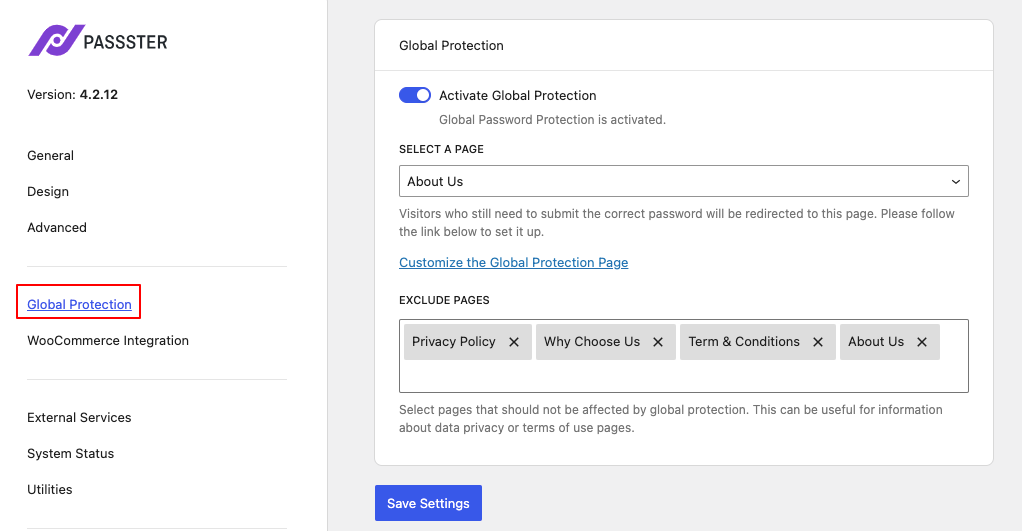
Under Select a Page, you can select the page to which you want to redirect your users when they try to access any page on your website without previously submitting the correct password. You can also exclude pages you don’t want to be protected by a password.
Now click the Save Settings button at the bottom to save your changes and move on to the next step. Next, click on the Customize the Global Protection Page link.
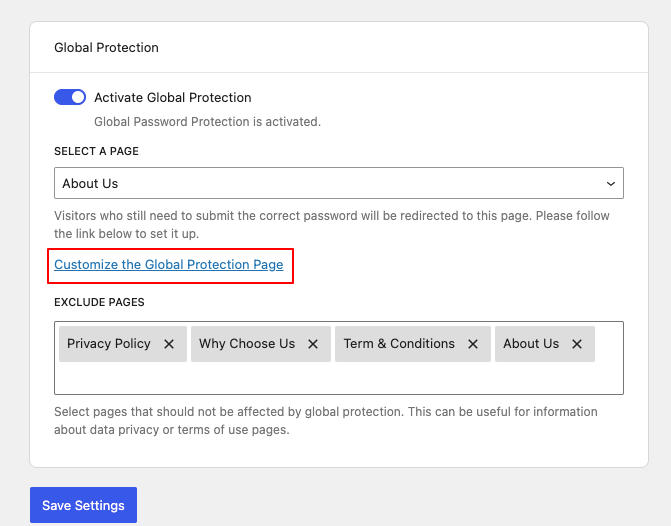
This will take you to the page you selected under the Select A Page option. Now on the right side of your screen, you’ll see an option labeled Activate Protection. Click on it to activate the option.
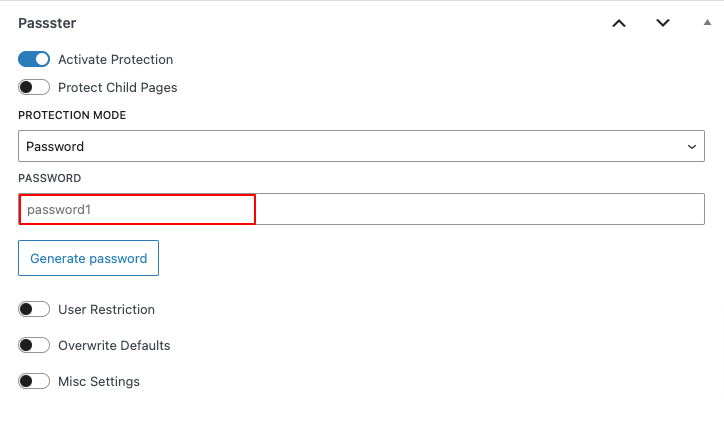
Now add the password to secure your website. Once done, click on the Save button to save your changes.
And that’s it. Your website is now password-protected. Anyone who wants to access it will have to submit the password you’ve just created to unlock the website.
Conclusion
Password-protecting your WordPress site enables you to limit access only to authorized users. This helps you to secure it and prevent your site’s content from falling into the wrong hands. By default, WordPress has a very limited password protection feature.
This is where Passster comes in handy. With this plugin, you can create a fully secure website within just a few minutes. So what are you waiting for? Start using Passster now.